

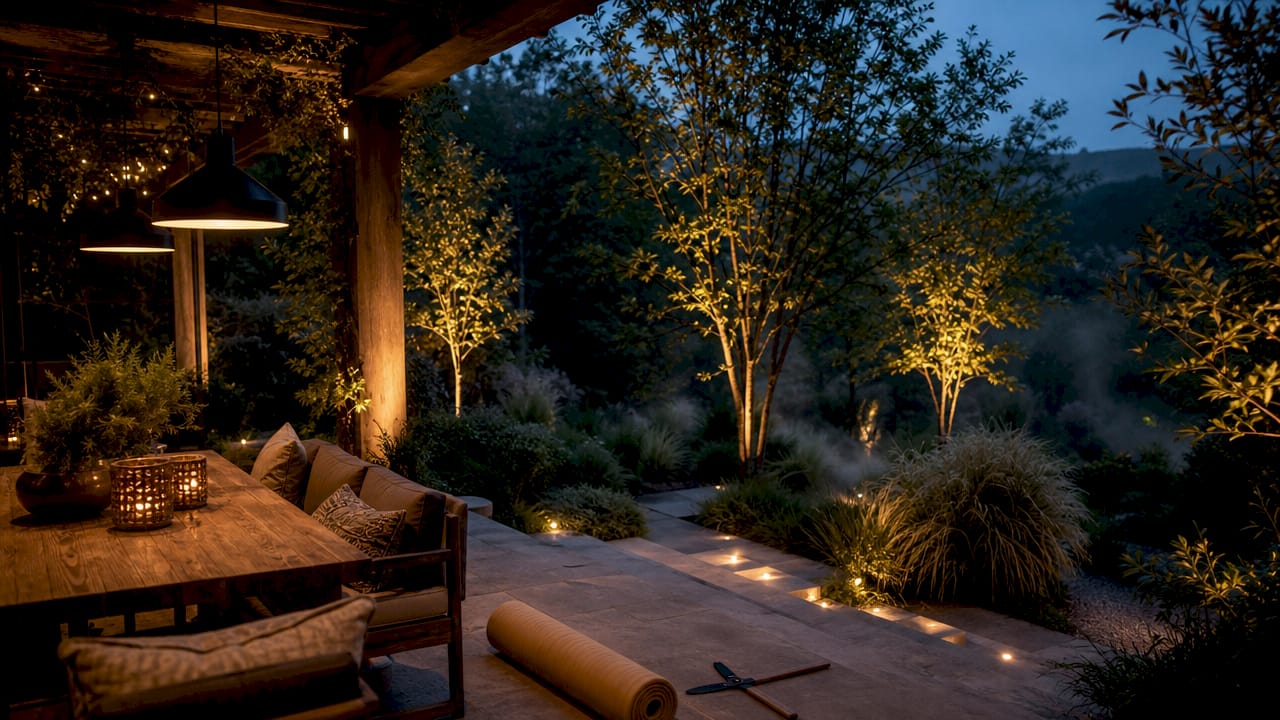
Landscape lighting layering techniques are the deliberate combination of ambient, task, and accent lighting to create depth, safety, and visual interest in outdoor spaces. Professional designers rely on a three-layer framework that treats each layer as a distinct tool with a specific job. When all three layers work together, your yard gains dimension, your pathways stay safe, and your best features get the attention they deserve. The industry standard for outdoor color temperature sits at 2700K–3000K, keeping light warm and natural rather than harsh or clinical. Foreverglowlighting applies these same principles to every custom installation in Charlotte and beyond.
1. What are the three core layers in landscape lighting?
The three core layers are ambient, task, and accent lighting. Each one serves a different purpose, and skipping any layer leaves your design feeling incomplete.
- Ambient lighting sets the overall mood. It provides broad, soft illumination across the yard without targeting any single feature. Post lights, lanterns, and low-voltage area lights are common ambient sources. Think of ambient light as the base coat that makes everything else readable at night.
- Task lighting handles function. It guides movement along paths, illuminates steps, and lights up cooking or seating areas. Deck and step lighting falls squarely into this category. Without task lighting, even a beautiful yard becomes a tripping hazard after dark.
- Accent lighting creates drama. It draws the eye to a specimen tree, a stone wall, or an architectural detail. Uplights, spotlights, and well lights are the workhorses here. Accent lighting is what gives a yard its personality at night.
Combining all three layers produces a balanced outdoor design that feels intentional rather than random. A yard lit only with path lights looks flat. A yard lit only with uplights looks theatrical. The right mix creates a space that is both functional and inviting.
2. Start with a focal point map before buying a single fixture
Planning before purchasing is the single most effective step most homeowners skip. Walk your yard at night with a flashlight and identify three to five features worth highlighting. These become your focal points.
Focal points typically include a mature tree, an entry gate, a water feature, or a distinctive wall. Mapping focal points first prevents over-lighting and keeps the design intentional. Every fixture you buy should serve one of those focal points or one of the three layers. If it does neither, leave it on the shelf.
This approach also helps with budget. Homeowners who buy fixtures without a plan tend to overspend on areas that do not need light and underspend on the features that matter most.
3. Use uplighting to make trees and architecture stand out
Uplighting is the technique of placing a fixture at ground level and aiming it upward at a tree, column, or wall. It is one of the most effective accent lighting methods available. Tree uplights work best when positioned 2–5 feet from the trunk, which allows the beam to spread through the canopy rather than blasting a single bright spot.
For architecture, uplighting along a facade creates texture and shadow that make a flat wall look three-dimensional. Aim the fixture at a slight angle rather than straight up to avoid a harsh, theatrical look. The goal is to reveal the surface, not flood it.
Pro Tip: Use two uplights on large trees placed at different angles. The overlapping beams create natural-looking shadow play that a single fixture cannot replicate.
4. Space path lights correctly to avoid the runway effect
Path lighting is task lighting at its most practical, but poor spacing ruins the effect. Evenly spaced path lights placed too close together create a “runway effect,” where the path looks like an airport landing strip rather than a garden walkway.
The fix is straightforward. Space path lights 8–12 feet apart and stagger them on alternating sides of the path rather than placing them directly across from each other. Staggering breaks the visual rhythm and creates a more natural feel. It also reduces the total number of fixtures needed, which saves money without sacrificing safety.
Choose fixtures with a downward-facing shield so the light falls on the ground, not into the eyes of anyone walking the path. Seeing the effect matters far more than seeing the fixture.
5. Apply grazing and silhouetting for texture and drama
Grazing and silhouetting are two accent techniques that most homeowners have never tried but immediately recognize when they see the results.
Grazing places a fixture very close to a textured surface, such as a stone wall or brick facade, and aims the beam nearly parallel to the surface. The light skims across the texture, throwing shadows into every crevice and making the material look rich and dimensional. It works especially well on rough stone, wood fencing, and stucco.
Silhouetting places a fixture behind a plant or object and aims it at a wall or fence behind the subject. The plant becomes a dark shape against a lit background. Ornamental grasses, agave plants, and sculptural shrubs are ideal candidates. The technique adds depth without requiring a large fixture or high wattage.
Both methods rely on hiding light sources from direct view. When you see the fixture, the illusion breaks. When you only see the effect, the design succeeds.
6. Try moonlighting for a natural, soft overhead glow
Moonlighting is one of the most underused techniques in residential garden lighting design. It involves mounting a downlight high in a tree and aiming it downward through the branches. The result mimics the soft, dappled light of a full moon filtering through a canopy.
The effect is subtle and calming, which makes it ideal for seating areas, dining patios, and garden paths beneath mature trees. Unlike uplighting, moonlighting does not call attention to itself. Guests notice the atmosphere, not the fixture.
For best results, use a warm white LED at 2700K and aim the fixture so the beam passes through multiple layers of foliage. The leaves break up the light naturally and eliminate any harsh spots.
7. Keep color temperature consistent across all fixtures
Consistent warm color temperature is one of the most important technical decisions in any layered lighting plan. Mixing cool white LEDs (4000K and above) with warm white LEDs (2700K–3000K) creates a patchwork appearance that looks unfinished and distracting.
Warm color temperatures in the 2700K–3000K range keep outdoor lighting natural and welcoming. They complement plant colors, wood tones, and stone surfaces without washing them out. Cool white light, by contrast, makes vegetation look gray and skin tones look unflattering.
Buy all fixtures for a single project from the same color temperature specification. Even fixtures from the same brand can vary slightly between product lines, so check the spec sheet before purchasing.
8. Use smart controls and zoning to manage each layer independently
Smart controls turn a good lighting design into a great one. Zoning and programmable schedules allow you to adjust ambient, task, and accent layers independently, which means you can set different scenes for different occasions.
Consider what this looks like in practice:
- Entertaining mode: Accent lights at full brightness, path lights dimmed to 60%, ambient lights on to create a welcoming glow.
- Security mode: All zones at full brightness, triggered by motion sensors.
- Relaxation mode: Accent lights off, ambient lights dimmed to 30%, moonlighting on.
Smart outdoor lighting systems also reduce energy use by scheduling lights to turn off after a set time rather than running all night. Dimming alone can cut energy consumption significantly without any visible loss in ambiance. Foreverglowlighting installs smart LED systems that give homeowners full smartphone control over every zone.
9. Choose durable fixtures that last in outdoor conditions
Fixture quality directly affects long-term performance. Commercial-grade solid brass fixtures last over 20 years and hold up in rain, heat, and freeze-thaw cycles. Plastic fixtures may cost less upfront but crack, fade, and fail within a few seasons.
Brass and copper fixtures also develop a natural patina over time that blends into the landscape. They become less visible as they age, which supports the goal of hiding the fixture and showing only the effect. Stainless steel is another solid option in coastal or high-humidity environments.
Look for fixtures with an IP65 rating or higher, which confirms they are dust-tight and protected against water jets. This rating is the minimum standard for any fixture installed in the ground or near irrigation zones.
10. Size your transformer correctly to maintain consistent brightness
Transformer sizing is a technical detail that has a visible impact on the finished result. Sizing transformers with 20% headroom over total wattage prevents voltage drop, which causes fixtures at the end of a run to burn dimmer than those near the transformer.
Calculate the total wattage of all fixtures on a circuit, then add 20% to that number. That is your minimum transformer capacity. Under-sizing the transformer is one of the most common installation mistakes, and fixing it after the fact requires rewiring.
Wire gauge matters equally. Thicker wire reduces resistance over long runs. Use 12-gauge wire for runs over 100 feet and 10-gauge for runs over 150 feet to maintain consistent voltage throughout the system.
11. Avoid over-lighting: restraint creates better results
Over-lighting is the most common mistake in residential landscape illumination. Restraint and balanced light combined with strategic shadows create drama and a far better nighttime experience than flooding every surface with light.
The best designs leave some areas dark. Darkness gives the lit areas contrast and makes them feel more significant. A single well-lit tree in a dark corner draws the eye far more effectively than five trees all lit at the same intensity.
A practical rule: light no more than 30–40% of your yard’s total area. The unlit portions provide the contrast that makes the lit portions beautiful. If everything is bright, nothing stands out.
Pro Tip: Step back to the street after installing each fixture and evaluate the view from outside the property. This perspective reveals over-lit areas and dark gaps that are invisible when you are standing in the yard.
Key Takeaways
Effective landscape lighting layering combines ambient, task, and accent layers at consistent warm color temperatures to create depth, safety, and visual interest without over-lighting any single area.
| Point | Details |
|---|---|
| Use all three layers | Ambient, task, and accent lighting each serve a distinct role; skipping one leaves the design incomplete. |
| Keep color temperature consistent | Stay within the 2700K–3000K range across all fixtures to avoid a patchwork, unfinished appearance. |
| Space and stagger path lights | Place path lights 8–12 feet apart and alternate sides to prevent the runway effect. |
| Size transformers with headroom | Add 20% above total wattage when sizing your transformer to prevent voltage drop and uneven brightness. |
| Restraint beats more fixtures | Lighting 30–40% of your yard creates contrast; over-lighting eliminates the depth that makes a design compelling. |
What I have learned from years of watching homeowners light their yards
Most homeowners approach landscape lighting the same way: they buy fixtures first and plan second. I have seen this pattern produce the same result every time. The yard ends up with too many path lights, not enough accent lighting, and a transformer that cannot keep up with the load.
The shift that changes everything is treating light as a material, not an accessory. Before I recommend a single fixture, I want to know which three features in the yard deserve to be seen at night. Everything else is secondary. That discipline keeps designs from becoming cluttered and keeps budgets from spiraling.
The other thing I tell homeowners consistently: the fixtures you cannot see are the ones doing the best work. When a visitor walks into your yard and says “this feels amazing” without knowing why, that is a sign the fixtures are hidden and the effects are doing the talking. Visible bulbs and exposed hardware pull attention away from the landscape and toward the hardware. Concealment is not a finishing detail. It is a core technique.
Finally, do not underestimate the value of a smart control system. The ability to dim your accent lights for a dinner party and then switch to full security brightness at midnight is not a luxury feature. It is the difference between a lighting system that serves one purpose and one that serves your whole life outdoors.
— Dave
Foreverglowlighting can bring your layered lighting plan to life
A well-planned layered lighting design takes expertise, the right fixtures, and a properly sized electrical system. Foreverglowlighting brings all three to every project in the Charlotte area.

Our team designs custom landscape lighting systems that combine warm LED technology, smart zone controls, and professional installation. We handle everything from focal point mapping to transformer sizing, so you get consistent brightness and a finished result that looks intentional from the street. Whether you want subtle accent lighting on a specimen tree or full smart-zone control across your entire property, we build systems that work every night without maintenance headaches. Contact Foreverglowlighting today for a free estimate.
FAQ
What are the three layers of landscape lighting?
The three layers are ambient, task, and accent lighting. Ambient sets the overall mood, task lighting guides safe movement, and accent lighting highlights specific features like trees or architecture.
What color temperature is best for outdoor landscape lighting?
A warm color temperature of 2700K–3000K is the industry standard for outdoor lighting. This range keeps light natural and welcoming while complementing plant colors and building materials.
How far apart should path lights be spaced?
Path lights should be spaced 8–12 feet apart and staggered on alternating sides of the path. Uniform spacing placed too close together creates an undesirable runway effect that diminishes ambiance.
How do I prevent glare from landscape fixtures?
Use fixtures with glare shields and position them behind plants or structures so the light source stays out of direct sightlines. Viewers should see the lighting effect, not the bulb itself.
Do I need a smart control system for layered landscape lighting?
Smart controls are not required, but they add significant value. Zoning and programmable schedules let you adjust ambient, task, and accent layers independently for different activities and times of night.