
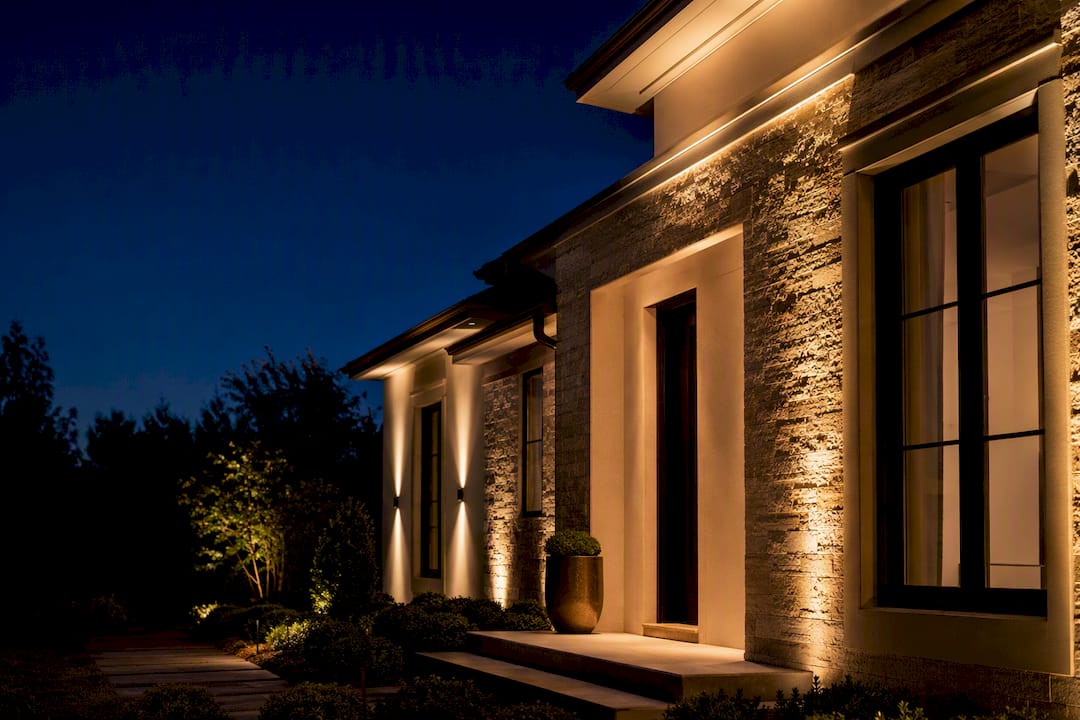
The most effective architectural exterior lighting approach is a layered, restrained scheme that reveals your home’s architecture rather than flooding it. That means warm, shielded fixtures in the 2700K to 3000K range, techniques like grazing and wall-washing matched to your materials, and smart scene control that keeps mood lighting separate from security lighting. The goal is always the same: light the surface, not the source, and let darkness do some of the design work.
TL;DR:
- Most fixtures should be kept low in brightness and spaced evenly to avoid over-illumination and glare, with fixtures typically producing 200-700 lumens.
- Selecting the right technique depends on surface material, with grazing for textured stone or brick, wall-washing for flat surfaces, and uplighting or silhouetting for structures and trees.
- Fixtures must have corrosion-resistant housings and a minimum IP65 rating, especially in coastal or high-moisture climates, with finishes matching each other and the interior design for cohesion.
- Smart scene controls should be separate for security and decorative lighting, allowing quick adjustments for different occasions and seasons via smartphone apps.
- Proper aiming, fixture selection, and regular maintenance, including professional installation and dark-angle testing, are crucial for an effective, long-lasting exterior lighting scheme.
Table of Contents
- Why Layered Architectural Lighting Works
- Which Lighting Technique Fits Your Home’s Features?
- Choosing Fixtures and Finishes for Architectural Effects
- What Color Temperature and Beam Angle Work Best?
- How Bright Should Each Fixture Be, and How Far Apart?
- How Do Smart Controls Improve Architectural Lighting?
- What Should You Know Before Installing Exterior Lighting?
- A Practical Checklist Before You Call an Installer
- Ready to Move From Ideas to an Installed System?
- Sources
- FAQ
Why Layered Architectural Lighting Works
Layering means treating your home’s exterior as four distinct zones instead of one flat surface: the roofline, the facade and its feature elements, the approach and path, and the landscape beyond it. Each zone gets its own light logic, and together they create depth that a single row of floodlights never can. This zoned approach is a defining trend in current outdoor lighting design, where smart systems let homeowners shift color and scene by zone through a smartphone app rather than rewiring anything.
Think in pairings rather than single fixtures. A few that consistently work well together:
- Roofline halo lighting paired with warm grazing across a stone or brick facade below it
- Soffit downlights at the entry paired with recessed step lights for a safe, glare-free arrival
- Uplighting on a chimney or dormer paired with silhouette lighting behind an ornamental tree
- Wall-washing on flat stucco paired with in-grade well lights along a walkway
- Cove or linear lighting under a porch overhang paired with sconces flanking the front door
- Landscape accent lights on specimen trees paired with low path lighting that avoids competing glow
Restraint is the discipline that separates a good scheme from a garish one. Not every wall needs light, and unlit sections of facade actually sharpen the contrast on the parts you do illuminate. Architect-level guidance treats darkness as a design tool, not a gap you forgot to fill.
Which Lighting Technique Fits Your Home’s Features?
The technique you choose should follow the material in front of you, not the other way around. Mismatching a technique to a surface is one of the most common mistakes homeowners make when they try to DIY a scheme from photos alone.
- Grazing. Mount the fixture close to the wall, roughly 6 to 18 inches out, and aim the beam up or down at a steep angle. This rakes light across texture, which is why it works so well on stone, brick, and rough stucco. It exaggerates every joint and groove, so it’s a poor choice for smooth, flat siding.
- Wall-washing. Pull the fixture out to 2 to 4 feet from the wall so the beam spreads evenly across the surface. This flattens texture rather than emphasizing it, making it the better call for flat stucco, siding, or a wall you want to read as a soft, even glow.
- Uplighting and silhouetting. Aim a narrow beam up a column, chimney, or specimen tree to create vertical emphasis. Silhouetting flips the idea: place the fixture behind an object and let it throw a shadow onto the wall behind, which works beautifully on ornamental grasses or a sculptural tree.
- Soffit downlighting. Recessed fixtures in a porch or entry soffit wash light straight down, keeping walkways visible without any glare in a visitor’s eyes.
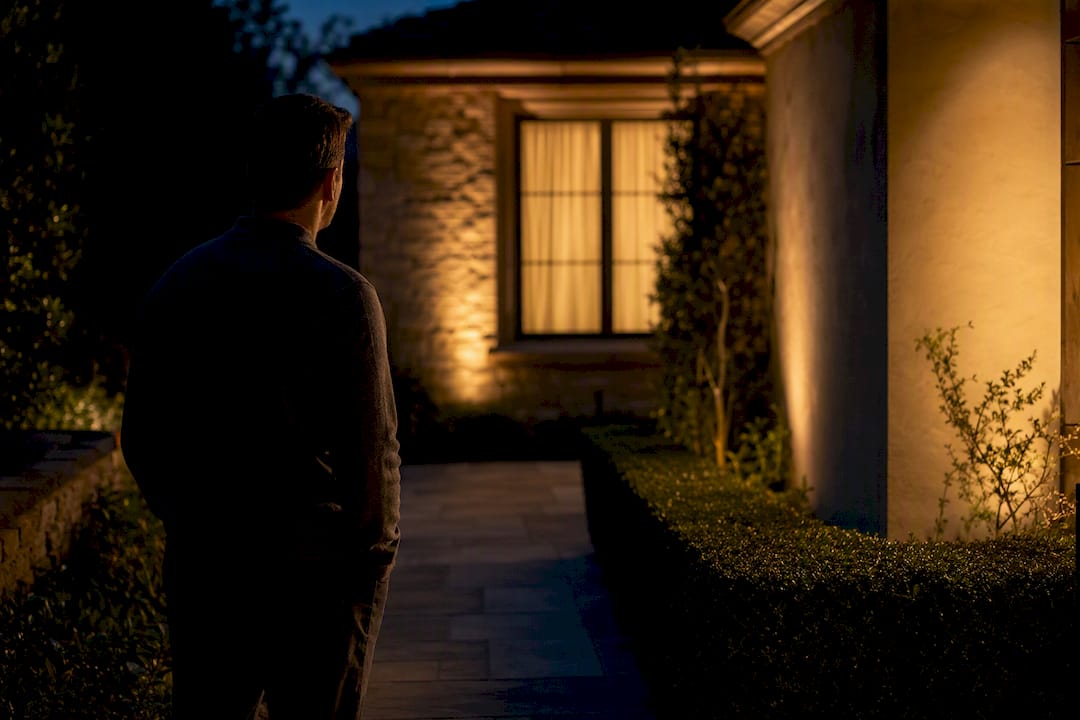
Glare is the failure mode that ruins an otherwise well-planned scheme. The rule that matters most: a viewer should see the lit surface, never the light source. Use recessed, louvered, or shielded fittings, and always aim beams so the bulb itself stays out of sightlines from the street, driveway, and neighboring windows, as facade lighting specialists consistently recommend.
Pro Tip: Walk the property after dark before calling any fixture placement final. What looks perfectly aimed from a ladder at 4 p.m. often throws glare straight into a window once the sun goes down.
Choosing Fixtures and Finishes for Architectural Effects
Fixture selection follows technique. Wall sconces suit entries and porch columns. Recessed step lights handle stairs and low walls. In-grade well lights sit flush in a walkway or patio for uplighting trees and columns. Linear or strip fixtures, sometimes called cove lighting, tuck into soffits and under stair nosings for a continuous glow with no visible dots.
Finish matters almost as much as placement. A few guidelines worth following:
- Choose matte or dark bronze, black, or graphite finishes that disappear into shadow, trim, or landscaping by day
- Keep finish consistent across zones so the fixtures read as one coordinated system rather than a mismatched collection
- Match exterior fixture finishes and color temperature to interior lighting where possible, since designers recommend that visual continuity so the home feels cohesive from inside out
- For coastal or high-moisture climates, prioritize marine-grade or corrosion-resistant bodies over standard aluminum housings
Fixtures exposed to rain, sprinklers, or direct weather need housings built for that reality, not just a rating on a spec sheet you never check again.
What Color Temperature and Beam Angle Work Best?
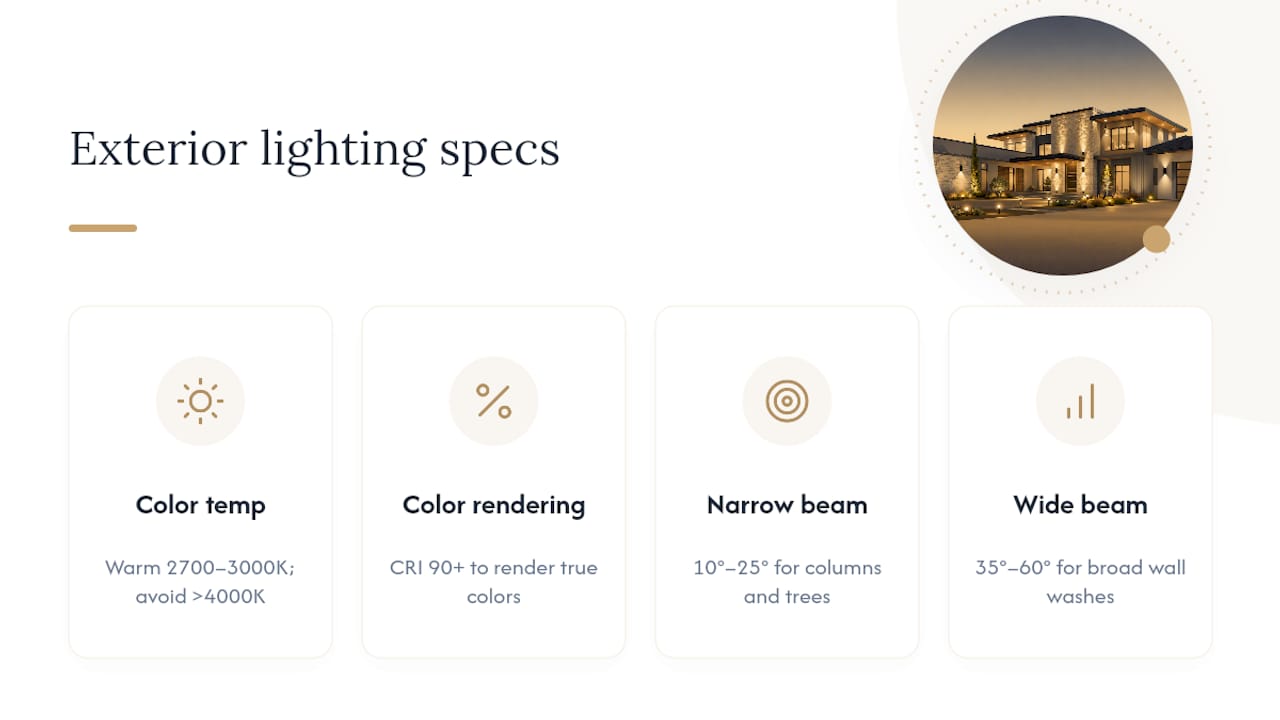
Warm white in the 2700K to 3000K range is the standard for residential facades, and for good reason: it flatters stone, brick, and wood tones the same way warm incandescent light flatters skin. Cooler temperatures above 4000K read as clinical and commercial on a home, even when the fixture quality is excellent.
Color rendering index matters just as much as color temperature. Look for CRI 90 or higher, which renders the true color of masonry, siding, and plant foliage instead of washing everything into a flat, slightly gray version of itself. A low-CRI fixture can make a warm brick facade look muddy even at the “right” color temperature.
Beam angle decides whether you get a tight spot or a soft wash. Narrow beams (10 to 25 degrees) suit uplighting a column or tree. Wider beams (35 to 60 degrees) suit wall-washing a broad flat surface. Facade lighting design guidance consistently points to testing fixtures on-site before final installation, since beam spread looks different on a textured wall than it does on a spec sheet.
How Bright Should Each Fixture Be, and How Far Apart?
Brightness and spacing are where most first-time schemes go wrong, usually in the direction of too much light from too few fixtures. The fix is almost always more fixtures at lower output, not one oversized flood trying to cover an entire facade.
Numeric guidance from current placement standards gives a solid starting point for planning:
| Application | Lumen range | Fixture distance | Spacing |
|---|---|---|---|
| Accent uplight (tree, column) | 200 lumens | Varies by height | Per feature |
| Wall wash (flat surface) | 400 lumens | 2 to 4 ft from wall | Every 6 feet |
| Wide flood (broad coverage) | 700 lumens | 4 ft or more | Sparingly |
| Grazing (textured surface) | 200 lumens | 6 to 18 in from wall | Every 3 feet |
Start with fewer, lower-output fixtures than you think you need, then add rather than subtract once you see the effect at night. It’s far easier to install one more well light than to explain to an electrician why you now want to remove three.
How Do Smart Controls Improve Architectural Lighting?
Security lighting and mood lighting solve different problems, and mixing them into one circuit is a common source of frustration. A motion-triggered flood that snaps on every time a raccoon crosses the yard will blow out a carefully graded architectural scene in an instant. Installation best practice calls for keeping decorative scenes on a separate control layer from security circuits entirely.
Smart scene control is what makes layered lighting practical day to day rather than a one-time setup you never touch again. A few scene types worth building into any system:
- Arrive: soft path and entry lighting that turns on automatically at dusk
- Entertain: warmer, brighter facade and patio lighting for evening gatherings
- Late-night: dimmed roofline and path lighting only, security floods still armed separately
- Holiday: color-shifting or seasonal presets layered on top of the permanent architectural scheme
Dusk-to-dawn and astronomical timers remove the guesswork of manually flipping switches as sunset time shifts through the year. Permanent systems with smartphone app control let a homeowner test and adjust every scene without ever climbing a ladder to reposition a fixture. This is a real advantage over seasonal string lights that get reinstalled from scratch each year, as outdoor lighting trend coverage has pointed out.
Pro Tip: Build in one or two extra scene slots when you set up the system, even if you don’t use them right away. It’s much simpler to program a new holiday or entertaining scene later than to retrofit control zones after installation.
What Should You Know Before Installing Exterior Lighting?
Every fixture exposed to rain, sprinklers, or direct weather needs an IP65 rating or higher, paired with a corrosion-resistant housing rather than standard aluminum that pits and discolors within a couple of seasons. This matters even more in coastal or high-humidity regions.
Mains wiring and permanent-track installations belong to a licensed electrician, full stop. Beyond code compliance, a professional installer will also schedule a dedicated aiming visit after dark, since fixture angles that look right at noon almost always need adjustment once the sun goes down. Budget for periodic maintenance, too: lens cleaning, LED module checks, and occasional re-aiming after landscaping grows in around a fixture. A system installed with easy access points in mind will cost far less to maintain over a decade than one where every bulb change means digging out a flower bed.
A Practical Checklist Before You Call an Installer
Before bringing in a professional, walk your property and answer a few questions honestly. What’s the primary goal: curb appeal, safety, or both? What materials dominate the facade, stone, brick, stucco, or wood siding? Where can wiring realistically run without tearing up finished landscaping? Do you want app-based smartphone control, and does your HOA have restrictions on visible fixtures or color-changing displays?
Forever Glow Lighting works through exactly this kind of checklist with homeowners before any design gets finalized, since a scheme that ignores HOA rules or access constraints usually needs expensive rework later. For more visual inspiration before that conversation, our exterior accent lighting ideas page and our breakdown of landscape lighting layering techniques are both worth a look.
Ready to Move From Ideas to an Installed System?
A permanent, smart LED system can be installed directly into your roofline and landscape, invisible in daylight and fully controllable from your phone at night. Where seasonal string lights and rental setups mean climbing ladders every fall and every spring, a permanent track stays in place year-round and simply gets reprogrammed for the next scene, whether that’s a warm architectural wash in July or a color display in December.

Our design consults start with the same checklist covered above: your goals, your materials, your access points, and your HOA rules, so the scheme we propose actually fits your property instead of a generic template. You can see the full process on our permanent lighting installation page, and explore dedicated options like architectural lighting design for facades and rooflines specifically. Reach out today for a free estimate and see what a layered, smart-controlled exterior scheme would look like on your own home.
Sources
- How Outdoor Lighting Can Bring Architecture to Life After Dark — Dwell
- Facade & Exterior Lighting Design: Light Your Home’s Face (2026) — Studio Matrx
- Exterior Facade Lighting: Brightness & placement guide (2026) — MiroDemi
- Exterior Lighting Design: From orientation to architectural expression — Studio De Schutter
FAQ
What Are the Current Trends in Exterior Lighting?
Layered, zone-based schemes with smart smartphone control are the dominant trend, letting homeowners shift between warm architectural scenes and vibrant holiday color without reinstalling any hardware.
What Is the Rule of Thumb for Outdoor Lighting?
Shield every fixture so you see the lit surface, not the bulb, and match your technique to your material: grazing for textured stone or brick, wall-washing for flat stucco or siding.
What Are the Trends for Outdoor Lighting Going Forward?
Expect continued growth in permanent, app-controlled LED systems that replace seasonal string lights, along with more homeowners separating security floods from architectural mood lighting on distinct control layers.
What Are Some Examples of Architectural Lighting?
Common examples include roofline halo lighting, warm grazing across stone facades, soffit downlights at entries, uplighting on columns or trees, and silhouette lighting behind ornamental landscaping.