

A landscape lighting upgrade is the process of improving an existing outdoor lighting system by replacing inefficient fixtures with LED technology, optimizing transformer capacity, and adding modern smart controls. For homeowners in Charlotte, NC, this type of upgrade delivers two clear wins: lower energy costs and a more polished curb appeal. The good news is that a full landscape lighting upgrade existing system project rarely requires tearing out your wiring or buying a new transformer. With the right approach, you can work with what you have and get dramatically better results.
How to assess your existing landscape lighting system before upgrading
A professional lighting audit is the right first step before spending a dollar on new fixtures. Audits identify safety hazards, voltage drop, and overgrown plants that would otherwise waste your upgrade budget on the wrong fixes. Skipping this step is the single most common mistake Charlotte homeowners make.
Start by recording your transformer’s total wattage rating and its current load. Most residential low-voltage transformers run between 150W and 600W. The industry standard is to keep your load at or below 80% of the transformer’s rated capacity. That buffer protects the transformer from overheating and extends its life.
Next, walk every wire run and note the following:
- Transformer wattage and current load: Add up the wattage of every connected fixture to find your total draw.
- Wire gauge: Most older systems use 16-gauge wire. Longer runs often need 14-gauge or 12-gauge to prevent dimming.
- Fixture types: Note whether each fixture uses halogen or LED bulbs, and record the wattage.
- Visible problems: Look for flickering lights, uneven brightness, or fixtures that have gone completely dark.
- Corrosion: Check wire connections and sockets. Voltage and socket corrosion are the most common causes of failing lights, not the fixtures themselves.
Pro Tip: Use a multimeter to measure voltage at the fixture farthest from your transformer. A reading below 10.8V under full load means you have a voltage drop problem that needs fixing before you add any new lights.
What are the best LED fixture and smart control options for upgrading?
Switching from halogen to LED is the single highest-impact change you can make. Replacing a 50W halogen with a 5W LED recovers 45 watts per fixture. On a 10-fixture system, that frees up 450 watts of transformer capacity. You can add new fixtures, extend coverage to dark areas of your yard, or simply run a lighter load without buying a new transformer.
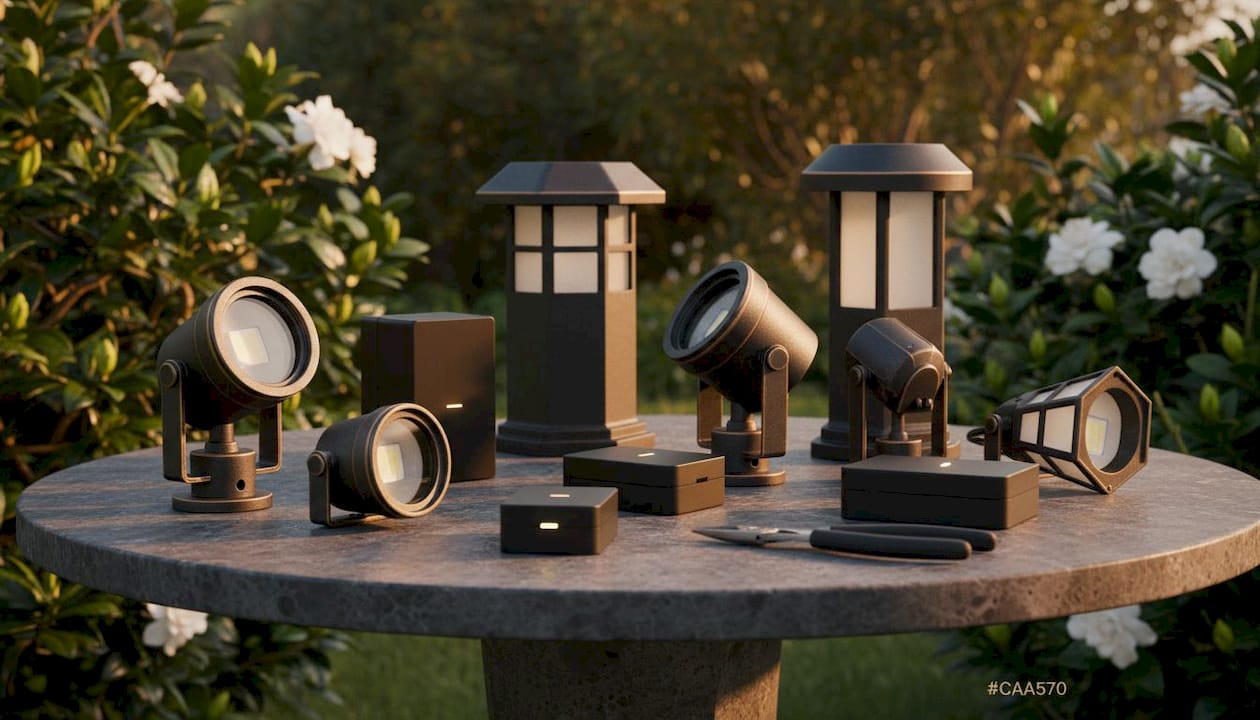
LED fixtures also last far longer than halogen bulbs and produce less heat. For aesthetic consistency, keep all fixtures within the 2700K–3000K color temperature range. That warm tone creates a welcoming, unified look across your entire yard. Mixing color temperatures, such as pairing a 2700K path light with a 4000K spotlight, creates a jarring appearance that undermines the whole design.
Smart controls are the second major upgrade. You can install a smart control module between the power input and your existing transformer without replacing any wiring. This retrofit replaces mechanical timers and photocells with app-based scheduling, motion sensors, and ambient light sensing. The cost is far lower than a full transformer replacement, and the result is a system you can adjust from your phone.
Key options to consider when selecting controls and fixtures:
- App-based scheduling: Set precise on/off times and adjust them remotely by season.
- Motion sensors: Trigger lights in high-traffic zones like driveways and entry paths.
- Ambient light sensors: Automatically turn lights on at dusk and off at dawn.
- Dimmable LED drivers: Reduce brightness during late-night hours to save energy.
Pro Tip: Before buying a smart control module, confirm it is compatible with your existing transformer’s voltage output. Some legacy magnetic transformers require a minimum load of 20–40W to operate correctly. If you drop below that threshold after switching to LED, the module or a dummy load resistor can stabilize the system.
One more consideration: retrofitting LED bulbs works well in most cases without replacing the transformer, unless the transformer is undersized or fails minimum load requirements. Learn more about what smart outdoor lighting can do for your home before committing to a specific control system.
How do you fix voltage drop in an existing landscape lighting system?
Voltage drop is the reduction in electrical voltage that occurs as current travels along a wire run. The longer the run and the higher the load, the more voltage is lost before it reaches the fixture. Voltage below 10.8V at the fixture socket under full load causes LED dimness or flicker. This is fixable without rewiring in many cases.
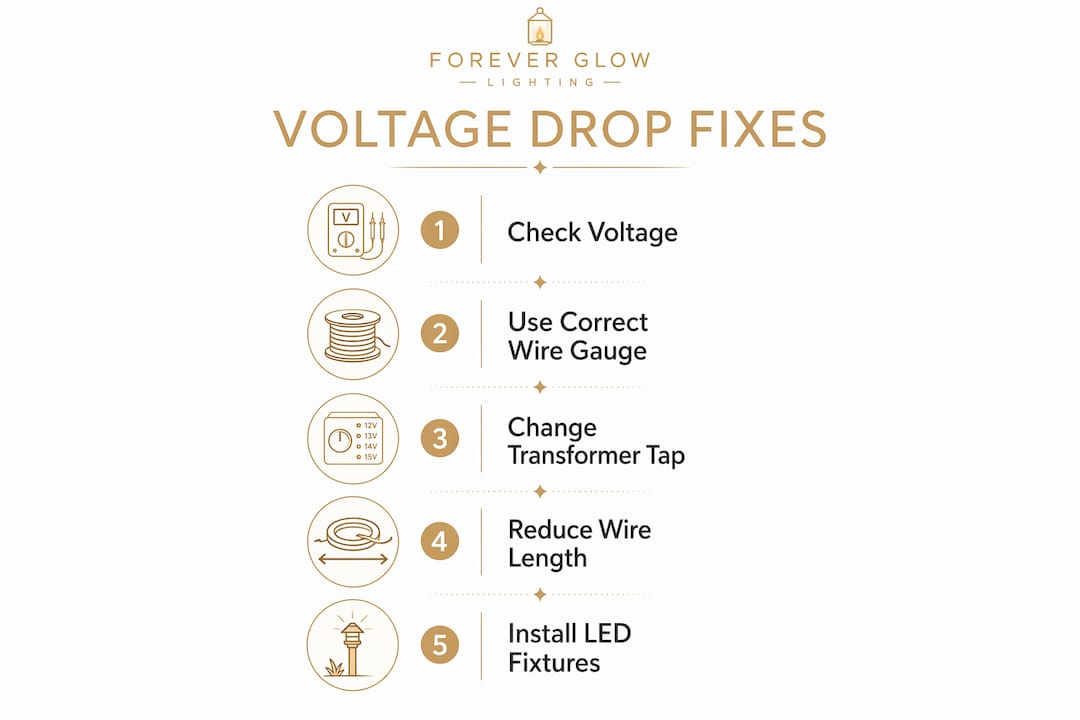
Most low-voltage transformers include multi-tap terminals set at 12V, 13V, and 14V. Moving a wire run from the 12V tap to the 13V or 14V tap compensates for the voltage lost along the run. This is the fastest fix and costs nothing. The limitation is that tap adjustments only work up to a point. Very long runs or heavy loads still need a wiring upgrade.
| Situation | Recommended fix |
|---|---|
| Short run, minor dimming | Move wire to 13V or 14V transformer tap |
| Run over 100 feet, moderate load | Upgrade to 12-gauge wire |
| Run over 150 feet, heavy load | Upgrade to 10-gauge wire or split into two zones |
| Transformer at or above 80% capacity | Add a second transformer for new zones |
| Flickering after LED retrofit | Check minimum load; add smart control module |
Using 12-gauge wire for runs up to 100 feet and 10-gauge for longer runs minimizes voltage drop and keeps brightness consistent at every fixture. Wire gauge upgrades are a one-time investment that pays off for years.
Pro Tip: Always measure voltage at the last fixture on each run, not just at the transformer. The transformer output can look fine while the end fixtures are starved for power.
What design principles improve an upgraded lighting layout?
Effective outdoor lighting uses three layers: ambient, task, and accent. Ambient lighting provides general illumination across a space. Task lighting targets functional areas like walkways, steps, and driveways. Accent lighting highlights specific features such as trees, architectural details, or garden beds. A system that uses all three layers looks intentional and polished rather than flat or cluttered.
Removing 20–30% of cluttered or poorly placed fixtures improves the overall design by creating contrast and allowing focal points to stand out. More lights do not automatically mean better lighting. Reducing fixture count in crowded areas often produces a more sophisticated result than adding more. This is a counterintuitive truth that most homeowners miss.
Before installing anything new, map your focal points. Identify the trees, architectural features, or garden beds you want to highlight. Then plan fixture placement around those goals rather than filling in gaps randomly. This approach produces a layered lighting design that holds up in every season.
Additional design practices that matter:
- Seasonal re-aiming: Plant growth and shifted stakes cause beam misalignment over time. Inspect and re-aim fixtures each spring.
- Waterproof connectors: Use direct-burial wire nuts or gel-filled connectors at every splice to prevent corrosion.
- Fixture height and angle: Aim spotlights at a 30-degree angle to a tree trunk for the most natural uplight effect.
- Avoid light pollution: Position fixtures to direct light downward or toward specific targets. This also qualifies as night sky friendly lighting practice.
Step-by-step process for upgrading your existing system
A clear workflow prevents costly mistakes and keeps the project on track. Follow these steps in order:
- Audit the existing system. Record transformer wattage, current load, wire gauge on each run, and fixture types. Note any flickering, dim spots, or corrosion.
- Calculate reclaimed wattage. Identify every halogen fixture and calculate the wattage freed by switching to LED. Use that number to plan new fixture additions.
- Map your new design. Identify focal points, dark zones, and areas with too many fixtures. Plan additions and removals before buying anything.
- Select compatible LED fixtures and controls. Match color temperature across all fixtures (2700K–3000K). Choose a smart control module confirmed to work with your transformer model.
- Adjust transformer taps. Move wire runs to higher-voltage taps as needed. Test voltage at the farthest fixture on each run after adjustment.
- Upgrade wiring where necessary. Replace 16-gauge wire with 12-gauge on runs over 100 feet. Add a second transformer if total load exceeds 80% of rated capacity.
- Install new fixtures and controls. Use waterproof connectors at every splice. Bury all wiring at least 6 inches deep per standard low-voltage installation practice.
- Test and adjust. Turn on the full system after dark and walk every zone. Check brightness, aiming, and color consistency. Re-aim any fixture that produces glare or misses its target.
Troubleshooting quick reference:
- Flickering after LED retrofit: Check transformer minimum load requirement; add a smart module or dummy load.
- Dim fixtures at end of run: Measure voltage; move to a higher tap or upgrade wire gauge.
- Uneven brightness across zones: Verify each zone stays within the 80% transformer load rule.
Key Takeaways
A successful landscape lighting upgrade combines LED efficiency gains, voltage management, and intentional design to produce a system that looks better and costs less to run.
| Point | Details |
|---|---|
| Audit before upgrading | Record transformer load, wire gauge, and fixture types before buying anything new. |
| LED retrofit frees capacity | Replacing a 50W halogen with a 5W LED recovers 45 watts per fixture for system expansion. |
| Fix voltage drop first | Voltage below 10.8V causes dimming; adjust transformer taps or upgrade wire gauge. |
| Remove before adding | Cutting 20–30% of cluttered fixtures improves design quality more than adding new ones. |
| Match color temperature | Keep all fixtures between 2700K and 3000K for a consistent, welcoming appearance. |
What I’ve learned after years of outdoor lighting upgrades in Charlotte
The most common mistake I see Charlotte homeowners make is treating an upgrade as a shopping trip. They buy new fixtures before they know what their transformer can handle or where their voltage is dropping. The result is a system that looks slightly better but still has the same underlying problems.
The second mistake is ignoring fixture aiming after installation. Charlotte’s growing season is long. By late summer, a tree that was perfectly lit in april is now blocking the beam entirely. A quick seasonal re-aim takes 20 minutes and makes a visible difference.
What actually works is starting with a thorough audit, fixing the electrical foundation first, and then making deliberate design choices. Removing fixtures is often more powerful than adding them. A yard with 12 well-placed, properly aimed LED fixtures at 2700K will outperform a yard with 30 mismatched, dim halogens every time. Professional landscape lighting design pays off precisely because it forces that discipline from the start.
Charlotte’s climate also matters. High humidity accelerates socket corrosion, which is why I always recommend gel-filled waterproof connectors and an annual voltage check at the farthest fixture on each run. That one habit catches 80% of problems before they become failures.
— Dave
Foreverglowlighting’s landscape lighting services for Charlotte homeowners
Foreverglowlighting works with Charlotte homeowners to plan and install custom landscape lighting systems that are built to last. Whether you need a full LED retrofit, a smart control integration, or a complete redesign of an outdated system, the team at Foreverglowlighting handles the audit, design, installation, and follow-up adjustments.

Every project starts with a free on-site estimate. Foreverglowlighting’s installations use energy-efficient LED fixtures, professional-grade waterproof connectors, and app-controlled smart modules that give you full control from your phone. The result is a yard that looks polished year-round without the maintenance headaches of an aging halogen system. Contact Foreverglowlighting today to schedule your free estimate and see what a properly upgraded system looks like on your property.
FAQ
Can I upgrade my landscape lighting without replacing the transformer?
Yes. Switching from halogen to LED fixtures frees significant wattage capacity, and a smart control module can modernize your controls without touching the transformer or wiring.
What causes landscape lights to flicker after an LED retrofit?
Flickering usually means the transformer is not receiving its minimum required load. Legacy magnetic transformers often need 20–40W minimum; a smart control module or dummy load resistor resolves this.
How do I know if my wire gauge needs upgrading?
Measure voltage at the farthest fixture on each run. A reading below 10.8V under full load signals a voltage drop problem that requires upgrading to 12-gauge or 10-gauge wire.
What color temperature should I use for landscape lighting?
Keep all fixtures between 2700K and 3000K. That warm range creates a consistent, welcoming appearance and avoids the jarring contrast caused by mixing different color temperatures.
How often should I re-aim my landscape lighting fixtures?
Re-aim fixtures at least once a year, ideally each spring. Plant growth and shifted stakes cause beam misalignment that reduces lighting quality and can create unwanted glare.