
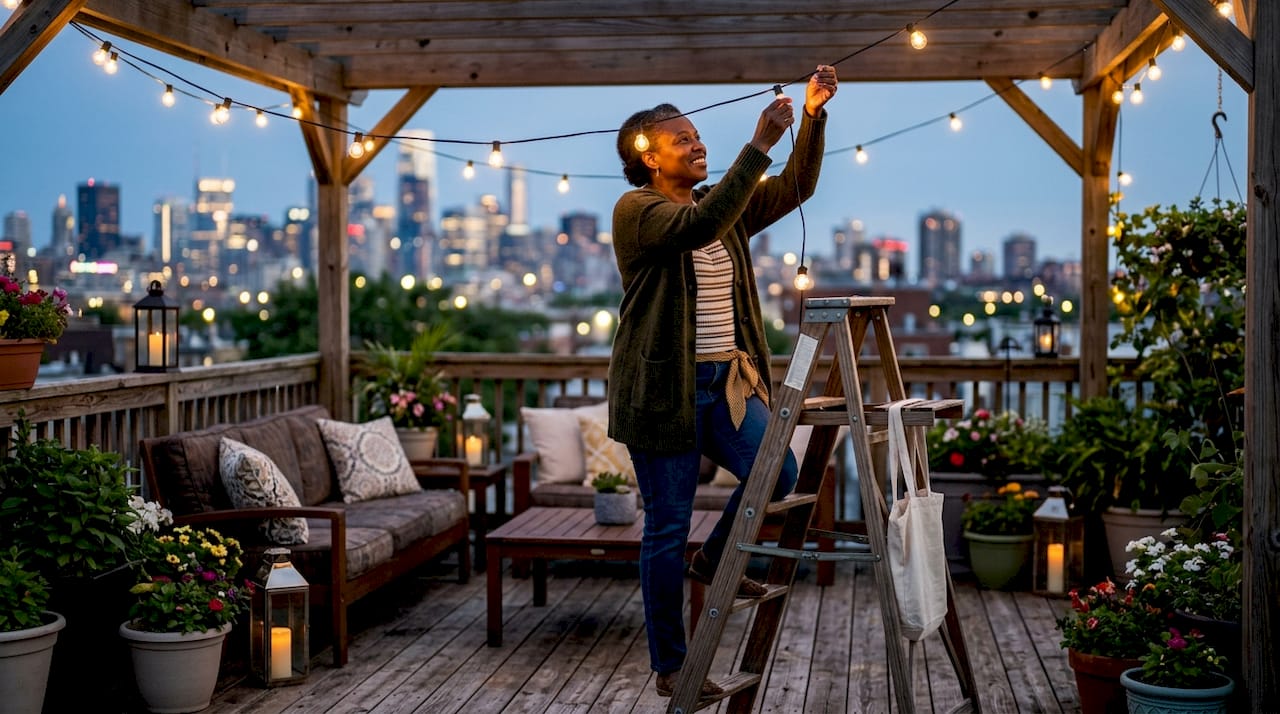
Outdoor lighting for entertaining spaces is the intentional layering of ambient, accent, and task light to create atmosphere, safety, and usability after dark. The most successful outdoor entertaining areas use a three-layer lighting approach: ambient overhead light, mid-height accent light, and low-level task or safety light. Each layer serves a distinct purpose, and removing any one of them leaves your patio feeling either flat or unsafe. Whether you are planning a summer dinner party or a casual weekend gathering, the right lighting design makes the difference between a space guests want to leave and one they never want to leave.
What are the essential types of outdoor lighting for entertaining spaces?
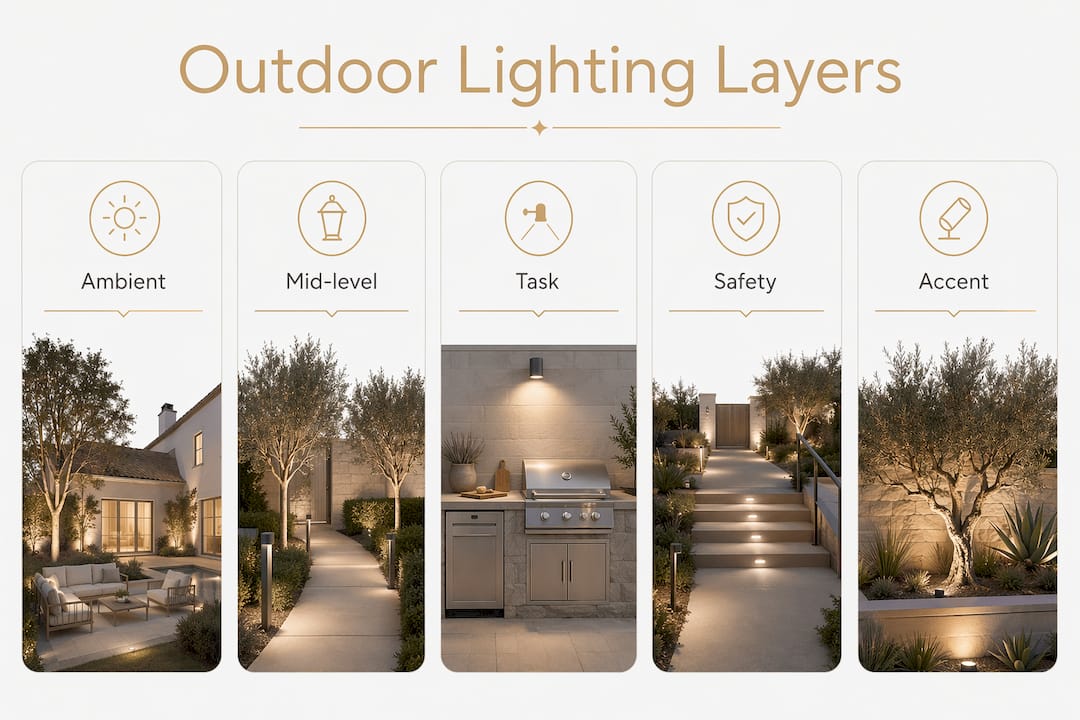
Layered outdoor lighting relies on three distinct categories, each filling a role that the others cannot. Understanding each category helps you build a complete, balanced design rather than defaulting to a single fixture type.
Ambient lighting
Ambient light is the primary overhead source that sets the overall brightness of your space. String lights for a patio are the most popular choice because they spread warm light evenly across a large area. Pendant fixtures, overhead lanterns, and pergola-mounted fixtures also serve this role well. The goal is consistent, even coverage without harsh shadows.
Accent and mid-level lighting
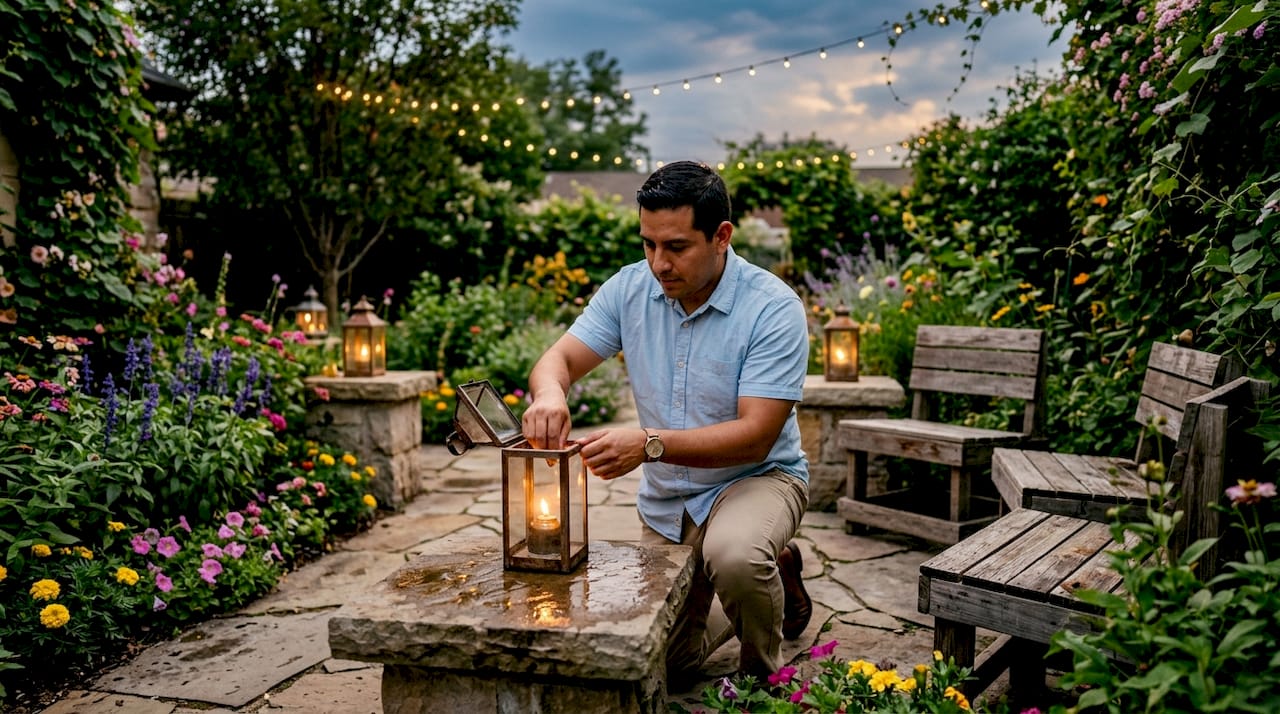
Mid-level lighting fills the gap between overhead fixtures and the ground. Floor lanterns near seating areas provide critical mid-level light that overhead fixtures simply cannot reach. Tabletop lanterns, wall sconces, and flameless pillar candles with timers add warmth and intimacy at eye level. This layer is what makes a space feel cozy rather than institutional.
Task and safety lighting
Task lighting covers specific functional zones: the grill, the bar, the food prep area, and the pathways connecting them. Pathway lights, step lights, and spotlights all belong here. Clearly lit steps and walkways prevent trips and falls, which matters especially when guests are moving between the house and the yard after dark.
Color temperature is the detail most homeowners overlook. The correct color temperature for evening entertaining is 2200K–2400K. Bulbs above 3000K produce a cool, bluish light that reads as utilitarian rather than welcoming. Staying within the 2200K–2400K range gives your space that warm, golden glow that photographs well and feels comfortable to sit in for hours.
Pro Tip: Buy one extra bulb in your chosen color temperature and test it against your existing fixtures before purchasing in bulk. Even small differences in Kelvin rating are visible side by side.
How do you plan and install string lights for full coverage?
String lights are the single most impactful addition to any patio or garden lighting plan. Getting the installation right requires more planning than most homeowners expect.
-
Calculate your strand count first. For a 12-by-14-foot pergola, plan two to three 48-foot strands to achieve continuous overhead coverage. That works out to 96–144 feet of lighting total. Under-buying strands is the most common mistake, and it results in patchy, uneven light.
-
Weave, do not drape. Proper string light installation involves weaving lights around pergola beams systematically to create a continuous grid. Loose draping creates slack, which causes sagging and uneven light puddles beneath the fixture. Tight, woven installation keeps the grid level and the light consistent.
-
Choose the right bulb. Select warm white bulbs rated at 2200K–2400K. Avoid “daylight” or “cool white” options, which look sterile outdoors at night. LED versions in this color range last significantly longer than incandescent and draw far less power.
-
Automate with a smart plug. Running your string lights through an outdoor-rated smart plug with a schedule means the patio glows before guests arrive and dims naturally late at night. You set the schedule once and never think about it again. This is especially useful for homeowners who entertain frequently throughout the week.
-
Anchor your endpoints securely. Use screw-in hooks rated for outdoor use at every anchor point. Zip ties and tape fail over time, especially in rain or wind. Secure anchors prevent sagging and extend the life of your strands.
Pro Tip: Run a single strand first and photograph it from your seating area before committing to the full installation. This reveals gaps and uneven spacing before you have strung everything up.
What are affordable options for pathway and ground-level lighting?
Ground-level lighting defines the edges of your space and guides guests safely through it. The good news is that this layer does not require a large budget.
Metal solar stake lights are the most durable baseline option for pathway lighting. A set of four runs about $28 depending on style and finish. Metal stakes outlast plastic alternatives significantly, especially through wet seasons and temperature swings. Plastic stakes crack, fade, and tip over. Metal stakes hold their position and their finish.
| Lighting type | Approximate cost | Best use |
|---|---|---|
| Metal solar path lights (set of 4) | $28 | Walkways, garden borders |
| Flameless pillar candles with timer | $15–$30 each | Lanterns, tabletop accents |
| Floor lanterns (mid-level) | $40–$80 each | Seating area perimeters |
| Step lights (hardwired) | $20–$50 per fixture | Deck steps, raised platforms |
Flameless pillar candles with built-in timers work exceptionally well inside lanterns. They produce a warm, flickering glow that mimics real candlelight without the fire risk or the need to light and extinguish them manually. Set the timer once and the lanterns come on automatically every evening.
- Place path lights every 6–8 feet along walkways for consistent coverage
- Position lanterns at the corners of seating areas to define the space
- Use step lights on every level change, including deck stairs and raised platforms
- Avoid placing ground-level lights where they shine directly into seated guests’ eyes
Lighting vertical surfaces such as fences, trellises, and garden walls makes the outdoor space feel larger and more enclosed. This is a technique professional designers use consistently, and it costs very little to add once your ground-level fixtures are in place.
How can homeowners layer lighting to create mood transitions during events?
The real power of layered lighting is adaptability. A well-designed space shifts from bright and functional during dinner to soft and intimate during late-night conversation, all without anyone moving a single fixture.
The three-layer approach works because each layer can be adjusted independently. Overhead string lights stay on all evening. Mid-level lanterns and floor lamps can be switched off or dimmed as the night progresses. Task lights at the grill or bar turn off once food service ends. The result is a space that feels different at 7:00 PM than it does at 10:00 PM, even though nothing physically changed.
- Dining phase: All three layers active. Overhead lights at full brightness, mid-level lanterns on, pathway lights guiding movement.
- Post-dinner phase: Overhead lights dimmed slightly, grill and bar task lights off, floor lanterns carrying the ambient load.
- Late-night phase: Overhead lights at minimum, only floor lanterns and candles active, pathway lights still on for safety.
Smart controls make these transitions effortless. Connecting your overhead lights to a smart outdoor lighting system lets you adjust brightness from your phone without leaving your seat. Timers handle the late-night dimming automatically, so you are not fumbling with switches when the conversation is flowing.
Lighting vertical surfaces adds another dimension to this layering strategy. Uplighting a garden wall or fence creates a sense of enclosure that makes the space feel intentional and complete. It also adds depth that flat overhead lighting alone cannot provide.
Pro Tip: Avoid placing all your lights on a single circuit. Separate controls for overhead, mid-level, and task lighting give you genuine flexibility without rewiring anything.
What are common mistakes in outdoor entertaining lighting?
Most outdoor lighting problems come from one of three errors: too much brightness, inconsistent color temperature, or poor fixture placement.
- Too much brightness ruins ambiance. Excessive light destroys the day-to-night transition that makes outdoor entertaining feel special. The goal is “just bright enough,” not floodlit. If you can read a book comfortably at every point in the space, the lights are probably too bright.
- Mixing color temperatures creates a sterile look. Combining 2200K string lights with 4000K security lights produces a jarring, mismatched appearance. Commit to one color temperature range across all fixtures in the entertaining zone.
- Loose string light installation causes uneven puddles. Draping strands loosely results in bright spots directly under each bulb and dark gaps between them. Weaving strands tightly through a grid structure solves this completely.
- Ignoring step and pathway lighting creates safety hazards. Guests moving between the house and the yard after dark need clearly lit paths. Deck and step lighting is not optional in a well-designed entertaining space.
- Skipping vertical lighting leaves the space feeling flat. Walls, fences, and trellises that go unlit make the space feel smaller and less finished. Even one or two uplights on a garden wall change the entire character of the yard.
Pro Tip: Walk through your space at night before any guests arrive. Sit in every chair and look for glare, dark corners, and unlit pathways. Fix those issues before the party, not during it.
Key takeaways
Effective outdoor entertaining lighting requires three distinct layers working together: ambient overhead light, mid-level accent light, and ground-level task and safety light.
| Point | Details |
|---|---|
| Use the three-layer system | Combine ambient, mid-level, and task lighting for a complete, adaptable design. |
| Match color temperature | Keep all fixtures between 2200K and 2700K to maintain a warm, welcoming atmosphere. |
| Install string lights correctly | Weave strands through a grid rather than draping loosely to prevent uneven light coverage. |
| Automate with smart controls | Use outdoor-rated smart plugs and timers to adjust lighting phases without manual effort. |
| Light vertical surfaces | Uplighting fences, walls, and trellises adds depth and makes the space feel larger. |
What I have learned from years of watching outdoor spaces come alive
Homeowners consistently underestimate how much lighting shapes the experience of an outdoor space. They spend months choosing furniture, plants, and decor, then hang a single string of lights and call it done. The space never quite delivers what they imagined.
The spaces that genuinely impress guests are the ones where the lighting was planned with the same care as the layout. I have seen patios with modest furniture and simple landscaping feel extraordinary because the lighting was layered correctly. The overhead glow, the lanterns at floor level, the soft uplight on the fence behind the seating area. Each element does a specific job, and together they create something that feels intentional.
The detail that surprises most homeowners is how much vertical lighting changes a space. Lighting a garden wall or a trellis costs almost nothing extra once the other layers are in place. But it adds a sense of enclosure and depth that makes the yard feel like a room rather than an open field.
Smart automation is the other underused tool. Homeowners who connect their outdoor lights to a scheduling system stop thinking about lighting entirely. The patio is ready before guests arrive. The lights dim naturally as the evening winds down. That kind of effortless consistency is what separates a well-designed space from one that requires constant attention.
My honest recommendation: start with the landscape lighting basics and build from there. Get the three layers right before adding complexity. The results will speak for themselves.
— Dave
How Foreverglowlighting can complete your outdoor entertaining space
Designing layered outdoor lighting is straightforward in theory. Executing it correctly, with the right fixtures, the right placement, and durable installation, is where professional expertise pays off.
Foreverglowlighting designs and installs custom landscape lighting systems for patios, decks, and gardens across Charlotte. We handle everything from bistro string lighting to permanent architectural accents, all controlled from your smartphone. Our installations are built to last through every season, so you get consistent results every time you entertain. If you are ready to stop guessing and start hosting with confidence, contact Foreverglowlighting for a free estimate today.
FAQ
What is the best color temperature for outdoor entertaining lights?
The best color temperature for outdoor entertaining is 2200K–2400K. This range produces warm, golden light that feels welcoming and avoids the cold, utilitarian look of bulbs above 3000K.
How many string lights do I need for a pergola?
For a 12-by-14-foot pergola, plan two to three 48-foot strands. That provides 96–144 feet of coverage, which is enough for a continuous overhead grid without dark gaps.
What is the most affordable way to add ground-level lighting?
Metal solar path lights offer the best value, with a set of four available for around $28. Pair them with flameless pillar candles inside lanterns for mid-level accent light at minimal cost.
Do I need a professional to install outdoor entertaining lights?
String lights and solar path lights are straightforward DIY projects. Hardwired step lights, permanent architectural fixtures, and smart-controlled systems benefit from professional installation to meet safety standards and deliver consistent results.
How do I prevent my outdoor lights from looking too bright?
Keep fixtures within the 2200K–2400K color temperature range and use dimmers or smart plugs to control brightness. The goal is just enough light for comfortable movement and conversation, not full visibility across the entire yard.