
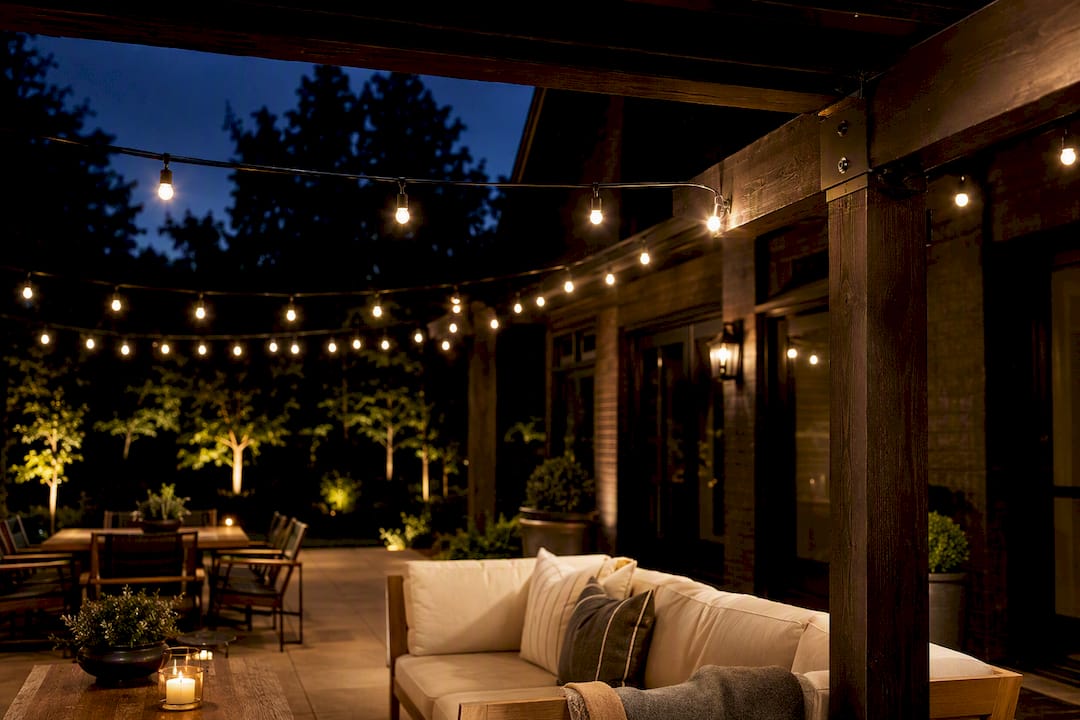
For most patios, a canopy pattern suits intimate dining nooks, a zigzag covers large rectangular spaces evenly, and a perimeter run defines the space without overhead clutter. Whichever pattern you choose, the installation priority stays the same: map your anchor points first, measure each run and add 10 to 15% for sag, install guide wire for any span over 15 feet, and keep the lowest bulbs at least 8 feet off the ground.
TL;DR:
- For large rectangular patios, zigzag patterns distribute light evenly, while canopies suit intimate dining areas with a central support point.
- Anchor points should be spaced 3 to 4 feet apart, and spans over 15 feet require guide wires tensioned with turnbuckles to prevent sagging.
- String light strands typically measure between 12 and 24 inches in socket spacing, with denser spacing producing brighter illumination.
- Always include 10 to 15 percent extra length for sag when measuring, and install lights at least 8 to 10 feet above ground to ensure safety and effective lighting.
- Using stainless steel or UV-resistant hardware and checking for loose anchors regularly prolongs the lifespan of outdoor string lights.
Table of Contents
- Which Patio String Light Layout Fits Your Space?
- How Do You Measure and Calculate String Light Lengths?
- How Far Apart Should Anchors and Supports Be?
- What Bulb Type and Spacing Work Best?
- What Mounting Hardware Should You Use?
- How Do You Install Patio String Lights Step by Step?
- How Do You Maintain and Weatherproof String Lights?
- Professional Perspective: When a Permanent Install Makes Sense
- A Permanent Alternative to Restringing Lights Every Season
- Sources
- FAQ
Which Patio String Light Layout Fits Your Space?
Picking the right pattern comes down to your patio’s shape and how you use it, not personal taste alone.
- Canopy: Lights radiate outward from a central high point, like the underside of an umbrella. It creates an intimate dining atmosphere and works best when you have one strong central anchor, such as a pergola beam or a central pole.
- Zigzag: Strands cross back and forth between two parallel sides. This is the workhorse pattern for large rectangular patios because it spreads light evenly without needing a center support.
- Perimeter: Lights trace the outer edge of the patio, following railings, fence lines, or roof eaves. It defines the boundary of an outdoor room and pairs well with a second, overhead pattern for layered depth.
- V or tent: Two runs meet at a peak, mimicking a tent roofline. It suits narrow patios or spaces between two structures, like a house wall and a detached garage.
- Curtain: Vertical strands hang straight down from a horizontal line, often used along a pergola edge or porch overhang for a soft, glowing wall effect.
- Wrapped tree: Strands spiral up tree trunks and through branches, useful when mature trees border the patio and you want light without new hardware.
Mixing a perimeter run with one overhead canopy or zigzag adds dimension without overcomplicating the install.
How Do You Measure and Calculate String Light Lengths?
Get your numbers right before you buy, or you will end up back at the store mid-project.
- Walk the patio and mark every anchor point you plan to use, from eaves to posts to tree trunks.
- Measure the straight-line distance between each anchor pair, then add 10 to 15% to every measurement to account for natural sag.
- Sketch the layout on paper and convert the total distance into linear feet, then divide by strand length to know how many strands to order.
- Check where your nearest outdoor outlet sits and confirm it can handle the combined wattage of your planned strands.
- Decide on socket spacing. Denser spacing between 12 and 24 inches creates brighter dining light, while wider spacing suits ambient perimeter glow.
Skipping the sag allowance is the single most common reason DIY installs come up short on strand length.
How Far Apart Should Anchors and Supports Be?
Every layout lives or dies on its anchor points. Eaves, pergola beams, mature trees, fence posts, and dedicated support poles all work, provided the anchor itself can bear the load without flexing.
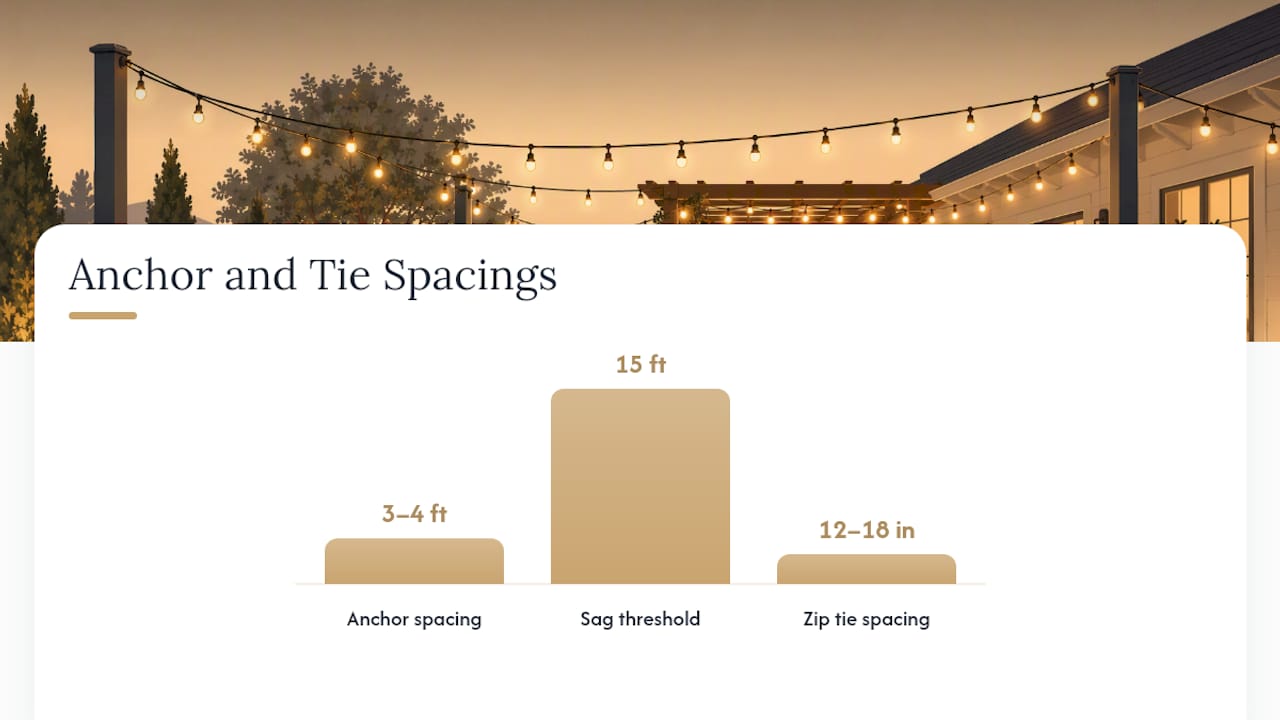
Space anchors 3 to 4 feet apart for a taut, professional-looking line. Once a run stretches past 15 feet, a single cord run starts to sag under its own weight and wind load, so a steel guide wire becomes standard practice rather than an upgrade. Run the guide wire between anchors, tension it with a turnbuckle, then attach the light strand to the wire with outdoor-rated zip ties every 12 to 18 inches, leaving a slight drape between ties for a natural look.
If you lack a strong anchor on one side, a weighted planter with a support pole set in concrete mix gives you a movable, sturdy option.
- Eaves and fascia boards: strong for permanent screw-in hooks.
- Mature trees: use wide straps, never screws, to avoid bark damage.
- Fence tops and posts: reliable if the post is set in concrete, shaky if not.
- Freestanding poles: best paired with a weighted base or buried footing.
Pro Tip: Tension the guide wire by hand before locking the turnbuckle. Overtightening stresses both the wire and the cord jacket, which shortens the life of your lights far faster than sun exposure does.
What Bulb Type and Spacing Work Best?
Bulb choice shapes the mood of your patio as much as the layout does. S14 bulbs give a bold, retro glow suited to zigzag and perimeter runs. G40 and G50 globes are rounder and softer, common in canopy layouts over dining tables. C7 bulbs run smaller and warmer, good for curtain effects. LED filament bulbs mimic incandescent warmth while using a fraction of the power.
- S14: bold, classic bistro look, best for open zigzag or perimeter runs.
- G40/G50 globe: soft, rounded glow, a natural fit for canopy layouts.
- C7: compact and warm, ideal for curtain-style vertical drops.
- LED filament: vintage look with modern efficiency, works in any pattern.
Socket spacing between 12 and 24 inches is standard; tighter spacing reads brighter and busier, wider spacing reads calmer. On the electrical side, outdoor-rated fixtures and GFCI-protected outlets are non-negotiable for any run near a patio or pool. Keep total connected load under about 80% of the circuit’s rating, and lean toward LED strands. ENERGY STAR notes that switching to efficient outdoor lighting cuts both energy use and bulb replacement frequency, since LED strands run cooler and last far longer than incandescent ones.
What Mounting Hardware Should You Use?
The right hardware depends on what you are anchoring into, and getting this wrong is how trim gets cracked or vinyl gets punctured.
- Wood eaves and pergolas: stainless screw hooks or eye screws driven into solid framing.
- Masonry or brick: masonry anchors rated for outdoor exposure, not plastic wall plugs.
- Vinyl siding or trim: adhesive hooks or specialty vinyl-safe clips rather than screws, which can crack the material.
- Metal rails or fences: rail clamps that grip without drilling.
- Renter-friendly or HOA-sensitive spots: removable adhesive hooks or zip ties on existing structures, checked against your HOA’s exterior guidelines first.
Stick with stainless steel or UV-resistant hardware outdoors. Standard zinc-plated hooks corrode within a season or two of rain and humidity.
How Do You Install Patio String Lights Step by Step?
Before touching a ladder, gather your materials: outdoor-rated strands, stainless hooks or eye screws, guide wire and turnbuckles if any span exceeds 15 feet, UV-resistant zip ties, a stable ladder, and a helper. Confirm your outlet is GFCI-protected.
- Measure every anchor-to-anchor distance and mark mounting points with chalk or tape.
- Install anchors first, spaced 3 to 4 feet apart along each run.
- For spans over 15 feet, run and tension the guide wire before attaching any lights.
- Attach the light strand to the wire or directly to anchors, keeping the lowest point at 8 to 10 feet off the ground.
- Tension the run, plug it in, and test every socket before you pack up the ladder.
- Walk the full patio to check clearance and confirm no strand droops below head height.
Two people on ladder duty matters more than most DIYers expect. One holds the strand while the other secures it, which keeps hands away from live sockets and prevents overstretching the cord.
How Do You Maintain and Weatherproof String Lights?
A seasonal walkthrough catches problems before a storm does it for you. Check for sagging lines, frayed or cracked cord jackets, and anchors that have worked loose from wind or ladder bumps.
- Inspect strands each season for cracked sockets or exposed wiring.
- In freeze-prone or high-wind regions, take strands down for winter rather than leaving them tensioned against ice load.
- Replace individual strands once UV damage makes the jacket brittle. Patching is rarely worth the effort.
- Keep the lowest bulbs at 8 feet or higher, use GFCI protection throughout, and swap out any damaged strand immediately rather than waiting for it to fail during a gathering.
Pro Tip: A quick tug test on each anchor point every spring tells you more than a visual check. If a hook flexes under light pressure, it will not survive the first summer storm.
Professional Perspective: When a Permanent Install Makes Sense
DIY string lights work well for a season or two, but cords degrade, anchors loosen, and takedown becomes a chore. A permanent, professionally installed system holds tension year round, integrates smart control, and meets most HOA aesthetic standards without a single visible extension cord. For complex spans, multi-zone dimming, or a layout tied into broader landscape lighting, hiring a pro usually saves more hassle than it costs.
— Dave
A Permanent Alternative to Restringing Lights Every Season
If you are tired of climbing a ladder every spring to restring the same patio, Certain companies install permanent smart LED systems built for exactly this problem. Instead of managing guide wires, zip ties, and seasonal takedown yourself, you get a weather-resistant bistro and patio lighting installation controlled entirely from your phone, with millions of color options and no annual restringing.

Our installs are engineered for HOA-compliant looks and stay tensioned through wind and storms without the maintenance a DIY canopy or zigzag run demands. Whether you want a dedicated dining canopy over your patio table or a full entertaining space lighting plan, Forever Glow Lighting designs it once and keeps it running with optional GlowCare maintenance. Contact lighting professionals for an estimate and to see what a permanent layout looks like on your own patio.
Sources
Spacing figures come from Eufy, mounting height from VOLT Lighting, and guide-wire technique from Bobby K Designs.
FAQ
How do I arrange outdoor string lights on a patio?
Start by choosing a pattern that fits your patio shape, canopy for a central dining spot, zigzag for large rectangles, or perimeter for defining the space, then map anchors before buying strands.
What are some good string light patterns for a patio?
Canopy, zigzag, perimeter, V or tent, and curtain patterns cover most patio shapes, with canopy suited to dining areas and zigzag suited to open rectangular spaces.
What is the recommended spacing for outdoor string lights?
Sockets typically sit between 12 and 24 inches apart, while support anchors along the run should sit 3 to 4 feet apart for a taut line.
What is the best pattern for hanging string lights?
There is no single best pattern; zigzag works best for large open patios, canopy for intimate seating, and perimeter for framing a space, often combined for layered effect.
How high should patio string lights hang?
Keep the lowest point of any strand between 8 and 10 feet off the ground to avoid head bumps while still casting good ambient light.