
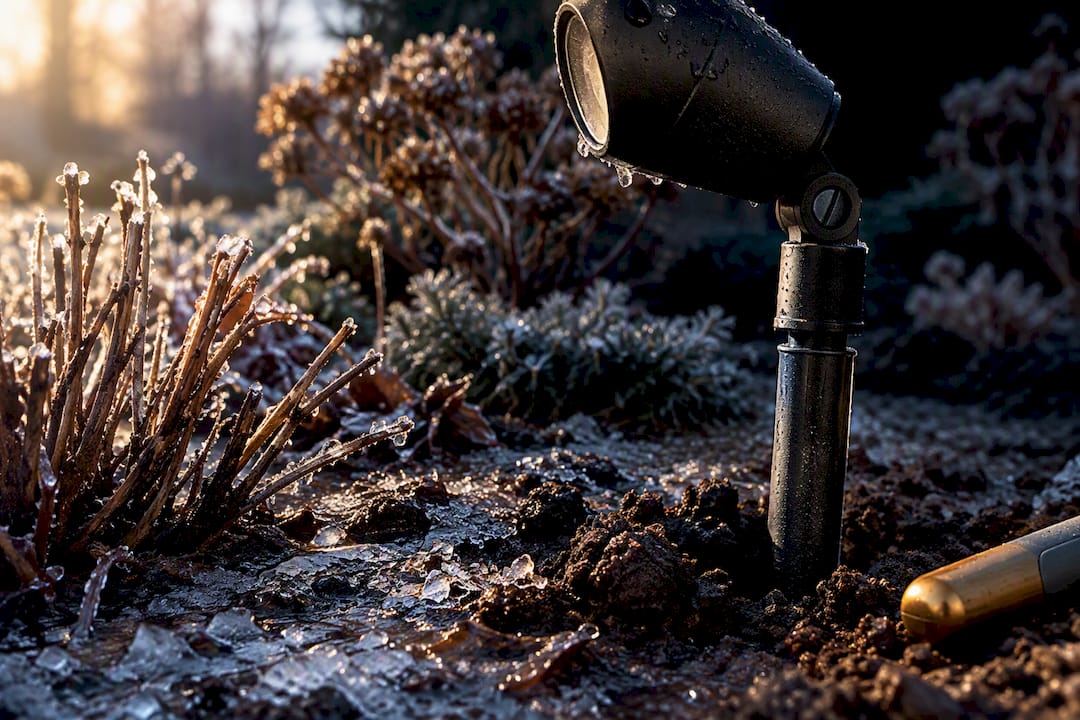
Right now, before the first hard freeze hits Mecklenburg County, inspect every fixture’s seals and connectors, clear any debris or ice buildup, and reset your timer or photocell for shorter days according to expert advice on how to winterize your doors to complement your lighting winterization efforts. Call a licensed electrician for anything involving the transformer or exposed live wiring. Charlotte loses roughly two to four hours of daylight heading into winter, which means your system runs each night for longer periods and every weak seal or loose connector gets tested more intensively.
TL;DR:
- Moisture intrusion and seal failure are common causes of winter lighting issues, so gasket replacement and proper sealing are critical precautions.
- Use fixtures rated IP65 or higher, with corrosion-resistant housings and waterproof connectors, to withstand Charlotte’s freeze-thaw cycling and moisture exposure.
- Shorter winter days extend nightly runtimes, requiring adjustments to timers and photocells to prevent excessive wear and moisture buildup.
- Regular weekly inspections during winter should include checking for fogged lenses, loose connectors, and signs of animal damage around wiring and fixtures.
- Professional maintenance and winter-proofing services help prevent costly repairs caused by moisture, frost, and ice stressing outdoor lighting components.
Table of Contents
- System Inspection Checklist: How to Walk Your Lighting System Before the First Freeze
- Step-by-Step Winterizing Actions Homeowners Can Safely Do Themselves
- Materials and Electrical Best Practices for Winter Durability
- Timers, Photocells, and Scheduling for Shorter Winter Days
- When to Call a Licensed Electrician or Lighting Pro
- Seasonal Maintenance Calendar for Charlotte Outdoor Lighting
- Charlotte Expertise: How Local Pros Prepare Systems for Winter
- Protecting Outdoor Wiring From Rodents and Wildlife in Winter
- What Makes Charlotte Winters Hard on Outdoor Lighting
- A Straight Answer on Winter Lighting Maintenance
- Get Your System Winter-Ready With Forever Glow Lighting
- Sources
- FAQ
System Inspection Checklist: How to Walk Your Lighting System Before the First Freeze
Do this walk-through at dusk, while the lights are actually on. Daylight inspections miss the fixtures that are dim, flickering, or aimed wrong, because you can’t see the problem until the sun goes down. Walk the full perimeter, roofline, and landscape beds with a notepad or your phone, and mark anything that looks off.
Here’s what to check at each stop:
- Brightness and aim. Note any fixture that’s noticeably dimmer than its neighbors or has drifted out of position from lawn work, wind, or settling soil.
- Housings and lenses. Look for hairline cracks, cloudy fogging inside the lens, or beads of moisture, all signs that water has already found a way in.
- Gaskets and threaded seals. Run a finger around the lens ring. If the gasket feels stiff, cracked, or has pulled away from the housing, it’s no longer keeping water out.
- Splices and shallow wire runs. Frost heave, the slow upward push of soil as it freezes and thaws, can shove buried low-voltage wire to the surface or pull a splice apart underground.
- Transformer housing and vents. Check that fuses look intact, ventilation slots are clear, and nothing (mulch, fallen leaves, a snowdrift) is blocking airflow around the unit.
Charlotte’s own winter guidance echoes this exact routine: clear leaves and debris from fixtures, and rebury any wire runs that have surfaced before the ground freezes solid. Once you’ve got your list of trouble spots, you’ll know which are quick fixes and which need a professional look.
Step-by-Step Winterizing Actions Homeowners Can Safely Do Themselves
Most of what your system needs before winter falls squarely into “homeowner-safe” territory. Here’s the order that makes sense, from least to most involved:
- Clean lenses and housings. Use a soft cloth or sponge with plain water or a mild dish soap solution. Skip anything abrasive and never scrape a lens with a metal tool. Scratches create new spots for moisture to collect.
- Check and reseat gaskets. If an O-ring or threaded lens has come loose but still looks intact, clean the seat, reseat it firmly, and hand-tighten. If the rubber is cracked or brittle, it needs replacing, not reseating.
- Inspect exposed splices. Any connector sitting above ground or loosely buried is a candidate for an upgrade. Gel-filled connectors or threaded, silicone-sealed connectors seal out moisture far better than old-style twist caps, and they hold up better against corrosion in Charlotte’s wet clay soil.
- Set up winter protections. Redirect irrigation heads away from transformers, and if heavy snow is forecast, tilt vulnerable fixtures slightly upward so a snowbank doesn’t bury the lens completely.
Pro Tip: If you find condensation fogging the inside of a lens, don’t just wipe it and move on. That moisture got in through a failed seal, and it will keep coming back until the gasket or housing is replaced.
Know where your responsibility ends. Never open a transformer case, splice into line-voltage wiring, or attempt to dry out a fixture that’s visibly wet inside. Any of those signal a job for a licensed electrician, not a Saturday project.
Materials and Electrical Best Practices for Winter Durability
The parts list matters as much as the maintenance schedule. Fixtures rated IP65 or higher resist both dust and directed water spray, which is the baseline you want for anything exposed to Charlotte’s mix of ice, sleet, and driving rain. A lower rating leaves your fixtures vulnerable exactly when freeze-thaw cycles are working water into every crack.
A few material choices that hold up better through winter:
- Brass or corrosion-resistant metal housings outlast lower-grade aluminum or plastic once freeze-thaw cycling starts working on seams and screw points.
- Tinned copper conductors resist corrosion at connection points far longer than bare copper, especially in damp soil.
- 18 AWG or heavier gauge wire for low-voltage runs, with UV-resistant insulation that won’t crack in sun and cold.
- Gel-filled or threaded waterproof connectors at every splice, cutting down the corrosion and intermittent failures that plague cheaper twist-on caps.
- LED fixtures paired with a quality transformer run cooler and handle the longer winter runtimes with far less wear than old halogen setups.
None of this is exotic. It’s the same hardware difference between a system that needs a repair call every January and one that quietly gets through the season.
Timers, Photocells, and Scheduling for Shorter Winter Days
Shorter days mean your system is switching on earlier and running longer, which puts more hours of use on every connector and bulb during the exact months when moisture risk is highest. With daylight dropping by two to four hours compared to summer, a schedule set in June will leave your lights coming on too late by December.
A few adjustments worth making now:
- Test your photocell right after the first snowfall. Snow sitting on the sensor can trick it into thinking it’s still daylight, so a manual override or a backup timer schedule avoids a no-light night.
- If you run app-based smart controls, set a temporary override for storm days rather than relying on the automatic sensor alone.
- With longer nightly runtimes, ask your installer to spot-check for voltage drop, since cold weather increases resistance and dimming at the far end of a run is a common winter complaint.
When to Call a Licensed Electrician or Lighting Pro
Some issues cross the line from maintenance to hazard. Stop and call a professional if you see any of these:
- Moisture or condensation inside a fixture housing that won’t clear after cleaning
- Insulation that looks scorched, melted, or discolored near a connection
- A transformer fuse that keeps tripping after you’ve reset it once
- Any exposed conductor with cracked or missing insulation
A qualified electrician brings equipment you don’t have at home, including load testing to check whether your transformer is properly sized for your current runtime, and a meter to confirm grounding is intact. Professionals also swap out old-style connectors for gel-filled or threaded waterproof versions as standard practice, which is worth requesting even if that wasn’t the reason for the call.
If your neighborhood has HOA lighting restrictions or your system is still under warranty, a professional visit often protects both. Many manufacturer warranties require documented professional service to stay valid, and some HOAs have specific rules about fixture placement or brightness that a local installer will already know. For a sense of what that kind of service visit looks like in the Charlotte area, a recent Charlotte landscape lighting installation shows the level of detail involved.
Seasonal Maintenance Calendar for Charlotte Outdoor Lighting
Winterizing outdoor lighting in Charlotte works best as a repeating cycle, not a one-time scramble in November. Here’s a sequence that keeps you ahead of the weather:
- Fall (September through November): Do a full inspection, reseal or replace any failing gaskets, clean every lens, and update your timer or photocell settings before the first freeze.
- Winter (December through February): Check the system weekly. Clear snow gently by hand, never with a shovel or hard tool near a fixture. Recheck the photocell after any snowfall, and hold off on non-emergency repairs until conditions improve.
- Spring (March through April): Walk the whole system again, readjust any fixtures that shifted over winter, swap out damaged parts, and consider a professional tune-up before peak outdoor season.
Most Charlotte homeowners get the best results pairing this calendar with an annual seasonal adjustment routine and, ideally, one professional inspection a year at minimum.
Charlotte Expertise: How Local Pros Prepare Systems for Winter
Some professional lighting installers build winter readiness into their permanent roofline systems from the start, sealing track connections and using waterproof connectors designed for specific climates. Our GlowCare maintenance subscriptions cover the seasonal checks most homeowners don’t have time for, and that kind of scheduled professional attention is often what preserves a manufacturer warranty and keeps a system inside HOA compliance year after year.
Protecting Outdoor Wiring From Rodents and Wildlife in Winter
Cold weather sends squirrels, mice, and voles looking for warmth and shelter, and a transformer box or a run of buried low-voltage wire looks exactly like what they want. Rodents gnaw through wire insulation, which exposes conductors and creates both a lighting failure and a small electrical hazard right in your yard.
A few habits cut down the risk significantly. Keep mulch and leaf piles pulled back a few inches from transformer housings and junction boxes, since dense cover is what draws rodents in to nest. Seal any gap where a wire passes through a wall, deck, or foundation with expanding foam or a rated bushing, since a quarter-inch gap is plenty of room for a mouse. If you’ve had chewing damage before, wire loom or flexible conduit sleeves around exposed low-voltage runs add a physical barrier that’s cheap compared to a repair call.
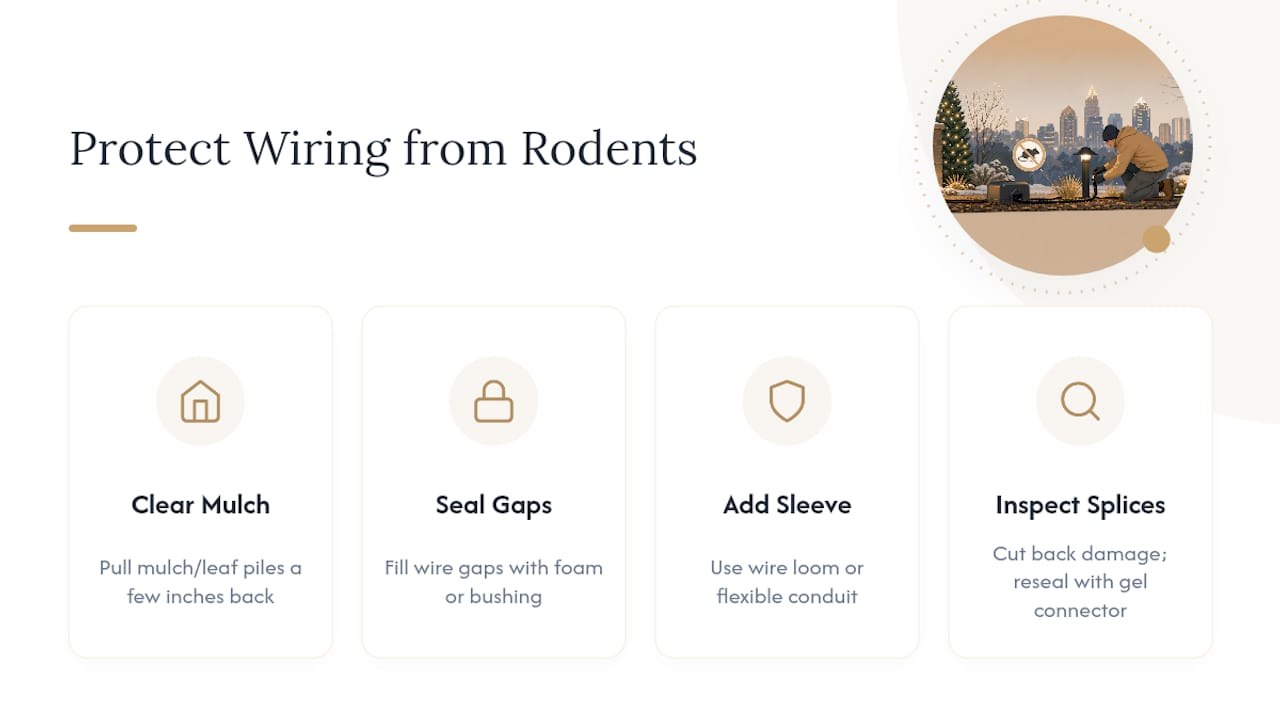
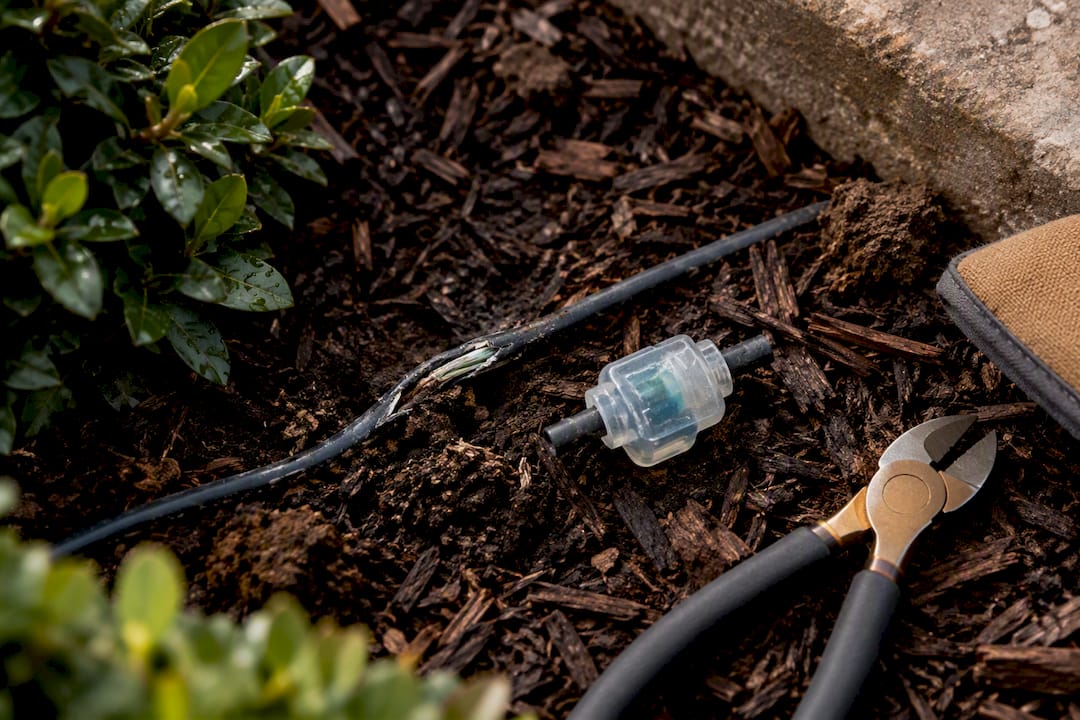
Check buried splices during your fall inspection for any sign of disturbed soil or exposed wire, both classic signs something has been digging nearby. If you find a chewed section, don’t just tape it. Cut back to clean wire and use a proper gel-filled connector to reseal it, since electrical tape alone won’t stop moisture once the insulation’s been breached. Outdoor cats and motion-activated deterrents help on the wildlife side, but sealing entry points is the fix that actually lasts through the season.
What Makes Charlotte Winters Hard on Outdoor Lighting
Charlotte’s winters aren’t brutal by national standards, but the specific mix of conditions is tough on lighting systems in ways that colder, drier climates don’t experience. The region swings between freezing nights and 50 degree afternoons, sometimes within the same week, and that constant freeze-thaw cycling is what cracks lenses and pops seals loose over a season, since water that seeps in during a warm spell expands roughly 9% when it refreezes.
Ice storms are the other local wildcard. Charlotte gets occasional glaze ice events that coat every exposed surface, including fixtures and wire runs, and that added weight can stress mounting brackets and connections that summer weather never tests. Heavy, wet snow, when it does fall, tends to be denser than the powder further north, which means more weight sitting directly on fixtures and more meltwater working into any weak seal.
The clay soil common across Mecklenburg County also holds moisture longer than sandier soil types, which keeps buried splices sitting in damp ground for weeks after a storm passes. That’s a big part of why gel-filled connectors matter more here than they might in a drier climate. Between the freeze-thaw swings, occasional ice, and slow-draining soil, Charlotte’s winter is less about extreme cold and more about extended exposure to moisture, which happens to be the exact thing outdoor lighting fails from most.
A Straight Answer on Winter Lighting Maintenance
Most winter lighting failures aren’t dramatic. They’re a gasket nobody replaced, a connector that was never upgraded, or a photocell nobody rechecked after the first snow. The fixes are almost always small and cheap if you catch them in the fall. The expensive failures happen when a homeowner skips the inspection entirely and finds out about a cracked housing in February, after three months of water has already worked its way into the wiring. Handle the moisture management and the seals yourself where it’s safe, and don’t hesitate to bring in an electrician the moment anything internal looks wrong. That one boundary is where a lot of otherwise careful homeowners get into trouble.
— Dave
Get Your System Winter-Ready With Forever Glow Lighting
Forever Glow Lighting is the local alternative to a seasonal scramble for winter-proofing your outdoor lighting in Charlotte: instead of you inspecting seals, hunting down gel-filled connectors, and guessing at transformer load, our crews handle it as part of a designed system built for the Carolinas’ freeze-thaw swings from day one.

Permanent roofline lighting systems typically use waterproof connections and climate-suited hardware, and maintenance subscriptions can cover the seasonal checks discussed here to ensure timely upkeep. Beyond holiday and roofline lighting, we handle landscape lighting design and patio, deck, and step lighting for anyone weighing a broader winter-proofing upgrade. If you’d rather not be the one checking gaskets in 40 degree weather, request a free estimate through our permanent lighting page and get a winter readiness check on the calendar before the next freeze.
Sources
- Winter solstice: how much shorter the days are compared to summer – AccuWeather
- Winter-Proof Your Yard: Essential Outdoor Lighting Tips for Cold Weather – COLOER Lighting
- Landscape Lighting Maintenance Checklist: 4 Seasonal Steps – Tru-Scapes
- Winter Maintenance Tips – Outdoor Lighting | Landscape Lighting Charlotte
FAQ
What Outdoor Christmas Lights Can Stay Up Year-Round?
Permanent LED roofline systems, like the kind Forever Glow Lighting installs, are built with weather-sealed housings and connectors specifically so they can stay mounted through every season without removal. Traditional clip-on string lights aren’t designed for that and should come down after the holiday season to avoid winter wear.
How Long Do Outdoor Lights Typically Last?
Quality LED fixtures with sealed, IP65+ rated housings commonly run for many years with minimal issues when maintained seasonally, while cheaper fixtures or unsealed connectors tend to fail within a season or two once moisture works its way in. Regular gasket checks and gel-filled connectors extend that lifespan significantly.
How Much Does It Cost to Add Outdoor Lighting?
Pricing depends on the size of the property, the type of system, and how much of the home or landscape is covered, so an exact figure isn’t something a general guide can responsibly state. Many lighting companies provide free, no-obligation estimates for permanent lighting and landscape lighting projects upon request.
How Do I Know If My Outdoor Lighting Needs a Professional Repair?
Any sign of moisture inside a fixture, scorched or melted insulation, or a transformer fuse that keeps tripping means it’s time to call a licensed electrician rather than continue with DIY fixes. Those symptoms point to internal wiring or transformer issues that go beyond safe homeowner-level repair.
Can I Winterize My Outdoor Lighting Myself?
Cleaning lenses, checking and reseating gaskets, and upgrading exposed splices to gel-filled connectors are all tasks a homeowner can safely handle. Anything involving the transformer’s internals or exposed line-voltage wiring should go to a qualified electrician instead.