

Adjust your landscape lighting seasonally, ideally in spring and fall, and run a quick control check periodically throughout the year. Those four touchpoints keep your system safe, efficient, and visually sharp through every season. The two highest-impact actions you can take today: reset your timer or controller for the current sunset time, and walk your property after dark to spot any fixtures that have been blocked by new growth or shifted by soil movement.
- Reset controls now. If your system runs on a mechanical timer, check whether it still matches today’s sunset. Mechanical timers require repeated manual adjustments for DST and seasonal daylight shifts; an astronomical or smart controller handles those changes automatically.
- Walk the property after dark. Look for blocked beams, fixtures aimed at bare branches, or lights creating glare toward windows. Seasonal re-aiming keeps the design intentional as plants grow and sightlines change.
- Check your GFCI outlets. Press the test and reset buttons on every outdoor GFCI before the wet season arrives. A tripped GFCI that resets immediately is fine; one that trips again within minutes signals a wiring problem worth investigating.
Pro Tip: Foreverglowlighting recommends keeping a simple log — date, what you adjusted, and what you noticed — so patterns (a fixture that keeps shifting, a photocell that keeps fouling) become obvious over time.
Table of Contents
- 1. How often should you adjust your landscape lighting?
- 2. Timers, photocells, and smart controls: which one fits your system?
- 3. How to re-aim fixtures when foliage changes
- 4. Your seasonal maintenance checklist
- 5. Preparing your lights for winter, snow, ice, and storms
- 6. Planning holiday and temporary displays without overloading your system
- 7. Common mistakes and simple rules of thumb
- 8. When should you call a professional?
- Key Takeaways
- Why seasonal adjustments matter more than most homeowners realize
- Foreverglowlighting keeps your system sharp through every season
- Useful sources and further reading
1. How often should you adjust your landscape lighting?
A practical cadence for most homeowners is two full seasonal tune-ups per year, plus brief control checks every few months. Spring and fall are the natural inflection points: spring brings rapid foliage growth that can block or redirect beams, while fall’s leaf drop exposes bare branches and changes every sightline on the property.
Quarterly control checks take about ten minutes. Confirm the on/off schedule still matches current sunset times, test the GFCI, and glance at the transformer for any signs of moisture. Beyond that fixed schedule, add an ad hoc check after any major storm, after significant landscaping work, or any time you notice a fixture that looks off during a casual evening walk.
Daylight Saving Time is the most common trigger for schedule drift. When clocks spring forward or fall back, a mechanical timer that was perfectly set will suddenly be running lights an hour early or an hour late. Homeowners in rapid-growth climates — the Southeast, Pacific Northwest, or anywhere with aggressive summer growth — often find that a mid-summer re-aim is worth adding to the calendar as well.
A simple rule of thumb: if you can see a fixture’s beam hitting something you didn’t intend to illuminate, it’s time to re-aim, regardless of where you are in the calendar.
2. Timers, photocells, and smart controls: which one fits your system?
Each control type handles seasonal change differently, and the maintenance each requires varies just as much.
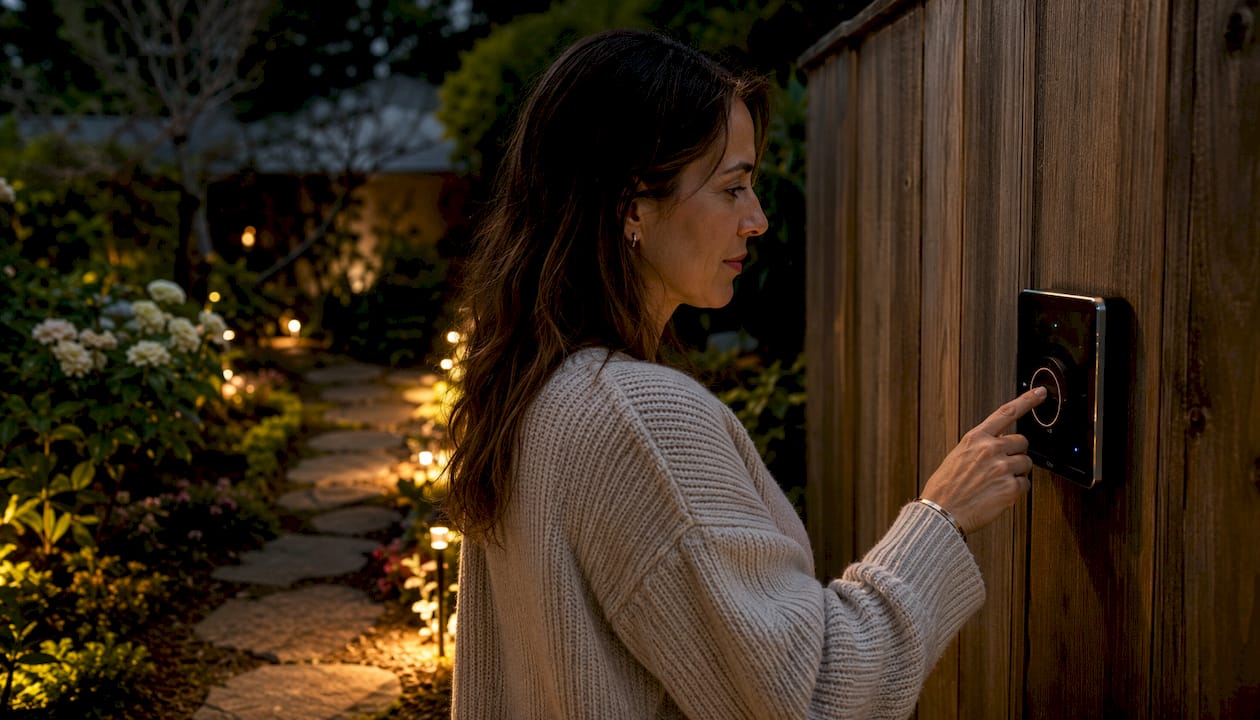
Mechanical timers are the most common and the most labor-intensive. Clock drift — where the timer’s internal clock loses or gains minutes over weeks — can accumulate enough offset over several months to create a visible mismatch with actual sunset times. They need manual recalibration after every DST change and at least once mid-season.
Photocells (dusk-to-dawn sensors) turn lights on at dusk and off at dawn automatically, which sounds ideal. The problem is fouling. Dirt, spider webs, or seasonal vegetation growth can shade the sensor and cause false triggers, keeping lights on during daylight hours and accelerating LED lumen depreciation. Regular photocell cleaning in spring and autumn prevents most related issues.
Astronomical timers use your geographic location to calculate precise sunrise and sunset times every day of the year. No manual DST adjustment, no drift. They’re a significant step up from mechanical timers for homeowners who want consistent schedules without quarterly recalibration.
Smart controllers add cloud backup, scene programming, and remote access via smartphone. Many retain their schedules through power outages and allow you to create separate seasonal scenes — a warmer, lower-intensity winter setting versus a brighter summer profile. Smart controllers with astronomical scheduling remove most of the manual seasonal work entirely.
A layered approach — photocell plus astronomical timer plus motion override — reduces nuisance running while preserving both security coverage and convenience.
| Control Type | Automation Level | Seasonal Maintenance | Key Advantage | Main Drawback |
|---|---|---|---|---|
| Mechanical timer | Low | Requires multiple recalibrations annually | Low cost | Clock drift, manual DST |
| Photocell | Medium | Requires cleaning twice yearly | Fully automatic on/off | Fouling causes false triggers |
| Astronomical timer | High | Requires annual location setting check | No DST adjustments | Higher upfront cost |
| Smart controller | Very high | Software updates, annual check | Remote access, scene control | Requires Wi-Fi, higher cost |
Pro Tip: In autumn, adjust your photocell’s sensitivity slightly toward the “darker” end of its range. Lower sun angles and longer twilight periods can fool a standard setting into triggering lights too early, running them unnecessarily for an extra hour each evening.
3. How to re-aim fixtures when foliage changes
Changing foliage alters nighttime sightlines in ways that aren’t obvious until you walk the yard after dark. A fixture that perfectly highlighted a Japanese maple in full leaf may be aimed directly at bare branches in December, creating harsh shadows instead of a warm focal point.
Follow these steps for a safe, effective re-aim:
- Turn off power at the transformer or breaker. Never adjust a fixture while it’s energized. Low-voltage systems are safer than line voltage, but the transformer itself carries 120V on the primary side.
- Walk the property in daylight first. Note which plants have grown significantly, which have been trimmed, and where soil or mulch has shifted. Fixtures that have sunk below grade need to be raised before re-aiming.
- Loosen the fixture’s knuckle or stake. Most low-voltage path and accent fixtures have an adjustable knuckle. Loosen it just enough to redirect the beam, then snug it back down firmly.
- Restore power and evaluate the beam at dusk. Check beam angle, throw distance, and whether the light is hitting the intended target without spilling onto neighboring windows or the street.
- Confirm framing from the curb. Step back to the street and look at the full picture. A fixture that looks correct up close can still create glare or an unbalanced composition from a distance.
- Raise or relocate when re-aiming isn’t enough. If a tree has grown significantly taller, a ground-level uplight may need to move closer to the trunk or be replaced with a fixture mounted higher on a stake. Mulch buildup over time is a common reason fixtures gradually sink and lose their intended angle.
Layering path, accent, and wash lighting helps maintain visual balance even when individual fixtures need adjustment — if one layer shifts, the others hold the composition together.
Pro Tip: To avoid window glare, aim uplights so the beam’s centerline is at least 15 degrees away from any window plane. A simple cardboard shield held at the fixture during the test helps you see exactly where the spill falls.

4. Your seasonal maintenance checklist
A consistent maintenance routine prevents most system failures. Here’s what to cover at each seasonal visit:
Spring (March–April)
- Inspect all fixtures for winter damage: cracked lenses, broken stakes, corroded connections
- Clear leaves and debris from around fixtures; keep a clear perimeter of a few inches for heat dissipation
- Clean photocell lenses with a soft cloth
- Test every GFCI outlet and confirm the transformer’s breaker label is legible
- Reset timer schedules for longer daylight hours
- Re-aim any fixtures shifted by frost heave or winter soil movement
Summer (June–August)
- Check for heat-related wear on fixture seals and gaskets
- Trim plants that have grown into beam paths
- Inspect wiring for any damage from lawn equipment or garden tools
- Confirm transformer ventilation is unobstructed
Fall (September–October)
- Perform a full re-aim as leaves drop and sightlines open up
- Sync timers for earlier sunsets and the DST change in November
- Clean photocells and adjust sensitivity for lower sun angles
- Inspect all wire connections and junction boxes before wet weather arrives
- Check transformer door seals and tighten any loose connections
Winter season maintenance
- Verify transformer is elevated above typical snow or flood levels
- Keep fixtures clear of snow piles, which create heat traps and can crack lenses
- Inspect for moisture intrusion after the first hard freeze
- Test GFCI regularly during wet periods
LEDs hold a clear advantage over legacy halogen or incandescent bulbs for seasonal longevity. They handle temperature swings better, produce less heat at the fixture, and maintain consistent color output across seasons. For winter specifically, a warmer color temperature produces a softer appearance on bare branches and hardscape — avoiding the cold, clinical look that higher-kelvin LEDs can create in low-foliage months.
5. Preparing your lights for winter, snow, ice, and storms
Winter is when deferred maintenance becomes expensive. Moisture intrusion and gasket failure are among the leading causes of system trips, and cold weather makes both more likely by contracting seals and stressing older wire insulation.
Before the first hard freeze, work through this storm-readiness checklist:
- Secure all ground stakes. Fixtures on loose stakes can tip over in high winds, exposing wire connections to standing water.
- Check transformer elevation. If your transformer is mounted near grade level and your area sees significant snowfall or ice storms, confirm it sits above the expected accumulation line.
- Inspect transformer door seals. A warped or cracked gasket lets moisture into the transformer housing. Replace it before wet season, not after the first trip.
- Clear debris from fixture perimeters. Accumulated leaves trap moisture against fixture housings and accelerate corrosion.
- Avoid salt near low-profile fixtures. Road salt and ice-melt products are corrosive. Keep them away from fixture bases and exposed wire runs near driveways or walkways.
When cold weather reveals wiring problems — a fixture that flickers only in freezing temperatures, or a GFCI that trips after rain — the cause is usually a compromised wire connection or a cracked fixture seal that allows water to reach the socket. Test by isolating the affected circuit at the transformer and checking each connection point with a voltage meter. If you find visible wire damage or a connection that shows corrosion, that’s a job for a licensed electrician or a qualified outdoor lighting professional.
6. Planning holiday and temporary displays without overloading your system
Temporary holiday lighting and permanent landscape systems can coexist safely, but only if you treat them as separate circuits. Daisy-chaining a string of holiday lights to your landscape transformer is the single most common mistake homeowners make during the holiday season.
Key rules for safe holiday lighting integration:
- Use a dedicated circuit for temporary displays. Plug holiday string lights into a separate outdoor GFCI outlet, not into the landscape transformer’s accessory port. Most residential landscape transformers are sized for the permanent system only.
- Calculate your load before adding strings. Add up the wattage of all temporary fixtures you plan to connect. Most landscape transformers have limited capacity headroom for additional load.
- Keep scheduling separate. If your landscape system runs on an astronomical timer, adding holiday lights to the same circuit means they follow the same schedule. Use a separate smart plug or timer for temporary displays so you can run holiday lights on a different schedule without disrupting the permanent system.
- Use safe mounting practices for roofline displays. Clip-on hooks designed for gutters are preferable to staples or nails, which can damage wire insulation. For roofline or soffit-mounted permanent holiday fixtures, Foreverglowlighting’s permanent holiday lighting systems eliminate the need for temporary strings entirely.
- Remove temporary lights promptly after the season. Leaving string lights in place through winter exposes them to freeze-thaw cycles that crack insulation and create shock hazards by spring.
Permanent holiday lighting systems — like those Foreverglowlighting installs — are wired as part of the permanent system, controlled via smartphone, and rated for year-round outdoor exposure. The practical difference: no ladder, no annual installation, and no load calculation guesswork each December.
7. Common mistakes and simple rules of thumb
Most seasonal lighting problems trace back to a short list of recurring errors.
- Over-illumination. More fixtures and higher wattage don’t automatically produce a better result. Overlapping beams create flat, washed-out scenes. Aim for contrast and shadow, not uniform brightness.
- Aiming at bare branches in winter. A fixture set for a full-canopy tree in July will often highlight nothing but sticks in January. Re-aim toward the trunk or structural branches when leaves drop.
- Buried fixtures. Mulch and soil accumulate over time. A fixture that was at grade three years ago may now be an inch or two below it, pointing at the ground instead of the intended target.
- Dirty photocells. A fouled photocell can keep lights running through the morning, wasting energy and shortening LED life. Clean them every six months.
- Ignoring clock drift. Older mechanical timers can lose several minutes per month. Over a full season, that adds up to a schedule that’s noticeably out of sync with actual sunset times.
The 5’7" rule is a practical guideline for uplighting trees: position the fixture so its beam center strikes the trunk or primary branch structure at roughly 5 to 7 feet above grade. This height creates natural-looking shadow and depth without the harsh “spotlight from below” effect that lower angles produce. It applies most cleanly to trees with clear trunk structure; for shrubs or ornamental grasses, aim closer to the plant’s midpoint.
Pro Tip: In winter, shift color temperature toward 2700K for path and accent fixtures. Warmer light softens the appearance of bare hardscape and avoids the cold, institutional feel that 4000K+ LEDs can produce against snow or frost.
For energy efficiency, consider shortening run times in early winter when nights are long but outdoor activity is low. A smart controller lets you program a “late-night dimming” scene that reduces output after 11 PM without turning the system off entirely, preserving security coverage while cutting energy use.
8. When should you call a professional?
Some seasonal issues are straightforward homeowner tasks. Others signal problems that require a licensed professional.
Call a pro when you see:
- Repeated GFCI trips that return after resetting, especially after rain
- Visible wire damage: cracked insulation, exposed copper, or burn marks near connections
- Transformer failure (no output, burning smell, or a housing that’s hot to the touch)
- Persistent photocell malfunctions that cleaning doesn’t resolve
- Any situation requiring access to the transformer’s primary (120V) wiring
Questions to ask before hiring:
- Are you licensed and insured for low-voltage outdoor lighting work in this state?
- What does a seasonal service visit include, and do you re-aim fixtures as part of the visit?
- How do you test for moisture intrusion and GFCI integrity?
- What control upgrades do you recommend, and why?
- Do you offer a warranty on parts and labor?
A professional seasonal service visit typically covers a full re-aim, control calibration, lens cleaning, GFCI and transformer testing, and a written report of any issues found. Cost varies by system size and region; most residential visits fall in the range of a few hundred dollars, though larger or more complex systems run higher. Foreverglowlighting offers seasonal adjustment visits for Charlotte-area homeowners, along with system upgrade consultations for homeowners whose systems are due for LED or control improvements.
If your system needs roofline or soffit access during a seasonal service, coordinating with a qualified exterior contractor — such as a roofing and exteriors professional — before the lighting visit can save a second trip.
Key Takeaways
Consistent seasonal maintenance, twice-yearly re-aiming, and a control upgrade to an astronomical or smart timer will keep your landscape lighting safe, efficient, and visually sharp through every season.
| Point | Details |
|---|---|
| Adjust twice a year, check quarterly | Full tune-ups in spring and fall; brief control checks every three months. |
| Upgrade controls to reduce manual work | Astronomical and smart timers handle DST and daylight shifts automatically, eliminating most recalibration. |
| Re-aim when foliage changes | Leaf-on and leaf-off seasons create different sightlines; re-aiming preserves design intent year-round. |
| Seasonal maintenance prevents failures | Cleaning photocells, checking GFCI, and clearing debris around fixtures prevents most common system trips. |
| Foreverglowlighting for professional service | Foreverglowlighting provides seasonal adjustment visits, control upgrades, and landscape lighting services for Charlotte-area homeowners. |
Why seasonal adjustments matter more than most homeowners realize
Most homeowners think of landscape lighting as a set-it-and-forget-it system. Install it once, maybe swap a bulb occasionally, and it takes care of itself. That assumption is exactly why so many systems look mediocre within two or three years of installation.
The real issue isn’t equipment quality. It’s that a landscape is a living system, and lighting designed for one season is, by definition, wrong for the others. A beautifully aimed uplight in October becomes a fixture pointing at bare sticks in January. A photocell that worked perfectly in March starts triggering at noon in September because a shrub grew six inches into its line of sight. These aren’t failures — they’re the predictable result of a static system in a dynamic environment.
What I see consistently is that homeowners who do one thing differently get dramatically better results: they treat seasonal adjustment as a scheduled task, not a reaction to something going wrong. Two visits a year, a quarterly timer check, and a willingness to re-aim when the yard changes. That’s the whole system. The homeowners who skip it end up with lighting that looks like an afterthought, even when the original installation was excellent.
The other underrated factor is color temperature. Shifting to a warmer 2700K setting in winter isn’t just aesthetic preference — it’s the difference between a yard that looks intentional and one that looks like a parking lot. Bare branches and winter hardscape are unforgiving under cool white light. Warm light hides nothing, but it makes everything look deliberate.
Foreverglowlighting keeps your system sharp through every season
Foreverglowlighting is Charlotte’s alternative to seasonal lighting frustration — no ladder, no annual guesswork, no fixtures drifting out of alignment while you’re focused on everything else. The practical difference between a well-maintained system and a neglected one shows up every night at the curb, and Foreverglowlighting’s seasonal service visits are built around exactly the tasks this article covers: full re-aiming, control calibration, photocell cleaning, GFCI and transformer testing, and a written summary of anything that needs attention.

For homeowners ready to stop managing seasonal adjustments manually, Foreverglowlighting also installs smart LED systems with astronomical scheduling and smartphone control — systems that handle DST, daylight shifts, and seasonal scene changes without a single ladder climb. Whether you want a professional tune-up for your existing system or a full upgrade to permanent, color-changing fixtures you can control from your phone, the next step is straightforward: contact Foreverglowlighting for a free estimate and find out what a properly maintained system looks like year-round.
Useful sources and further reading
These resources support the guidance throughout this article. For controls and automation, the Hyperlite seasonal maintenance guide and the Ace Pump scheduling resource are the most technically detailed. For maintenance checklists and seasonal task timing, the Kings Outdoor Lighting checklist and the Promier Landscapes seasonal guide are practical starting points. For homeowners considering upgrades, the Foreverglowlighting internal guides cover smart controls, layering techniques, and LED performance in depth.
- Why Routine Re-Aiming and Seasonal Adjustment Matter — Stewart Lawncare & Landscape
- Seasonal Maintenance for Outdoor Lighting Controls — Hyperlite
- Seasonal Scheduling Adjustments for Outdoor Lights — Ace Pump and Supply
- Seasonally Adjusting Your Landscape Lighting — Promier Landscapes
- Seasonal Outdoor Lighting Maintenance Checklist — Kings Outdoor Lighting
- What Does Smart Lighting Mean Outdoors For Homeowners? — Foreverglowlighting
- Landscape Lighting Layering Techniques For Homeowners — Foreverglowlighting
- Landscape Lighting Upgrade For Your Existing System — Foreverglowlighting
Local climate and growth rates affect how often checks are needed. Homeowners in the Southeast, Gulf Coast, or Pacific Northwest may find that a mid-summer re-aim is worth adding to the standard spring-fall schedule. When in doubt, a quick after-dark walk of the property costs nothing and catches most problems before they become failures.