

An outdoor lighting maintenance plan keeps every fixture producing its intended light output while catching moisture and wiring problems before they cause an outage. The baseline cadence is simple: inspect the whole system quarterly, clean fixtures every season, and add a check after any major storm or landscaping work. Before touching anything, always cut power at the breaker and test the GFCI outlet first.
TL;DR:
- Moisture buildup and loose connections are the leading causes of outdoor lighting failures, so regular inspection and moisture-resistant splices are crucial.
- Replacing lamps in zones rather than one at a time ensures consistent color and brightness, reducing long-term labor costs.
- Seasonal checklists aligned with weather changes help address specific issues like frost damage in spring and leaf coverage in fall effectively.
- Inspect and clean fixtures at least twice a year, using gentle methods, to maintain optimal light output and prevent seal damage.
- Professional maintenance, including voltage testing and fixture re-aiming, is recommended for large or complex systems to prevent major failures.
Table of Contents
- Building Your Outdoor Lighting Maintenance Plan: The Audit and Inventory
- What Core Maintenance Tasks Keep Landscape Lighting Working?
- Wiring, Transformer, and Moisture Checks That Prevent Failures
- What Should a Seasonal Lighting Maintenance Checklist Include?
- Why Are My Outdoor Lights Flickering or Not Turning On?
- When Should You Hire a Professional for Lighting Maintenance?
- What I’ve Learned About Lighting Maintenance That Actually Sticks
- Let Forever Glow Lighting Handle the Maintenance Calendar
- Sources
- FAQ
Building Your Outdoor Lighting Maintenance Plan: The Audit and Inventory
Every reliable outdoor lighting maintenance plan starts with a walk-through, not a toolbox. Walk the property at dusk, when fixtures are lit, and map the property into zones based on which transformer or circuit feeds them. This is the moment to catch dark spots, glare, and fixtures aimed at the wrong angle, all of which are much harder to see in daylight.
For each fixture, record the details that matter later when something fails:
- Fixture type and location (path light, wall wash, uplight, step light)
- Lamp type, whether LED or halogen, and its approximate install date
- Which transformer zone and circuit it belongs to
- Control type: photocell, mechanical timer, or smartphone-controlled smart system
Take photos of each zone and keep a simple log with a fixture ID, last service date, and any notes on performance. A maintenance checklist built around seasonal timing makes this inventory far easier to maintain than a memory-based approach, and it pays off the first time a fixture starts flickering and you need to know its history.
What Core Maintenance Tasks Keep Landscape Lighting Working?
Landscape lighting care comes down to five recurring jobs: cleaning, re-lamping, re-aiming, vegetation control, and checking gaskets. None of them require special training, but sequence matters.
Cut power at the breaker before touching any fixture, then confirm the circuit is dead. This single habit prevents the vast majority of avoidable shocks and short circuits during routine outdoor fixture inspection.
- Clean lenses and housings with a mild pH-neutral soap and a soft microfiber cloth. Skip the pressure washer and alcohol-based solvents, which strip anti-glare coatings and can force water past seals that were never designed for direct spray.
- Re-lamp by zone, not by bulb. Replacing every fixture in a zone at once, rather than one burnt-out lamp at a time, keeps color temperature and brightness consistent across a run of lights and reduces the labor cost per visit. LEDs typically outlast halogen lamps by a wide margin, so mixing the two in one zone creates uneven output faster than you’d expect.
- Re-aim fixtures that have drifted from settling soil, mower bumps, or wind. A five-degree shift on an uplight can throw the beam onto a fence instead of the tree it was meant to highlight.
- Manage vegetation by keeping at least 12 inches of clearance between any fixture and surrounding shrubs or ground cover. Overgrowth traps moisture against housings and blocks the beam path entirely within a season or two.
- Check gaskets and lens seals for cracking, warping, or gaps. A compromised seal is usually the first sign that a fixture is about to develop a moisture problem.
Pro Tip: Keep a spare lamp of each type and color temperature in a labeled bin. When one fixture in a zone fails, you can match it instantly instead of guessing at warm white versus daylight from memory.
Wiring, Transformer, and Moisture Checks That Prevent Failures
Moisture is the single biggest cause of outdoor lighting failure, and most of it traces back to a handful of preventable weak points. Fixing those points does more for long-term reliability than any amount of lamp replacement.
Start every check at the transformer. Confirm it’s on the correct breaker, test the GFCI outlet feeding it, and clear any mulch, leaves, or debris blocking its ventilation slots. A transformer that overheats because it’s buried in landscaping fabric will fail years before its rated lifespan.
- Inspect every splice and wire connector for green or white corrosion buildup.
- Use gel-filled connectors and dielectric grease at every splice point exposed to soil or moisture.
- Keep splices elevated off wet ground whenever possible, rather than buried directly in soil.
- Spot-check voltage at a few fixtures per zone using a basic multimeter.
Industry guidance suggests that applying dielectric grease and moisture-resistant connectors can meaningfully reduce corrosion-related failures in humid climates, which covers most of the country for at least part of the year. If voltage readings swing wildly between fixtures on the same run, that inconsistency usually points to a failing connection or transformer tap rather than a bad lamp, and it’s a solid signal to call a licensed electrician.
What Should a Seasonal Lighting Maintenance Checklist Include?
A seasonal lighting checklist turns the quarterly cadence into something you can actually act on, rather than a vague intention to “check the lights sometime.” Tying inspections to seasonal transitions rather than fixed calendar dates works better because the stressors on your system change with the weather.
- Spring: Do a full clean of every fixture, re-aim anything that shifted over winter, inspect for exposed wiring from frost heave, and swap out any lamp that looked marginal in the fall.
- Summer: Check transformer ventilation as heat rises, trim back fast-growing plants monthly, and watch for voltage drops caused by irrigation overspray or insect nests in fixture housings.
- Fall: Clear leaves before they trap moisture against lenses, adjust photocells and timers as daylight hours shorten, and prep fixtures for the cold ahead.
- Winter: Keep an eye on output consistency, brush snow off the transformer housing, and do a quick visual check after any major storm.
A seasonal adjustment schedule built around these four windows, plus a fifth check after severe weather or any landscaping work, covers the quarterly benchmark most professionals recommend.
Why Are My Outdoor Lights Flickering or Not Turning On?
Flickering, dimming, and dark zones almost always trace back to one of five causes, and most of them take less than ten minutes to check. Start with the breaker: confirm it hasn’t tripped and that the GFCI outlet resets cleanly. From there, tighten any loose terminal connections at the transformer, clean lenses that may just be caked with grime mimicking a dim lamp, and test the photocell or timer to confirm it’s switching on schedule. Chewed wiring from squirrels or rabbits is also common enough to check for on any run near ground cover.
- Loose connections at the transformer or splice points
- A failing or misaligned photocell sensor
- Marginal lamps nearing end of life, which flicker before they fully fail
- Exposed or chewed wiring near ground level
Pro Tip: If tightening connections and swapping a marginal lamp doesn’t fix a flicker, stop guessing. Repeated GFCI trips, exposed conductors, or visible corrosion on a splice are signs the problem needs a multimeter and a trained eye, not another round of trial and error.
When Should You Hire a Professional for Lighting Maintenance?
Some tasks genuinely belong to a licensed technician. Transformer diagnostics, surge protection installation, major splice replacement, and voltage balancing across a large property all require tools and testing most homeowners don’t keep on hand.
A professional visit typically includes:
- Full voltage checks across every zone and fixture
- Replacement of degraded connectors with moisture-sealed hardware
- Re-aiming fixtures to restore the original design intent
- A written report documenting fixture condition and any repairs made
An outdoor light service plan that bundles these visits, like the GlowCare maintenance subscription from Forever Glow Lighting, gives homeowners a scheduled version of everything covered above without needing to track it themselves.
What I’ve Learned About Lighting Maintenance That Actually Sticks
Most homeowners overinvest in reactive fixes and underinvest in the boring habits that prevent problems in the first place. A fixture log sounds tedious until the third time a light in the same zone fails and you realize it’s always the one near the sprinkler head, not a coincidence.
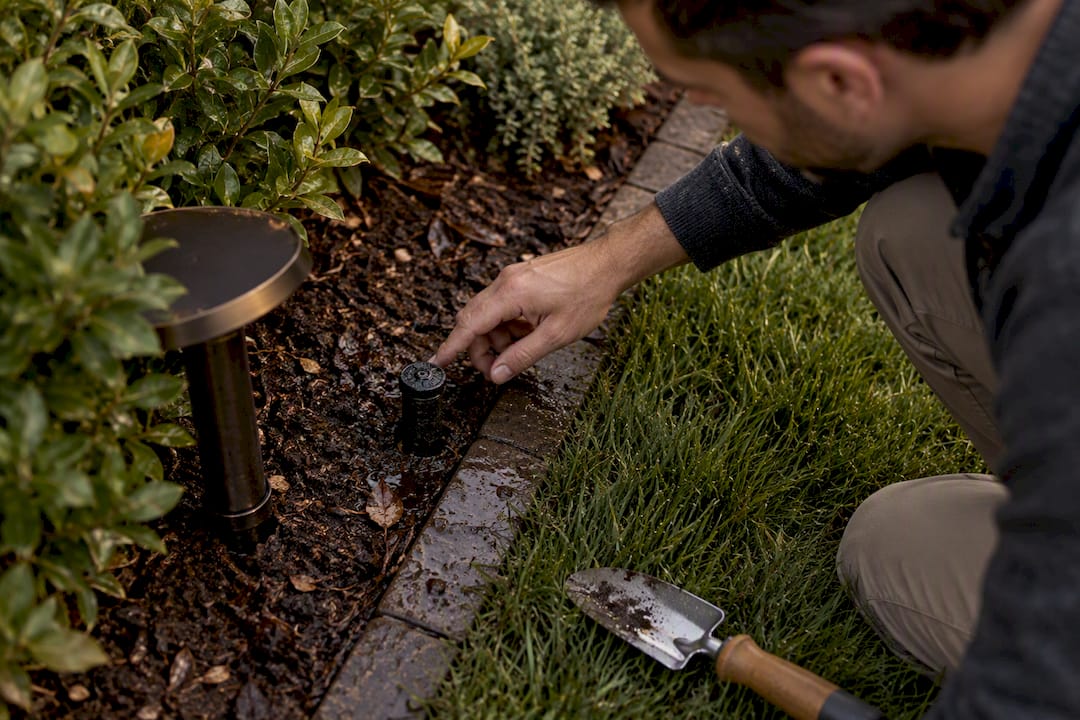
Grouping relamping by zone is the habit I’d argue matters more than people give it credit for. It’s tempting to swap one bulb at a time as things fail, but that approach guarantees mismatched color temperature within a year, and it costs more in labor over time than doing it in batches.
The single highest-leverage habit, though, is the seasonal walk. Put it on a calendar like you would a smoke detector battery check. Fifteen minutes at dusk, four times a year, catches almost everything covered in this guide before it becomes a repair bill.
— Dave
Let Forever Glow Lighting Handle the Maintenance Calendar
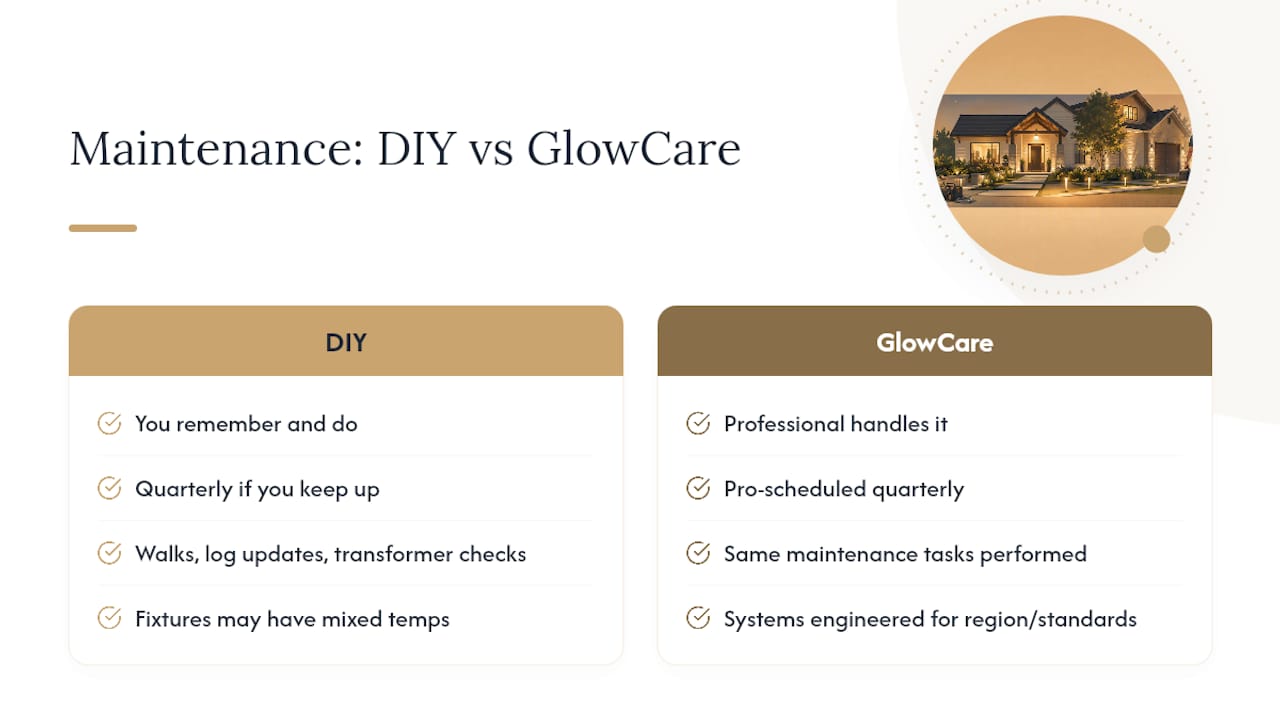
Running your own outdoor lighting maintenance plan works, but it takes real time: the quarterly walks, the log updates, the transformer checks, the re-aiming after every storm. Forever Glow Lighting built the GlowCare Maintenance Subscription so property owners in the Charlotte area get that scheduled professional attention without having to be the one who remembers to do it.

GlowCare pairs with Forever Glow Lighting’s permanent lighting systems, which are engineered for the region’s weather and designed to meet HOA and municipal standards from the start, so there’s less to maintain in the first place. If your current setup already has fixtures scattered with mismatched color temperatures and a transformer you’re not sure about, a professional landscape lighting design review often catches issues a DIY audit misses.
Contact a professional lighting service for an estimate, or ask about adding a maintenance subscription to an existing system so your seasonal checklist becomes someone else’s job.
Sources
For deeper detail on the standards behind this checklist, the Golden Lighting maintenance guide covers moisture prevention and seasonal priorities in depth. Aloha Outdoor Lighting offers additional guidance on cleaning frequency by climate, and Landscape Illumination’s maintenance guide covers photocell and timer testing in more detail. Landscaping professionals marketing maintenance services may also find landscaping SEO guidance useful for structuring service offerings.
- Outdoor Lighting Maintenance: A Pro’s Guide for 2026 – Golden Lighting
- Maintenance guide: Keeping your outdoor LED strips bright for years – Rafaria
- Landscape Lighting Maintenance Tips: Keeping Your Lights Bright – Tru-Scapes
- Outdoor Lighting Maintenance Guide: Protect Your Home’s Lighting Investment – Landscape Illumination
FAQ
How Do I Maintain Outdoor Lighting Year-Round?
Inspect the full system quarterly, clean fixtures with pH-neutral soap each season, and add an extra check after any major storm or landscaping work. Always cut power at the breaker and test the GFCI outlet before touching any fixture, following the pro maintenance protocol most technicians use.
What Should a Lighting Maintenance Plan Include?
A solid plan includes a fixture inventory with photos, a recurring cleaning and re-lamping schedule, wiring and transformer checks for corrosion, and a seasonal checklist tied to spring, summer, fall, and winter. A written log tracking fixture ID, install date, and service notes makes repeat problems easy to spot.
How Do I Create an Outdoor Lighting Plan From Scratch?
Start with a dusk walk-through to map zones and note every fixture’s type, lamp, and control method. From there, layer in a quarterly inspection schedule, a cleaning routine, and moisture-prevention steps at every splice, or consider a scheduled option like the GlowCare subscription if you’d rather not track it manually.
What Are the Most Important Lighting Maintenance Tasks?
The core tasks are cleaning lenses with pH-neutral soap, re-lamping by zone to keep color consistent, re-aiming fixtures that have drifted, trimming vegetation back at least 12 inches, and checking connectors for corrosion. Skipping the wiring and moisture checks is the most common reason lights fail well before their expected lifespan.
How Often Should Outdoor Lights Be Cleaned?
Most systems need cleaning at least twice a year, though dusty or high-pollen environments may need quarterly cleaning to keep light output consistent. Always use a soft cloth and mild soap rather than a pressure washer, which can force water past fixture seals.