
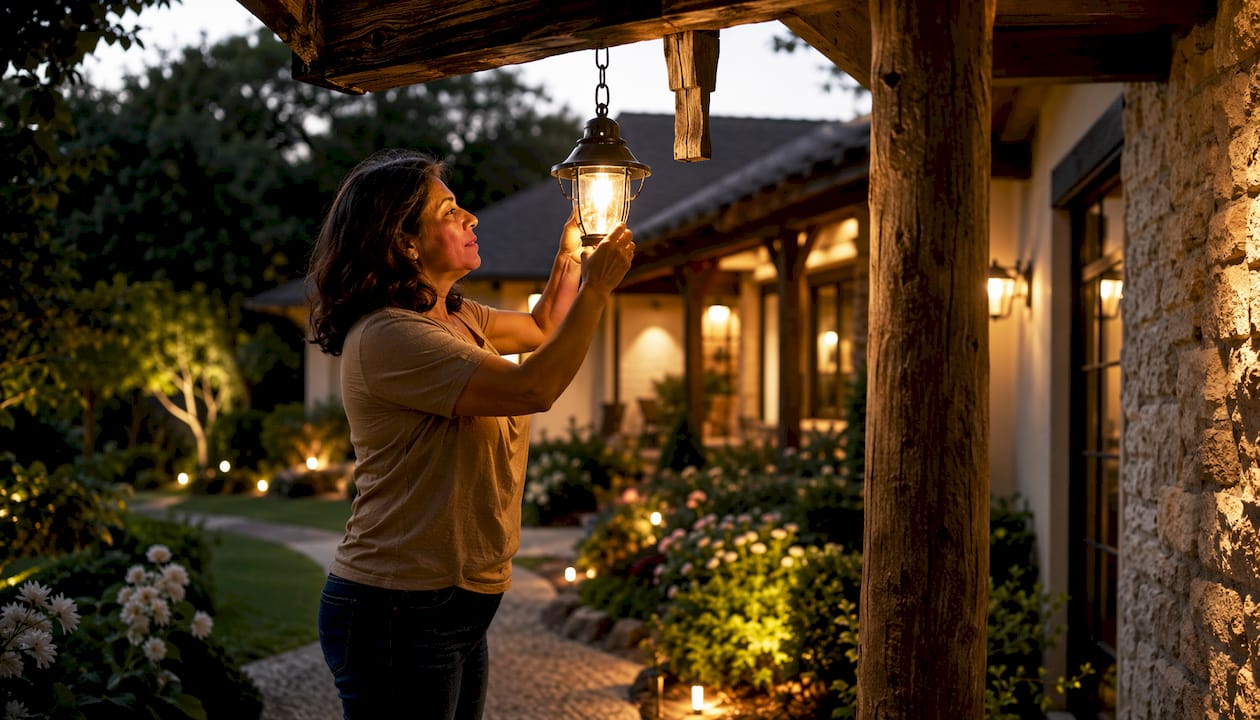
Exterior home lighting design is the strategic layering of ambient, task, and accent light sources across your property to achieve two goals simultaneously: aesthetic enhancement and reliable security. A complete design covers fixture selection, placement, color temperature, and a smart control system that lets you manage everything from your phone. LEDs deliver 60–80% energy savings over traditional bulbs and last 25,000–50,000 hours, making them the clear foundation for any permanent installation.
The core components of every exterior lighting design:
- Fixture types and placement: path lights, sconces, spotlights, floodlights, and soffit/track fixtures each serve a specific role
- Color temperature: warm Kelvin values (2700K–3000K) for ambiance; cooler values (4000K–5000K) for security visibility
- Lumen targets: matched to function, not maximum brightness
- Smart control system: scenes, schedules, and motion-sensor logic managed from a single app
Table of Contents
- What makes exterior home lighting design work?
- Which fixtures go where, and how bright should they be?
- How does a professional permanent smart installation actually work?
- What smart control options work best for permanent exterior systems?
- What electrical codes and safety standards apply to exterior lighting?
- What does a permanent exterior lighting project cost and how long does it take?
- Should you hire a professional or do it yourself?
- Key Takeaways
- Why thoughtful exterior lighting changes how you live in your home
- Foreverglowlighting: permanent smart LED installations for your home
- Useful sources for further reading
What makes exterior home lighting design work?
Good outdoor lighting design rests on four principles: layering, contrast, human-centered placement, and glare control.
Layering means combining all three light types. Ambient light (sconces, post lights, overhead pendants) sets the baseline glow. Task light (step lights, pathway fixtures, garage floodlights) targets specific activity zones. Accent light (uplights, spotlights, wall-wash fixtures) creates visual interest by drawing the eye to focal points. None of these layers works well in isolation.
Contrast is what creates depth at night. Uniformly bright exteriors look flat and commercial. The dark areas between lit subjects are what make the lit subjects appear brilliant. Resist the urge to fill every shadow.
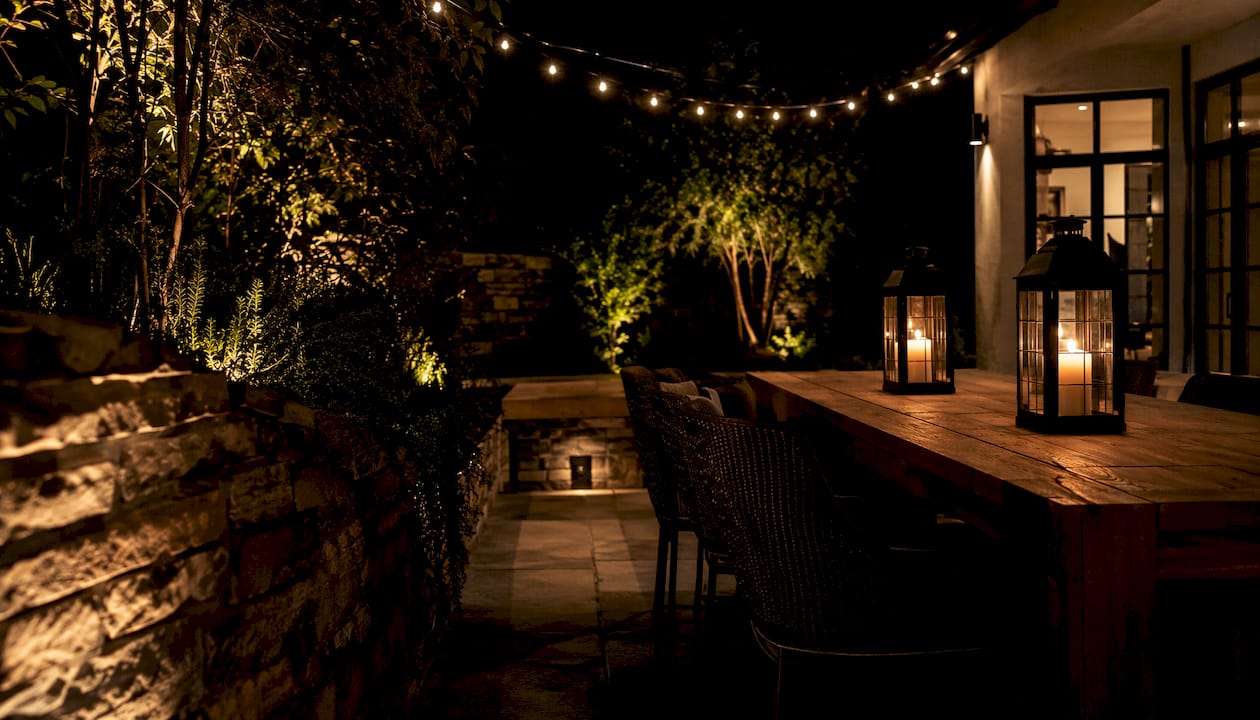
Human-centered placement means designing from a “night map” of how people actually move through your property: entrances, paths, seating areas, and sightlines from inside the house. Architects assign light to behaviors first, then choose fixtures. Choosing fixtures first is the most common planning mistake.
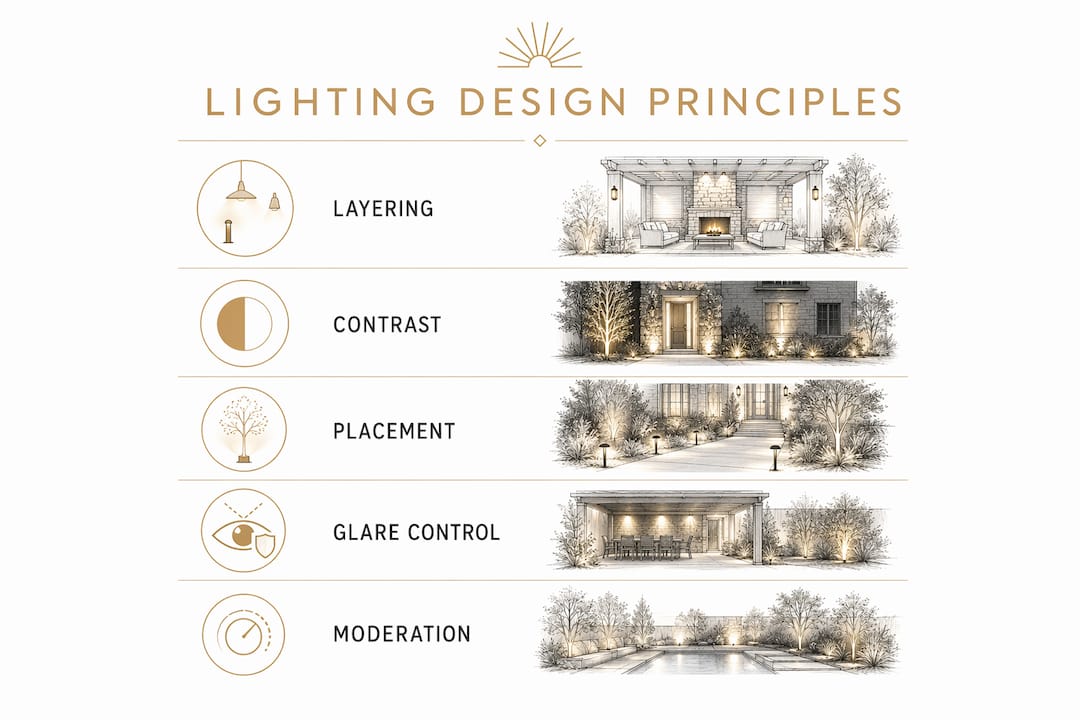
Glare control comes down to optics and shielding. Fixtures aimed directly at eye level or with exposed bulbs create discomfort and reduce visibility. Dark-sky-compliant housings direct light downward, protecting neighbors and preserving the atmosphere you worked to create. Landscape lighting layering techniques cover this in more depth for homeowners ready to sketch a plan.
Pro Tip: The most common amateur mistake is over-illuminating. Start with fewer fixtures than you think you need, then add only where a specific gap in safety or aesthetics appears.
Which fixtures go where, and how bright should they be?
| Application | Lumens | Color Temp | Beam Angle | Primary Effect |
|---|---|---|---|---|
| Pathway / step lights | — | 2700K–3000K | Wide (60°+) | Safe navigation |
| Porch / entry sconces | — | 2700K–3000K | Diffuse | Welcoming glow |
| Accent / uplights | — | 2700K–3000K | Narrow (15°) | Focal point drama |
| Security floodlights | — | 4000K–5000K | Wide flood | Visibility, deterrence |
| Wall-wash / grazing | — | 2700K–3000K | Medium–wide | Texture, facade depth |
Wall-mounted sconces belong at 60–66 inches from the ground, or roughly one-quarter to one-third the height of the door frame. Path lights work best staggered on alternating sides of the walkway, spaced 4–6 feet apart, directing light downward rather than outward.
For trees, pull spotlights 12–24 inches from the trunk and angle them to graze the bark. Large trees need multiple fixtures spaced around the perimeter to capture their full volume. For textured walls, place a narrow-beam spotlight 6–10 inches from the surface to graze and reveal texture; a wider beam placed farther back produces even facade illumination without exaggerating imperfections.
For deck and step lighting, recessed step-riser fixtures keep the light source hidden while marking grade changes clearly.
Durability basics for fixture selection:
- IP65 minimum for ground-level and exposed fixtures (dust-tight, direct water spray)
- IP67 where pooling or temporary submersion is possible
- Brass, aluminum, or powder-coated steel housings outlast plastic in freeze-thaw climates
- Hardwired 12V or 120V systems deliver more consistent output than solar for large-scale architectural lighting
How does a professional permanent smart installation actually work?
The process follows a clear sequence. Skipping steps, especially the electrical ones, creates safety and code problems that are expensive to fix later.
- Assess the space and map human patterns. Walk the property after dark. Note where people enter, where they park, where they sit, and where shadows create security gaps.
- Define your goals. Separate security priorities (consistent visibility, motion-sensor coverage) from atmospheric ones (entertaining zones, holiday color scenes). These drive different fixture and control choices.
- Draft a fixture layout and schedule. Sketch the house footprint with fixture locations, types, and lumen targets. Assign each fixture to a layer (ambient, task, or accent).
- Electrical load assessment and permit check. A licensed electrician calculates total wattage, verifies panel capacity, and confirms whether a new circuit or GFCI-protected outlets are required. Permits are typically required for line-voltage work and new circuits. Custom lighting installation guides cover what to expect from this step.
- Installation and commissioning. Fixtures are mounted, wired, and aimed. Shielding is adjusted to eliminate glare. Smart controllers are programmed with initial scenes. Motion sensors are calibrated.
Post-install verification checklist:
- Confirm all motion sensors trigger at the correct range and dwell time
- Test each scene (arrival, security, entertaining, holiday) from the app
- Verify GFCI protection on all outdoor circuits
- Check that no fixture creates direct glare toward a neighbor’s property or a camera lens
What smart control options work best for permanent exterior systems?
Smart control turns a static lighting installation into a living system. The main approaches differ in reliability, cost, and integration depth.
- Dedicated smart controllers / transformers: purpose-built for low-voltage landscape systems; offer zone control, scheduling, and dimming curves matched to LED drivers
- Wi-Fi bridges: connect existing fixtures to a smartphone app without a local hub; convenient but dependent on internet uptime
- Local hubs (Zigbee or Z-Wave): operate independently of cloud services; more reliable for security-critical scenes and preferred for permanent installs
- On-fixture smart drivers: built into individual fixtures; flexible but harder to coordinate across large systems
Common scene types every permanent system should include:
- Arrival scene: full ambient and path lighting triggered by geofence or scheduled sunset
- Entertaining scene: warm, dimmed accent lighting with patio zones active
- Night-safety scene: reduced ambient with motion sensors armed at full sensitivity
- Holiday / color preset: full-color LED scenes for seasonal decoration
A dimming and scene-based approach reduces light pollution and preserves atmosphere while still providing the safety coverage you need when motion is detected. The system works harder when it matters and stays quiet the rest of the time.
For smart outdoor lighting to perform reliably long-term, always include a manual override switch and a backup schedule in case the app or network is unavailable.
What electrical codes and safety standards apply to exterior lighting?
than low-voltage and always require a licensed electrician. Low-voltage (12V) systems are safer for DIY in modest layouts, but any new circuit, outdoor receptacle, or hardwired fixture still falls under local electrical code and typically needs a permit.
Permanent exterior lighting that ties into mains power is an electrical project, not a landscaping project. Treating it otherwise is where safety problems start.
Safety and code checklist to review with your installer:
- Panel capacity confirmed for the added load
- GFCI protection on all outdoor circuits
- Conduit or UF cable burial depth meets local code (often 18 inches for line-voltage)
- All fixtures rated for wet locations (UL wet-listed)
- IP65 minimum for exposed ground fixtures; IP67 where pooling is possible
- Dark-sky-compliant shielding to prevent upward light spill
- Written permit confirmation before work begins
Pairing good exterior lighting with a quality security door creates a more complete perimeter defense, since lighting removes hiding spots but a reinforced entry point closes the gap lighting alone cannot address.
What does a permanent exterior lighting project cost and how long does it take?
A 10W LED fixture saves approximately $16.42 per year compared to a 60W incandescent running 6 hours per day at $0.15/kWh. Across a full installation of 10–20 fixtures, annual energy savings are meaningful, and the 25,000–50,000-hour LED lifespan eliminates frequent bulb replacement.
Factors that shift total project cost:
- Trenching length and depth (line-voltage requires deeper burial)
- Fixture grade and IP rating (commercial-grade brass vs. entry-level aluminum)
- Smart-control complexity (number of zones, hub type, sensor count)
- Permit and inspection fees, which vary by municipality
- Site conditions: concrete, tree roots, or existing wiring complications
For detailed local figures, Foreverglowlighting’s permanent lighting cost guide for Charlotte homes breaks down typical ranges by project type.
Timeline milestones for a typical residential permanent install: site assessment (1–2 days), permit approval (1–3 weeks depending on municipality), trenching and wiring (1–3 days), fixture installation and commissioning (1–2 days).
Should you hire a professional or do it yourself?
Low-voltage path and accent lighting in a modest layout is within reach for a capable homeowner. Anything involving a new circuit, hardwired architectural fixtures, or line-voltage work is a different category entirely.
Questions to ask every prospective installer:
- Are you licensed and insured for electrical work in this state?
- Can you provide examples of permanent smart LED installations you have completed?
- What IP ratings do you specify for ground-level fixtures?
- How do you handle electrical load assessment and permit filing?
- What does your warranty cover, and for how long?
- Will scene programming be documented and handed off to the homeowner?
Red flags in quotes or proposals:
- No mention of an electrical load test or panel capacity check
- Vague warranty language with no written terms
- No discussion of permits or code compliance
- Scene programming described as “standard” with no customization detail
- Pressure to skip a site visit and quote remotely
Low-voltage landscape systems offer the best DIY-friendly entry point, but professional landscape lighting design pays off in fixture placement precision, electrical safety, and long-term system reliability.
Key Takeaways
Exterior home lighting design works when it layers ambient, task, and accent light with intentional contrast, warm color temperatures, and a smart control system installed by a licensed electrician.
| Point | Details |
|---|---|
| Layer all three light types | Ambient, task, and accent lighting must work together; no single layer covers all goals. |
| Match Kelvin to function | Use 2700K–3000K for ambiance and 4000K–5000K for security floodlights. |
| Hire a licensed electrician | Line-voltage and permanent installs require load assessment, permits, and code-compliant wiring. |
| Use smart scenes | Arrival, night-safety, and entertaining scenes balance security and atmosphere automatically. |
| Foreverglowlighting | Offers permanent smart LED installations in Charlotte with custom design, licensed install, and scene programming. |
Why thoughtful exterior lighting changes how you live in your home
Most homeowners think about exterior lighting only when something goes wrong: a dark walkway, a security camera that captures nothing useful, or a front facade that looks flat after dark. The real opportunity is designing the system before those problems appear.
What strikes me most, having seen how permanent smart LED systems perform over time, is how much the design-first approach changes daily life. A well-layered exterior makes a home feel safer and more welcoming every single evening, not just during the holidays. Security coverage becomes consistent rather than reactive. The property looks intentional from the street, which matters for curb appeal and resale value alike.
The homeowners who get the best results treat exterior lighting as an architectural decision, not a hardware purchase. They start with the night map, define their goals clearly, and let fixture selection follow. That sequence, combined with a licensed electrician handling the electrical side, is what separates a permanent system that performs for 15 years from one that needs constant adjustment.
Foreverglowlighting: permanent smart LED installations for your home
Skip the seasonal ladder climbs and temporary setups. Foreverglowlighting designs and installs permanent smart LED systems that blend into your roofline by day and deliver full color, security, and architectural accent lighting by night, all controlled from your smartphone.

Services include:
- Free site assessment to map your property’s lighting goals and electrical requirements
- Custom fixture layout and scene design tailored to your home’s architecture
- Licensed installation with full permit and code compliance
- Scene programming: arrival, security, entertaining, and holiday presets
- Warranty and ongoing support after commissioning
Whether you want landscape lighting that highlights your property’s best features or a permanent system that handles security and decoration year-round, Foreverglowlighting handles every step. Contact us today for a free estimate.
Useful sources for further reading
Technical references and design guidance:
- U.S. Department of Energy — LED energy savings and lifespan data
- Alliance Outdoor Lighting — installation tips and contrast principles
- Dazuma — professional landscape spotlight techniques
- Archi & Interiors — architect’s approach to outdoor lighting hierarchy
Foreverglowlighting resources:
- Landscape lighting layering techniques for homeowners
- How permanent lighting improves home security
- What smart lighting means outdoors for homeowners
- Permanent lighting installation cost guide for Charlotte homes
For any code or permit questions specific to your municipality, consult a licensed electrician before beginning work. Local requirements vary and should be confirmed with your jurisdiction’s building department.