
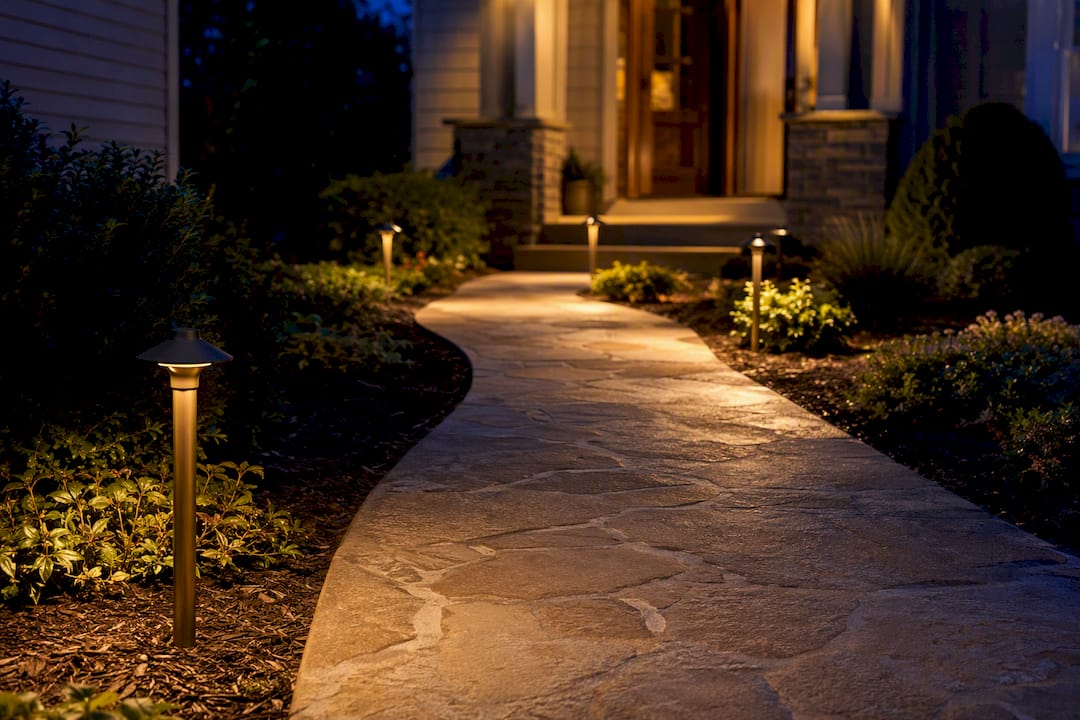
Start with 6 to 10 feet between fixtures on alternating sides, with 6 to 8 feet as the balanced default for most residential walkways. Tighten that to 4 to 6 feet at steps, curves, and entry approaches, where footing matters more than ambiance. Fixture height factors in too. A mount height around 18 inches is commonly recommended as versatile. Measure your path first, then use the ranges below to fine-tune for your fixtures and site.
TL;DR:
- Path light spacing should be 6 to 10 feet for most residential walkways, tightening to 4 to 6 feet at steps, curves, and entry points.
- Factors like beam angle, lumen output, mounting height, surface reflectivity, and ambient light heavily influence ideal spacing.
- Proper placement involves staggering fixtures on alternating sides, starting 2 to 3 feet from the path’s beginning, and maintaining consistent offset from edges.
- Testing with stakes or temporary fixtures before permanent installation can prevent gaps over 4 to 5 feet and improve overall effect.
- DIY spacing is suitable for simple straight paths but complex layouts with curves or grade changes benefit from professional design and custom system installation.
Table of Contents
- Recommended Path Light Spacing By Scenario
- What Actually Changes Your Ideal Spacing
- How Should You Place And Stagger Path Lights?
- How Do You Test And Adjust Path Light Spacing?
- Common Path Light Spacing Mistakes
- When Professional Design Beats DIY Spacing
- Path Light Spacing Checklist
- Why Homeowners Get Path Light Spacing Wrong
- Get Path Lighting Spacing Right The First Time, Permanently
- Sources
Recommended Path Light Spacing By Scenario
Spacing isn’t one number. It shifts depending on what the path is doing at that particular stretch, and treating a driveway approach the same as a straight garden walk is where a lot of DIY layouts go wrong.
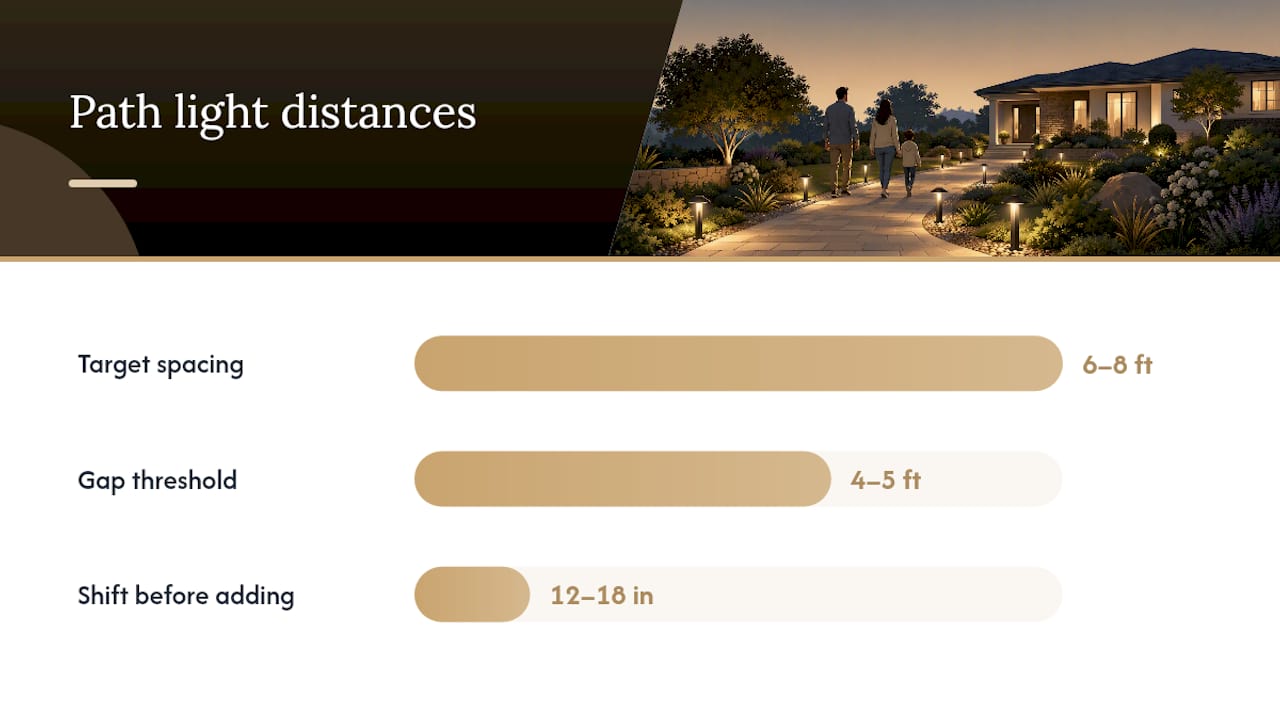
Most guides land on 6 to 10 feet as the baseline, with 6 to 8 feet becoming the go-to for homeowners who want even, walkable light without a runway effect. Wider, straighter runs can stretch to 8 to 12 feet because there’s less need for tight visual guidance. Steps and approaches to a front door deserve the tightest spacing, since a missed step is a real fall risk, not just an aesthetic miss.
| Scenario | Recommended spacing | Placement pattern |
|---|---|---|
| General garden path | 6–10 ft | Staggered, alternating sides |
| Balanced residential walkway | 6–8 ft | Staggered |
| Steps, curves, entry approach | 4–6 ft | Both sides or tighter single-side |
| Driveway or long straight run | 8–12 ft | Paired or staggered |
Here’s useful guidance: a 40-foot front walk with moderate spacing calls for several fixtures staggered across both sides rather than lined up in matching pairs. Staggering breaks up the visual monotony and avoids the “landing strip” look that professional lighting designers tend to steer clients away from.
What Actually Changes Your Ideal Spacing
The 6 to 10 foot rule is a starting point, not a fixed measurement. Several variables push it wider or tighter, and understanding them saves you from buying fixtures you don’t need or leaving your path with awkward dark patches.
- Beam angle: A narrow beam concentrates light in a tighter pool, so fixtures need to sit closer together to avoid gaps. A wide beam spreads more and can be spaced further apart.
- Lumen output: Lower-lumen LED fixtures placed closer together tend to read as softer, more intentional guidance, while a few high-lumen fixtures spaced wide can feel harsh and uneven. Energy-efficient LED design makes the closer-and-dimmer approach affordable to run.
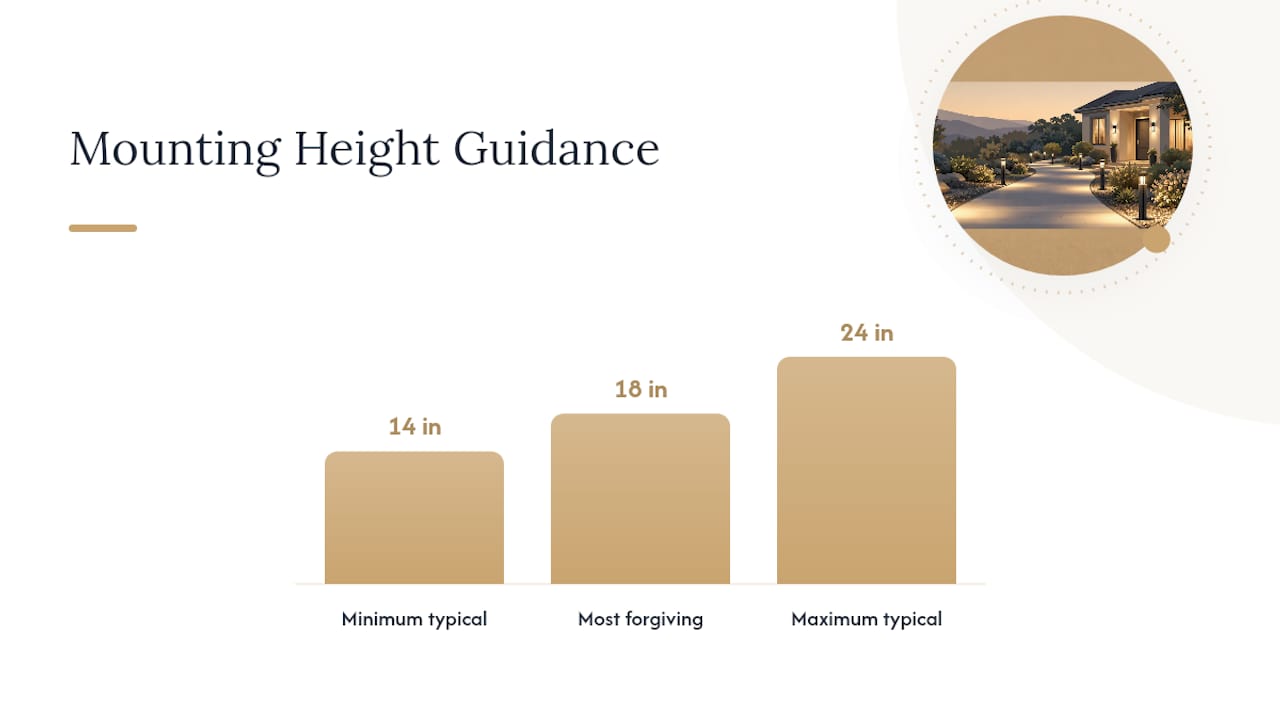
- Mounting height: Path lights commonly perform best between 14 and 24 inches off the ground, and 18 inches tends to be the most forgiving height for typical fixture spreads. Raise or lower a fixture by even a couple of inches and the coverage circle changes noticeably.
- Surface reflectivity: Light-colored gravel or stone bounces light back up and can support slightly wider spacing, while dark pavers or mulch absorb it and may need tighter placement.
- Ambient light: A path near a porch light or streetlamp needs less fixture density than one running through a dark side yard.
Pro Tip: Check the fixture’s spec sheet for its beam angle in degrees before you buy a single light. A 25 degree beam and a 60 degree beam from the same manufacturer can call for completely different spacing on the same path.
If you’re weighing beam spread against fixture design more broadly, our guide on spread lighting outdoors breaks down how mounting height and beam angle interact in more detail.
How Should You Place And Stagger Path Lights?
Getting spacing right on paper doesn’t guarantee a good-looking result if the placement pattern is wrong. Layout matters just as much as distance.
- Stagger, don’t mirror. Alternating fixtures on opposite sides of the path creates visual rhythm and shadow variation instead of the flat, symmetrical look of matched pairs.
- Place your first fixture 2 to 3 feet from where the path begins, not right at the edge, so the light doesn’t glare into an entryway or driveway.
- Keep a consistent offset from the path edge, typically 12 to 18 inches back, so fixtures don’t get clipped by mowers or buried under encroaching plants.
- Tighten spacing on the inside of curves. A wide radius on the outer edge needs less light than the tighter inner arc, where shadows pool.
- Use one side only on narrow paths under about 3 feet wide, and reserve both-side lighting for wider, more formal walkways where symmetry reads as intentional rather than excessive.
- Account for plant growth. A fixture placed 12 inches back from a young boxwood hedge will be swallowed by that same hedge in two seasons.
For more on combining path lights with other fixture types without visual clutter, see our piece on landscape lighting layering.
How Do You Test And Adjust Path Light Spacing?
Spacing math on a notepad rarely survives contact with an actual yard at night. Shadows, slopes, and plantings all shift what “6 to 8 feet” looks like in practice, so testing before you commit to holes and wiring saves both money and regret.
- Measure the path length and width, then divide by your target spacing to get a rough fixture count.
- Mock the layout with stakes, solar lights, or extension-cord fixtures before installing anything permanent.
- Walk the path after dark and note where pools of light overlap heavily and where you’re stepping into shadow.
- Mark any gap longer than 4 to 5 feet. That’s usually the threshold where a path starts to feel unsafe rather than atmospheric.
- Move an existing fixture 12 to 18 inches toward the gap before adding a new one. This small shift often solves the problem outright, since most of a low-voltage fixture’s useful light sits close to the head anyway.
- Fix decision points first, meaning steps, turns, and driveway approaches, before fine-tuning straight stretches.
Pro Tip: Run the walk-test on two different nights, one with the moon up and one without. A layout that looks fine under a bright moon can reveal real dark spots on a cloudy one.
If the walk-test turns up electrical issues, long low-voltage runs that dim toward the end, or HOA rules about fixture visibility, that’s usually the point to bring in a professional rather than keep troubleshooting.
Common Path Light Spacing Mistakes
Most spacing complaints trace back to a handful of repeat offenders, and nearly all of them are fixable without buying more fixtures.
- Runway effect: Too many fixtures at even spacing on both sides reads as an airport taxiway. Stagger the layout or pull every other fixture and see if the path still reads clearly.
- Dark gaps: Usually the result of spacing fixtures by eye instead of walking the path after dark. Mark gaps over 4 to 5 feet and shift the nearest fixture toward them first.
- Glare: Comes from mounting height that’s too low relative to eye level, or a fixture with too much output for its beam angle. Shield the head, drop the lumen spec, or lower the mount before adding anything.
- Uneven brightness along a run: Often a power issue, not a spacing issue. A transformer that’s undersized for the total load will dim fixtures near the end of a long run regardless of how well they’re spaced.
- Adding fixtures as a first response: The instinct to buy more lights when a path looks uneven usually treats the wrong problem. Reposition first, add second.
When Professional Design Beats DIY Spacing
DIY spacing works well for a straight front walk with predictable soil and no electrical complications. It gets harder fast once a path curves through mixed terrain, crosses multiple grade changes, or needs to meet HOA lighting standards.
- Complex layouts with multiple curves, steps, and branching paths benefit from a designer who can balance spacing across the whole property, not just one stretch.
- Wiring and transformer sizing for longer low-voltage runs should follow NEC electrical standards, and a licensed installer keeps that work code-compliant.
- Year-round consistency matters if you want the same layout doing double duty for security lighting in winter and accent lighting in summer.
Forever Glow Lighting designs custom low-voltage systems around these exact variables, and our installation process page walks through what that looks like from first estimate to final walk-test.
Path Light Spacing Checklist
Keep this list handy while you’re staking out a layout or doing a final nighttime walk-test.
- Baseline: 6 to 10 feet, staggered; 6 to 8 feet for most residential paths.
- Tighten to: 4 to 6 feet at steps, curves, and entry approaches.
- Mounting height: 14 to 24 inches, 18 inches is the safest default.
- Edge offset: 12 to 18 inches back from the path edge.
- Test before you dig: mock the layout, walk it at night, mark any gap over 4 to 5 feet.
- Adjust before adding: shift a fixture 12 to 18 inches toward the gap first.
- Never skip: steps, grade changes, and the final approach to the entry door.
| Situation | Quick rule |
|---|---|
| Straight, wide walkway | 8–12 ft, paired or staggered |
| Standard front path | 6–8 ft, staggered |
| Steps or curve | 4–6 ft, tighter on inside edge |
| Dark gap found in walk-test | Move nearest fixture 12–18 in, don’t add yet |
Why Homeowners Get Path Light Spacing Wrong
The biggest misconception in path lighting isn’t about distance at all. It’s the belief that more fixtures automatically means a better-lit, safer path. In practice, a path with too many fixtures at even spacing loses depth and starts looking like an airstrip, while a path with fewer, well-placed fixtures and a deliberate stagger reads as intentional and actually guides the eye better after dark.
The conventional advice treats 6 to 10 feet as a formula to apply uniformly across an entire property. That’s backwards. The number should shrink and stretch depending on what’s happening at that specific stretch of path, tight at a step, looser on a straight run, and the only way to know for sure is to walk it after dark before anything gets buried in the ground.
If there’s one thing homeowners should prioritize first, it’s testing over buying. A $15 stake light moved 12 inches solves more spacing problems than a $40 fixture added to a layout that was never walked at night. Get the test right, and the spacing math almost takes care of itself.
— Dave
Get Path Lighting Spacing Right The First Time, Permanently
Testing spacing with stakes and extension cords works for a weekend project, but it doesn’t solve the long-term issues: bulbs that burn out unevenly, low-voltage runs that dim over time, or a layout that needs rethinking every time your landscaping grows in. Custom smart LED outdoor lighting systems should be designed and installed considering your path’s actual curves, steps, and approach points rather than using a generic spacing formula.

Well-designed outdoor lighting systems can be HOA-compliant, weather-engineered, and controllable from a smartphone, allowing adjustment of brightness or color by season without touching fixtures. That matters most on properties with steps, grade changes, or curved walkways where DIY spacing tends to fall apart over time. If your path also runs near a pool or water feature, our partners at R&R Swimming Pools cover the added safety considerations for lighting near wet hardscapes.
Contact a professional outdoor lighting company for a free estimate, and they can help design a permanent path lighting layout that gets the spacing right from day one.
Sources
- Pathway Landscape Lights: Placement, Spacing & Style Tips
- Landscape lighting design guide
- Energy
- How to Fix Pathway Lighting Spacing Problems – lightissues