

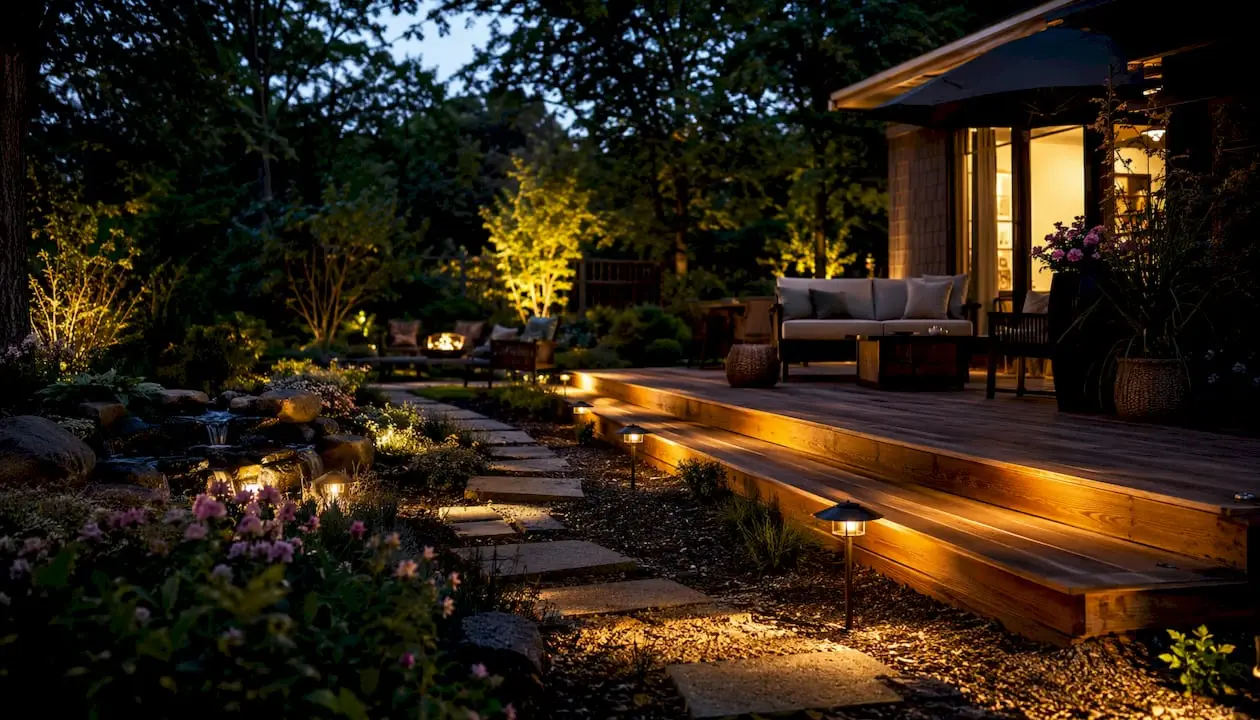
Landscape lighting defines how your yard is used and perceived after dark. A well-planned system turns a daytime investment into a usable, safe, and emotionally appealing outdoor space once the sun sets. The foundation of any successful design rests on three layers: ambient (general illumination), task (functional light for paths and steps), and accent (focused light on features). Lutron’s layering guidance and IES principles both treat this framework as the starting point, not an optional upgrade.
Three things lighting does for your property:
- Aesthetics: Highlights focal points, reveals texture, and adds curb appeal after dark.
- Safety and security: Illuminates paths, steps, and the perimeter to deter intruders and prevent falls.
- Usability: Extends outdoor living hours with smart controls and scene-based zones.
Foreverglowlighting is a real-world example of a permanent smart LED system that delivers all three, with smartphone control and fixtures invisible by day.
Table of Contents
- What is the role of lighting in landscaping?
- Why does landscape lighting improve your property?
- Which lighting techniques create the best outdoor effects?
- What fixture specs do homeowners need to know?
- How should you plan a landscape lighting layout?
- How do smart controls and energy savings work together?
- What does a landscape lighting installation cost and involve?
- How do you maintain and troubleshoot a landscape lighting system?
- What does a permanent smart LED install look like in practice?
- Key Takeaways
- Lighting deserves a seat at the design table
- Foreverglowlighting: permanent smart LED systems for homeowners
- Useful sources for further reading
What is the role of lighting in landscaping?
Lighting’s role in landscaping goes beyond decoration. Landscape professionals now treat it as a core design element, included in nearly every project rather than added as an afterthought.
The three-layer framework works like this:
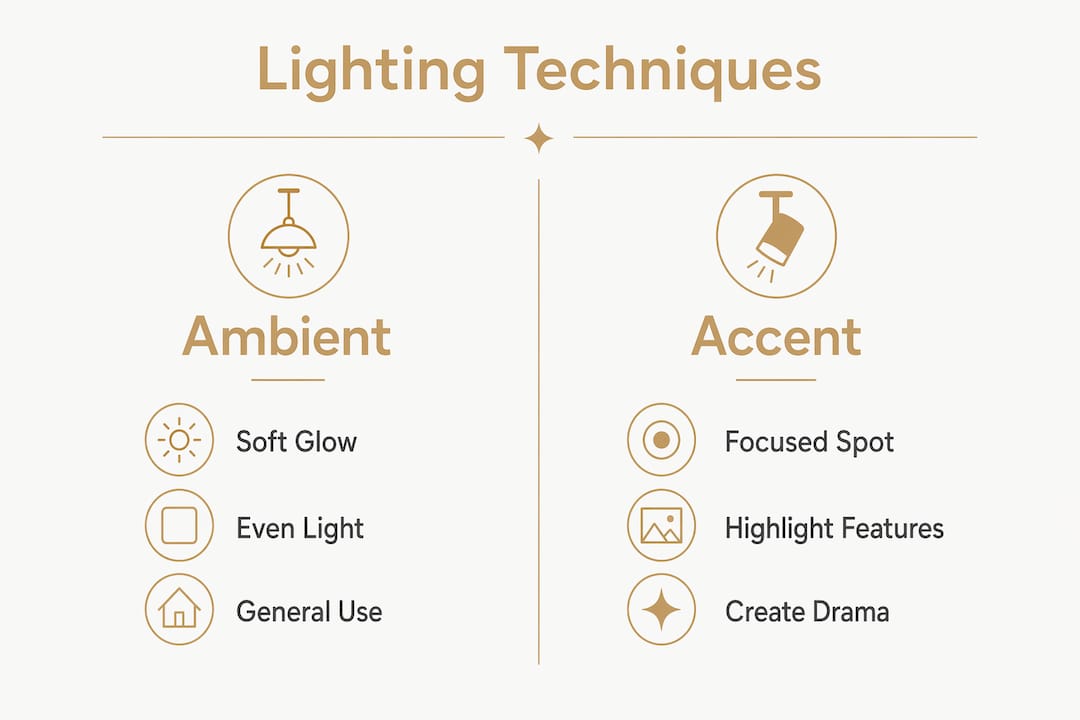
- Ambient layer covers the house, patio, and open lawn with soft, general illumination. Think wall-mounted lanterns, post lights, or string lights overhead.
- Task layer handles specific functions: path lights, step lights, and driveway markers that keep people safe and oriented.
- Accent layer draws attention to focal points. Uplights on a mature oak, a spotlight on a sculpture, or grazing light across a stone wall all belong here.
Balance matters more than brightness. A yard lit with contrast and deliberate shadow reads as sophisticated. One flooded with uniform light looks flat. Lutron’s layering guidance specifically calls out the risk of overlighting: when every surface is equally bright, the eye has nowhere to rest and the space loses depth.
A simple way to think about placement: the house gets ambient and accent, the patio gets ambient and task, planting beds get accent, and the perimeter gets task and security-grade ambient.
Why does landscape lighting improve your property?
A professionally designed system increases nighttime usability, safety, and perceived property value. Premier Landscaping’s research shows that a well-lit patio extends usable evening hours, meaning homeowners recoup more value from their landscape investment.
The safety benefits are direct: lit walkways and steps reduce trip-and-fall risk, and a well-lit perimeter removes the hiding spots that make a property attractive to intruders.
Lighting increases the likelihood that suspicious activity will be seen. Consistent perimeter coverage, especially near entry points, is one of the most cost-effective security measures a homeowner can add.
Psychologically, warm light (2700K–3000K) near seating areas creates the same sense of enclosure and comfort as an interior room. Beam control and contrast shape emotions: a narrow uplight on a tree creates drama; a soft wash across a patio creates calm. The effect is not accidental. It is the result of planned fixture placement, color temperature selection, and deliberate shadow.
Key benefits at a glance:
- Extends outdoor entertaining time into the evening.
- Deters trespassers by eliminating dark zones around the property.
- Highlights architectural features and mature plantings that go unnoticed after dark.
- Adds measurable curb appeal for resale.
Which lighting techniques create the best outdoor effects?
The most impactful techniques each produce a distinct visual result. Choosing the right one for each feature is what separates a composed nighttime yard from a random collection of fixtures.
| Technique | Best Use | Visual Effect | Common Fixture |
|---|---|---|---|
| Uplighting | Trees, columns, facades | Drama, height, focal point | In-ground or stake spotlight |
| Downlighting / moonlighting | Tree canopies, pergolas | Natural, dappled shadow | Mounted directional fixture |
| Silhouetting | Ornamental trees, sculptures | Bold, graphic contrast | Ground spotlight behind subject |
| Grazing | Stone walls, textured surfaces | Reveals texture and depth | Low-angle stake or in-ground |
| Path / step lighting | Walkways, stairs, driveways | Safe passage, subtle glow | Bollard, step light, hardscape insert |
Common mistakes to avoid:
- Placing uplights too close to a tree trunk creates a harsh, unnatural cone of light. Move the fixture out to capture the full canopy.
- Using too wide a beam angle on a narrow focal point washes out the effect. A 15°–25° beam works for most trees; wider spreads suit broad walls.
- Lighting every feature equally removes contrast and makes the yard feel like a parking lot at night.
- Spacing path lights too close together creates a “runway” effect. Industry guidance recommends staggering them 8–10 feet apart.
What fixture specs do homeowners need to know?
Modern landscape lighting is LED-forward. LEDs use up to 75% less energy than halogen and last significantly longer, making them the practical and economical choice for any permanent installation. Understanding a few key specs helps you choose fixtures that achieve the right effect.
| Fixture Type | Lumen Range | Color Temp | Beam Angle | Typical Mount |
|---|---|---|---|---|
| Pathway light | 40–200 lm | 2700K–3000K | Wide | Stake |
| Uplight / spotlight | 200–1,000 lm | 2700K–4000K | 15°–25° | Stake or in-ground |
| Floodlight | 700–3,000 lm | 3000K–4000K | — | Stake or wall |
| Step light | 30–150 lm | 2700K–3000K | Wide | Recessed or surface |
Specs to check before buying:
- IP rating: Outdoor fixtures need at least IP65 for rain resistance; IP67 or higher for in-ground or near-water use.
- GFCI protection: Required by the National Electrical Code for all outdoor circuits.
- Transformer sizing: Size your transformer to no more than 80% of its rated capacity to allow for future expansion and prevent overload.
- Low-voltage systems: 12V systems are safer to install and easier to modify than line-voltage setups. Low-voltage landscape lighting is the standard for residential projects.
Recommended settings: Use 2700K–3000K near living areas and seating for warmth. Reserve 4000K for security zones where crisp, clear visibility matters more than ambiance.
How should you plan a landscape lighting layout?
Plan zones, set a wattage budget, and test placements before burying any wiring. That single step prevents the most common and costly mistakes.
- Sketch a site map. Mark the house footprint, patio, planting beds, trees, paths, and any water features.
- Identify focal points. Choose 3–5 features worth highlighting: a specimen tree, the front facade, a garden sculpture.
- Assign layers. Decide which zones need ambient, task, or accent coverage before selecting fixtures.
- Calculate wattage and load. Add up fixture wattages per zone and size the transformer with a 20% buffer.
- Plan transformer placement. Mount it near a GFCI outlet, at least 12 inches off the ground.
- Check permit requirements. Low-voltage systems under 50V typically do not require a permit, but line-voltage work does. Confirm with your local jurisdiction.
- Test fixture placement. Use temporary stakes or clamp lights to preview the effect before digging.
- Finalize wiring routes. Plan daisy-chain or hub-and-spoke runs to minimize cable length and voltage drop.
Pro Tip: Before committing to fixture locations, spend an evening walking the property with a flashlight aimed at each feature. The angle and distance that look right in the dark are the ones worth marking.
Questions to ask a designer or installer: What transformer size do you recommend, and does it allow for expansion? What is the warranty on fixtures and the control system? Will the system integrate with my existing smart home app?
How do smart controls and energy savings work together?
Smart controls combined with LED fixtures dramatically lower operating costs while making the system more convenient to manage. IES-aligned guidance also notes that targeted controls reduce light pollution and protect local ecosystems.
Common control setups:
- Dusk-to-dawn photocell: Turns the system on at sunset and off at sunrise automatically.
- Time schedules: Set specific on/off windows, such as 7 PM to 11 PM, to reduce overnight energy use.
- Motion-sensor overlays: Boost brightness in security zones when movement is detected, then dim back down.
- Smartphone zoning: Group fixtures into scenes (entertaining, security, off) and switch between them from an app.
Smart outdoor lighting lets you run different scenes for different occasions without touching a single switch.
Pro Tip: Set security zones to stay at 30%–50% brightness all night and ramp to 100% on motion detection. This keeps the property visible without creating the light-pollution complaints that come from full-brightness all-night operation.
What does a landscape lighting installation cost and involve?
A small DIY low-voltage kit is a weekend project. A full permanent smart LED install is a multi-day professional job with design, trenching, and commissioning phases.
Typical installation steps:
- Site design and fixture layout (1 day for a professional).
- Trenching or conduit placement for buried wiring.
- Transformer mounting and circuit connection.
- Fixture installation and initial aiming.
- Control system setup and scene programming.
- Final walkthrough and aiming adjustment after dark.
What drives cost:
- Fixture quality and quantity.
- Trenching through hardscape (significantly more labor than soft soil).
- Smart control integration and app setup.
- Licensed electrician fees for any line-voltage work.
Safety and permit checklist:
- Call 811 before any digging to locate buried utilities.
- All outdoor circuits require GFCI protection per the NEC.
- Line-voltage work (120V) requires a licensed electrician in most states.
- Low-voltage systems (12V) are generally DIY-friendly, but a pro install ensures correct transformer sizing and wiring topology.
If your property has existing fixtures that need updating, a landscape lighting upgrade is often more cost-effective than a full replacement.
How do you maintain and troubleshoot a landscape lighting system?
Simple seasonal checks and an annual tune-up keep a system reliable for years. Most problems trace back to three causes: a tripped GFCI, a loose wire connector, or a photocell that has drifted out of position.
Seasonal maintenance schedule:
- Spring: Re-aim fixtures shifted by frost or soil movement. Clean lenses. Inspect wire connectors for corrosion.
- Summer: Check photocell sensitivity and adjust timer schedules for longer days.
- Fall: Clear debris from fixture housings. Inspect transformer for moisture intrusion.
- Winter: In cold climates, protect exposed connectors with weatherproof tape. If your region gets heavy snow, review how to protect landscaping during snow removal to avoid fixture damage from plowing.
Troubleshooting flow: Fixture dark? Check the transformer’s circuit breaker first. Still dark? Test the GFCI outlet. Next, inspect the wire connector at the fixture for corrosion or a loose crimp. Finally, check the photocell or timer settings. A correctly sized transformer with a 20% load buffer rarely trips under normal operation, so a tripped breaker usually signals an overloaded run.
What does a permanent smart LED install look like in practice?
Permanent smart LED installs deliver invisible daytime aesthetics and reliable nighttime control. That is the core promise, and it is what separates a professionally installed system from a plug-in kit.
A homeowner starting with an unlit yard typically moves through this sequence with Foreverglowlighting: a site consultation to map focal points and zones, transformer sizing based on total fixture load, buried wiring with conduit through hardscape areas, on-site fixture aiming after dark, and final smart control setup with scene programming. The result is a system that runs on a schedule, responds to motion, and can be adjusted from a smartphone without touching a single fixture.
What to request in any professional proposal:
- A written wattage plan showing load per zone and transformer capacity.
- Fixture specs including lumen output, color temperature, and IP rating.
- Warranty terms for both fixtures and the control system.
- A live control demo before final sign-off.
Foreverglowlighting’s Charlotte-area installations show what a layered LED system looks like on a finished property, from roofline accents to planting bed uplights. Professional installation also means the wiring is integrated cleanly into hardscapes during construction, avoiding the visible conduit that retrofit installs often leave behind.
Key Takeaways
Landscape lighting works best when it is planned as a structural element, not added after the fact, with layered LED fixtures, smart controls, and a correctly sized transformer.
| Point | Details |
|---|---|
| Use the three-layer framework | Combine ambient, task, and accent lighting to create depth, safety, and visual interest. |
| Choose LED fixtures | LEDs use up to 75% less energy than halogen and are the industry standard for residential projects. |
| Size your transformer correctly | Keep load at no more than 80% of transformer capacity to prevent overload and allow for expansion. |
| Test placements before digging | Use temporary stakes or clamp lights to confirm fixture positions before committing to buried wiring. |
| Foreverglowlighting permanent systems | Foreverglowlighting delivers smartphone-controlled, permanently installed LED systems with on-site aiming and warranty support. |
Lighting deserves a seat at the design table
The most common mistake homeowners make is treating lighting as the last item on the landscape budget. By the time the hardscape is poured and the plantings are in, the opportunity to integrate wiring cleanly has passed. Retrofit conduit runs along the surface, connectors sit exposed, and the whole system looks like an afterthought because it was one.
Lighting planned alongside hardscaping and planting beds produces cleaner results at lower cost. The wiring disappears into the structure. The fixtures sit exactly where the design calls for them. The nighttime result looks intentional because it was designed that way from the start.
The argument for design-first lighting is not aesthetic snobbery. It is practical: integrated wiring costs less to install, less to maintain, and produces a better result. If you are planning a landscape project, add lighting to the first conversation, not the last.
Foreverglowlighting: permanent smart LED systems for homeowners
If you want a permanent, smartphone-controllable LED system that disappears into your roofline by day and delivers full scene control by night, a professional install is the most direct path.

Foreverglowlighting specializes in exactly that for homeowners across the Charlotte area:
- Permanent LED track systems installed flush to the roofline and structure, invisible during daylight hours.
- Smart control integration with smartphone app access, scene programming, motion-sensor overlays, and scheduled zones.
- Warranty and ongoing service covering fixtures, wiring, and control systems after installation.
For homeowners interested in creative uses beyond seasonal lighting, the same system handles accent, security, and entertaining scenes year-round. Visit the landscape lighting service page to request a free estimate and see what a permanent system looks like on a finished property.
Useful sources for further reading
- Lutron: Layering Lighting at Home — The foundational three-layer framework (ambient, task, accent) explained for residential settings.
- Alcon Lighting: Landscape Lighting Guide — IES principles on targeted light levels, glare control, color temperature, and minimizing light pollution.
- Tru-Scapes: How to Design a Professional Landscape Lighting Layout — Practical spec guidance on lumen ranges, path-light spacing, transformer sizing, and wiring topology.
- National Association of Landscape Professionals (The Edge) — Industry perspective on integrating lighting into design from the start and using 3D night visualizations.
- Premier Landscaping: How Outdoor Lighting Extends Beauty and Function — Case-based argument for usability and value gains from professional lighting.
- Foreverglowlighting: Landscape Lighting Layering Techniques — Homeowner-focused deep dive on layering methods and fixture placement.
- Foreverglowlighting: Why Professional Landscape Lighting Design Pays Off — Before/after examples and the value case for professional installation over DIY.