
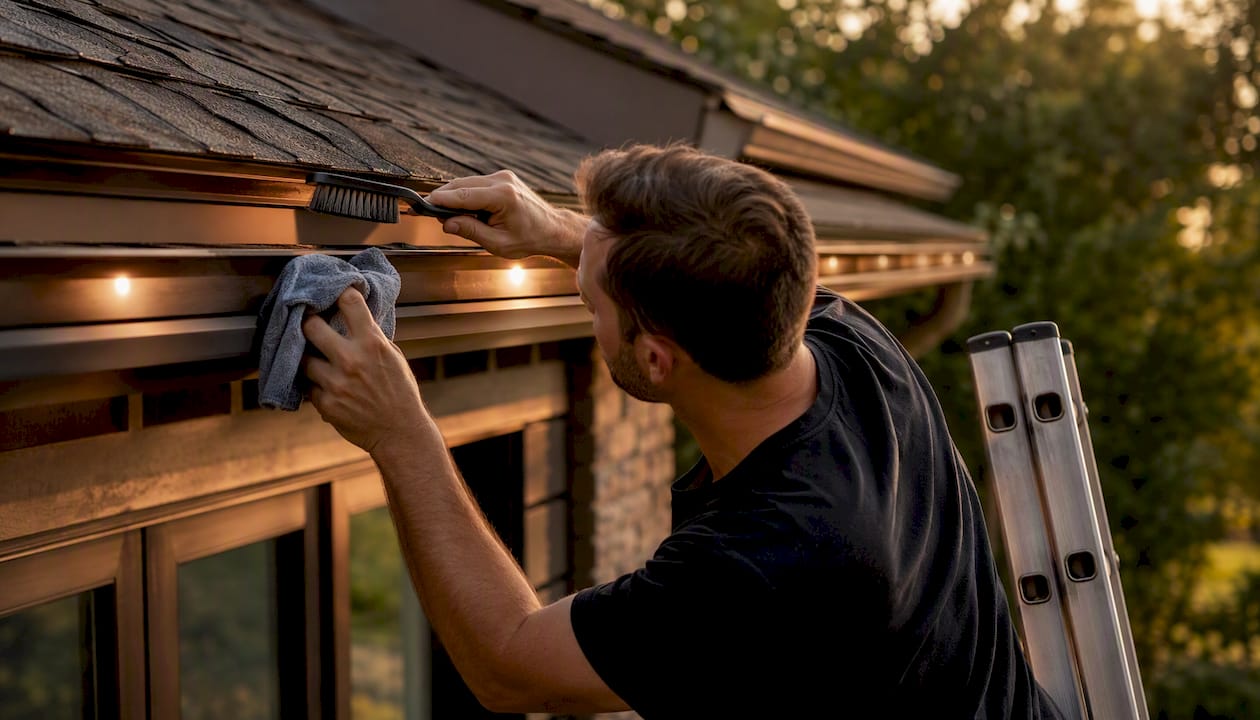
Homeowners can safely perform basic surface cleaning of accessible roofline LED track lenses and aluminum profiles — but power must be isolated at the breaker before touching any fixture, and sealed or IP-rated components should never be opened. This single rule separates safe DIY maintenance from the work that belongs to a professional. According to VST Lighting’s diffuser channel guidance, neglected maintenance can significantly reduce light output within a couple of years, which makes a consistent cleaning cadence worth building into your regular home care routine.
Before you do anything else, take these three steps:
- Isolate power at the breaker serving the roofline circuit. Treat each fixture as live until confirmed otherwise with a non-contact voltage tester.
- Secure your access. Set up a fiberglass ladder on level ground, wear non-slip footwear, and put on gloves and eye protection.
- Photograph the current condition of every fixture, channel, and visible wire connection before touching anything. Those photos protect your warranty and speed up any technician diagnosis later.
Table of Contents
- What does a safe pre-cleaning checklist look like?
- How do you clean roofline LED lenses, channels, and IP65 strips safely?
- When should you call a professional instead of cleaning yourself?
- How often should you clean and inspect your roofline lighting system?
- How do you troubleshoot common roofline lighting problems safely?
- What does a professional roofline LED inspection actually involve?
- How do you choose the right contractor or maintenance plan?
- Key Takeaways
- Why professional maintenance matters more than most homeowners realize
- Foreverglowlighting’s GlowCare service keeps your system performing year-round
- Useful sources
What does a safe pre-cleaning checklist look like?
Safe access and power isolation are non-negotiable before any cleaning of permanent roofline LED systems. Skipping either step turns a routine task into an electrical or fall hazard.
Power isolation
Turn off the dedicated breaker for your roofline lighting circuit. Confirm the circuit is dead with a non-contact voltage tester held near the fixture leads. This “lockout mindset” — treat it as live, verify it is not — is the same discipline electricians use on commercial jobs, scaled for a home system.
Safe access
- Use a fiberglass (non-conductive) ladder rated for your weight plus tools.
- Place the ladder feet on firm, level ground, and have a second person stabilize it where possible.
- Wear rubber-soled, non-slip footwear, work gloves, safety glasses, and a dust mask.
- If your roofline pitch is steep, surfaces are wet, or you cannot comfortably reach the work area, stop and schedule a professional visit instead.
Electrical precautions
- Never open sealed housings or pry gaskets to “check inside.”
- Do not work in rain or immediately after rain, when surfaces are still wet.
- Photograph all wire terminations and connector positions before any intervention.
Minimum equipment list
Non-contact voltage tester, fiberglass ladder, microfiber cloths, soft-bristle brush, pH-neutral (mild) dish soap diluted in water, and isopropyl alcohol for stubborn grime on rigid diffusers only. Per PacLights’ exterior track guidance, mild soap and soft cloths are the correct cleaning agents — harsh chemicals risk damaging coatings and gaskets.
Pro Tip: If you cannot isolate power at a clearly labeled local breaker, or if the roofline is more than one story above a hard surface, call Foreverglowlighting for a professional maintenance visit rather than attempting DIY access.
How do you clean roofline LED lenses, channels, and IP65 strips safely?
Homeowners may do surface cleaning only. Opening or wiping an uncoated PCB (IP20 LED tape) is unsafe and can permanently damage the strip. The Gradus cleaning and maintenance guidelines are explicit: do not clean IP20 tapes directly, and for IP65 variants, use only a dry cloth with gentle padding — no firm wiping.
Understanding IP ratings before you start
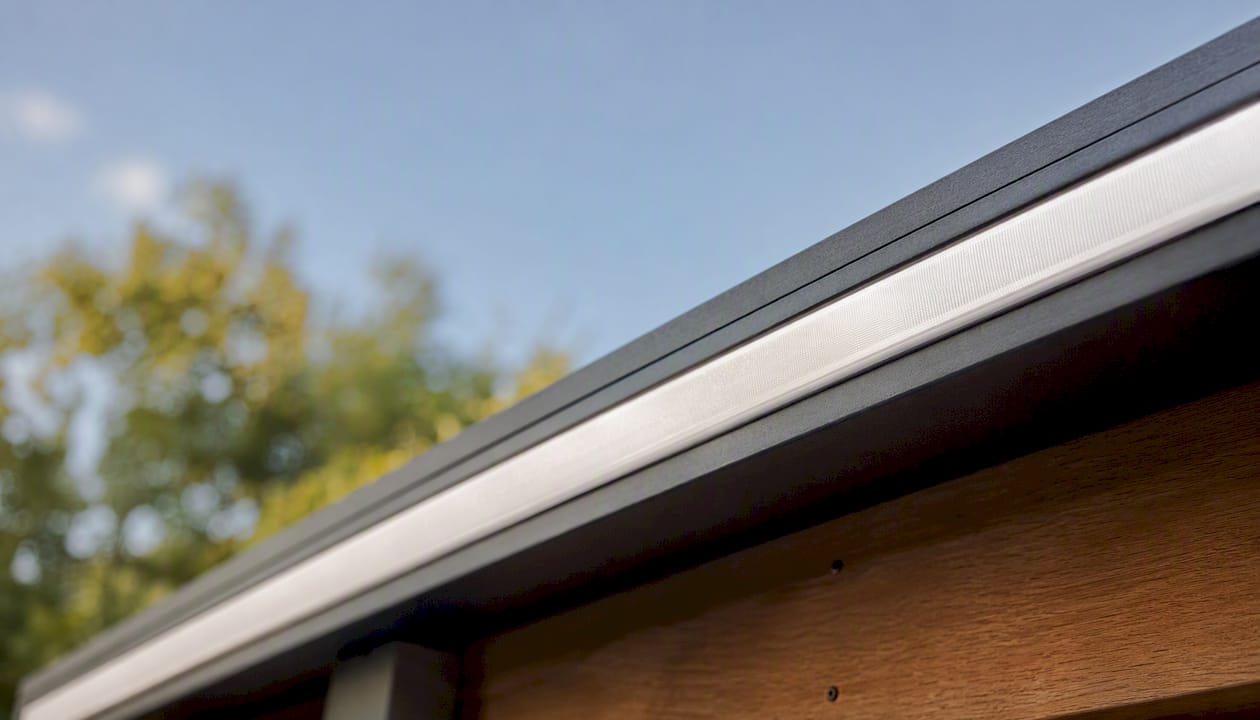
IP20 strips have an uncoated circuit board and are typically housed inside a sealed aluminum profile. You clean the profile’s diffuser lens, not the strip itself. IP65 strips carry a clear silicone sleeve and can tolerate gentle surface contact, but still require a light touch.
Step-by-step cleaning procedure
- Isolate power at the breaker and verify with a non-contact voltage tester.
- Document condition with photos of each channel, lens, and visible connector.
- Remove loose debris using a soft-bristle brush or low-pressure compressed air along the channel exterior.
- Wipe the diffuser lens and aluminum profile with a microfiber cloth dampened with diluted pH-neutral soap. Work in one direction; do not scrub.
- For accessible IP65 strip surfaces, use a dry or very lightly damp microfiber cloth with gentle padding only — consistent with Gradus guidance for coated tapes.
- For mud or heavy soiling on waterproof strips, LEDIA Lighting recommends starting with a soft brush, then gentle rinsing with low-pressure water. Protect all connectors from direct water contact.
- Allow full drying before restoring power at the breaker — at minimum 30 minutes in dry conditions.
What not to do
- No abrasive pads, scouring sponges, or steel wool on any surface.
- No pressure washers or garden hose nozzles set to jet.
- Do not open sealed housings or pry gaskets.
- No isopropyl alcohol on silicone sleeves unless the manufacturer explicitly permits it.
When should you call a professional instead of cleaning yourself?
Call a professional when you see moisture inside housings, cracked or discolored channels, persistent flicker, burned connectors, or any evidence that a seal has already failed. Surface cleaning will not fix these conditions — and attempting to do so can make them worse.
Red flags that require professional attention
- Water pooling or fogging visible inside a lens or channel
- Visible micro-fissures or cracks in the housing or profile
- Discolored, frayed, or brittle wiring at any connection point
- Repeated breaker trips or blown fuses on the roofline circuit
- Sections that remain dim after cleaning
- Connectors showing corrosion, green oxidation, or burn marks
- Any prior evidence of seal breach or previous DIY repair attempts
Micro-fissures are the failure mode most homeowners miss. A hairline crack in a housing admits moisture during rain, which then corrodes the driver and LED contacts over weeks. By the time a section goes dark, the damage has spread well beyond the visible crack. Professional technicians inspect under magnification and catch these early, which is why proactive inspection consistently prevents full system outages.
Before you call, document everything
Photograph each problem area, note when symptoms appear (after rain, after temperature swings, only at startup), and log any controller error messages or connectivity drops. That information cuts diagnostic time significantly on a technician visit.
How often should you clean and inspect your roofline lighting system?
A three-tier cadence keeps permanent roofline LED systems performing reliably: homeowner surface cleaning, periodic technician spot checks, and an annual in-depth professional inspection. The right frequency within that framework depends on your environment.
| Environment | Surface Cleaning | Professional Inspection |
|---|---|---|
| Clean suburban (low dust, no salt) | Once per year | Annual |
| Dusty, construction zone, or high pollen | Quarterly | Every 6 months |
| Coastal (salt air) | Quarterly | Every 6 months |
| Food service or high-debris commercial | Monthly | Quarterly |
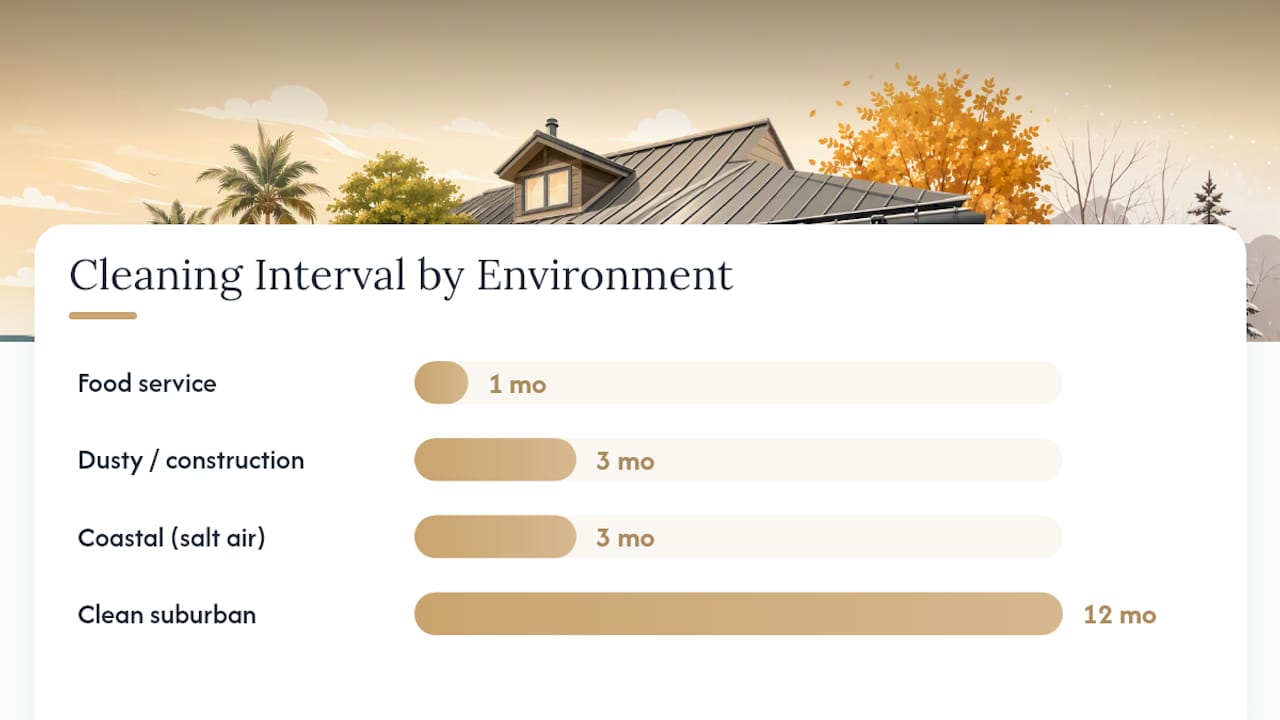
VST Lighting’s diffuser channel guide supports this tiered approach, noting that cleaning frequency should scale with environmental conditions to protect light output. Pairing your roofline lighting check with a seasonal home maintenance checklist is a practical way to stay consistent without adding a separate calendar item.
What a professional annual inspection covers
- Gasket condition check and replacement where needed
- Micro-fissure inspection of housings and channel joints
- Driver output and voltage verification
- Insulation resistance testing
- Photometric spot checks for lumen or color drift
- Firmware and control system audit
- Fastener resealing and torque check
Per BKlite’s outdoor LED maintenance checklist, annual in-depth inspections should include driver and insulation tests alongside the standard visual checks Coastal properties should also factor in corrosion control on aluminum channels; Bear Light Studios’ channel material guide notes that aluminum profiles benefit from occasional protective coating inspection, while PVC channels need UV-focused checks for micro-cracks.
Professional visit time for a single-family roofline typically runs two to four hours. Final pricing depends on run length, access difficulty, and control system complexity — contact Foreverglowlighting for a specific quote.
How do you troubleshoot common roofline lighting problems safely?
Some temporary fixes can restore safe operation, but live wiring repairs are never a homeowner task. The goal of troubleshooting is to stabilize the system and collect information for a technician.
| Symptom | Immediate Safe Action |
|---|---|
| Flickering sections | Power-cycle at breaker; if it persists, document and call a pro |
| Whole-run dimming | Check controller settings; clean diffuser lens; schedule inspection |
| Intermittent sections | Isolate circuit; photograph connector condition |
| Controller unresponsive | Reboot controller per manufacturer steps; check Wi-Fi signal |
| Visible moisture inside housing | Isolate power immediately; do not re-energize; call a pro |
Before calling a technician, record
- Time-stamped photos of each symptom
- Weather conditions when the problem appears
- Any recent maintenance, modifications, or physical impacts
- Control app error logs or connectivity history
Never energize a fixture with visible moisture inside. Water inside a sealed housing means the seal has failed, and powering the circuit risks a short circuit or driver damage.
What does a professional roofline LED inspection actually involve?
Professional inspections go well beyond surface cleaning. Technicians test electrical integrity, seal performance, and component-level health to catch failures before they cascade into full system outages.
Inspection methodology
- Full visual inspection of channels, lenses, gaskets, and wire runs
- Gasket and micro-fissure inspection, often under magnification or with an IR thermometer to detect thermal anomalies
- Connector and solder joint checks for oxidation, cold joints, or mechanical stress
- Driver output verification with a multimeter and clamp meter
- Insulation resistance testing (megger) to detect hidden leakage paths
- Photometric sample testing with a lux or foot-candle meter to identify lumen or color drift
- Control system and firmware audit, including RDM-capable interface checks where applicable
Technician field kit
Multimeter, clamp meter, IR thermometer, lux/foot-candle meter, insulation resistance tester (megger), low-pressure air gun, contact cleaner, and a control interface compatible with the installed system.
After the visit, a professional should provide a written service report documenting photos, test values, parts replaced, recommended repairs, and a severity rating for each identified issue. That report is your maintenance record and supports any warranty claims.
How do you choose the right contractor or maintenance plan?
Choose contractors who document pre- and post-service conditions, provide a written warranty on seals and installation work, and offer a recurring maintenance plan. Foreverglowlighting’s GlowCare subscription is one example of a structured recurring service built specifically for permanent roofline LED systems.
Vendor vetting checklist
- Documented experience with permanent roofline LED track installations
- Written service reports provided after every visit
- Proof of licensing and general liability insurance
- References or local project examples (Charlotte-area installs, for instance)
- Clear warranty terms covering both parts and labor
Questions to ask before signing
- What IP-rated products were used in the original installation?
- Do you perform insulation resistance testing on annual visits?
- What replacement parts do you stock for same-day repairs?
- How are ladder placement and fall protection handled on your visits?
Service contract terms to request
Response SLA for urgent issues, scope of included inspections and cleaning, a spares allowance for common wear parts, labor and materials pricing for out-of-scope repairs, and a process for control system firmware updates. Foreverglowlighting’s roofline installation and maintenance services include local Charlotte-area project experience and the GlowCare recurring maintenance option for homeowners who want professional oversight without managing it themselves.
Key Takeaways
Isolating power at the breaker before any cleaning is the single most important step in a roofline track system cleaning guide — everything else depends on it.
| Point | Details |
|---|---|
| Power isolation first | Always turn off the breaker and verify with a non-contact voltage tester before touching any fixture. |
| Surface cleaning only | Clean diffuser lenses and aluminum profiles; never open sealed housings or wipe uncoated IP20 strips directly. |
| Watch for moisture and cracks | Fogging inside lenses, micro-fissures, or repeated breaker trips all require professional repair, not cleaning. |
| Annual professional inspection | Schedule in-depth inspections yearly — quarterly or more often in coastal, dusty, or high-debris environments. |
| Foreverglowlighting GlowCare | Foreverglowlighting offers recurring maintenance subscriptions for permanent roofline LED systems in the Charlotte area. |
Why professional maintenance matters more than most homeowners realize
The conventional wisdom on roofline LED maintenance tends to stop at “wipe the lens once a year.” That advice is not wrong — it is just incomplete in a way that costs homeowners money.
The real risk in a permanent roofline track system is not dirt on the lens. It is the micro-fissure that opened in a housing joint after last winter’s freeze-thaw cycle, or the gasket that compressed unevenly during installation and has been admitting humidity ever since. Neither of those shows up on a casual visual check. Both of them will eventually kill a driver or corrode a connector run, and by then the repair bill is significantly higher than a preventive inspection would have been.
Foreverglowlighting’s position on this is straightforward: professional maintenance is not an upsell — it is the mechanism that makes a permanent lighting investment actually permanent. The technicians who installed your system know where the stress points are, what the original seal condition looked like, and what test values indicate a component approaching failure. That institutional knowledge is what separates a GlowCare visit from a generic handyman cleaning the outside of your fixtures.
For homeowners with permanent roofline lighting in Charlotte, documented inspections have consistently identified early-stage seal degradation that would have required full channel replacement within a season if left unaddressed. The cost difference between resealing a gasket and replacing a damaged channel run is substantial.
Foreverglowlighting’s GlowCare service keeps your system performing year-round
Permanent roofline LED lighting is a long-term investment — and Foreverglowlighting’s GlowCare maintenance subscription protects it. Rather than waiting for a section to go dark or a controller to drop offline, GlowCare clients receive scheduled professional inspections, documented service reports, and priority response for any issues that come up between visits.

The permanent lighting installation process at Foreverglowlighting includes system documentation from day one, which means every GlowCare visit starts with a baseline — not a guessing game. For property managers overseeing multiple properties, the commercial permanent lighting guide outlines how maintenance scopes scale across larger installations. Contact Foreverglowlighting today to request a free inspection quote or ask about enrolling in a GlowCare plan.
Useful sources
The following manufacturer guides and industry resources informed this article. Check the product-specific cleaning instructions for your installed system before attempting any cleaning — generic advice does not always apply to your exact IP rating or channel material.
- LED Architectural Lighting LED Tapes – Cleaning & Maintenance Guidelines (Gradus)
- LED Silicone Diffuser Channel: Complete Guide (VST Lighting)
- PVC vs. Aluminum: Best Material for Your Govee Track – Bear Light Studios
- Maintenance Checklist for Outdoor LED Wall Wash Lighting | BKlite
- Exterior Track Lighting: Lighting Explained – PacLights
- Recommended Cleaning Methods for Outdoor Waterproof LED Strips – LEDIA Lighting
Recommended
- Roofline Lighting Installation Charlotte NC | Forever Glow
- Professional Oelo Roofline Lighting Installation In Charlotte, NC | Forever Glow Lighting
- Professional Oelo Roofline Lighting Installation In Weddington, NC | Forever Glow Lighting
- Professional Oelo Roofline Lighting Installation In Charlotte, NC | Forever Glow Lighting