
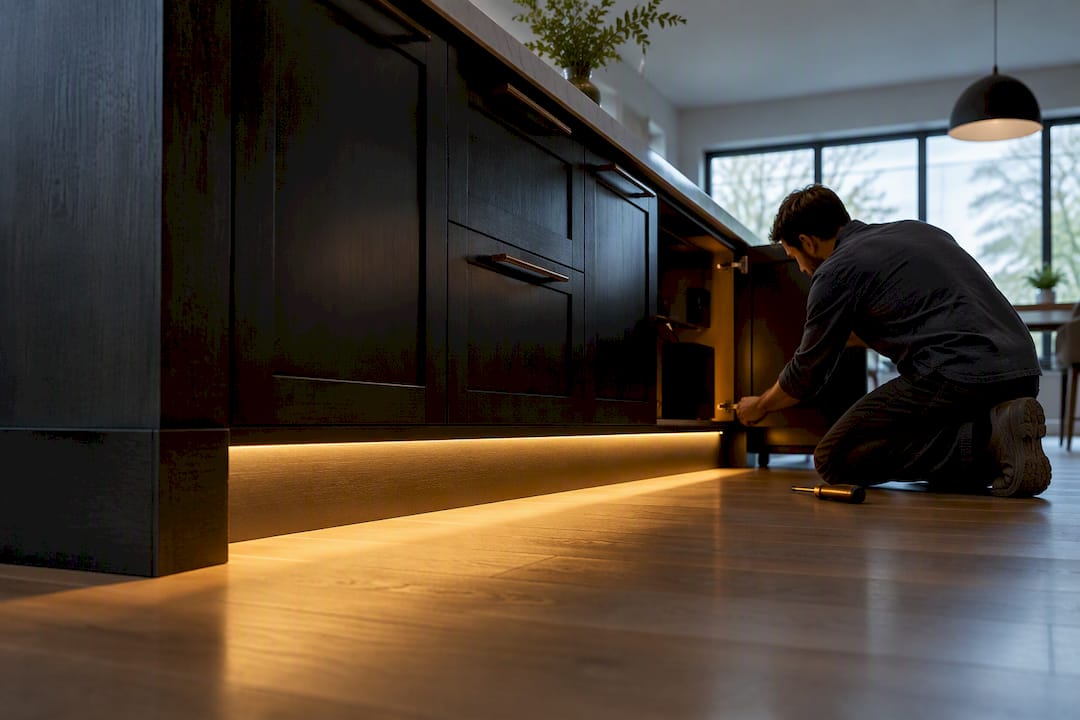
Toe kick lighting gives kitchens a low-level ambient glow that improves nighttime navigation without the glare of overhead fixtures. For most homes, the easiest and most reliable choice is a concealed warm-white LED strip set in an aluminum channel, wired to a dimmer and paired with a motion sensor. This setup delivers safety, layered lighting, and low maintenance in one straightforward installation that a contractor can plan for and service later.
TL;DR:
- Using a dimmed motion sensor LED strip is the simplest and most reliable setup for most kitchens, combining safety, low maintenance, and layered lighting.
- Longer runs should be planned with recessed or surface-mounted channels and joints placed near access panels to ensure serviceability and a seamless appearance.
- Specifying high-CRI, warm-white (2700K to 3000K) LED tape with proper diffusers and drivers improves color rendering and consistency, especially near food prep areas.
- Dark cabinets and matte floors require slightly higher output lighting to prevent under-illumination and uneven floor washout.
- Installing the system during cabinet construction and labeling driver locations will make future troubleshooting easier and maintain a clean built-in look.
Table of Contents
- 1. Ten toe kick lighting ideas and when to use each
- 2. Placement, spacing, and layout rules of thumb
- 3. Fixture and technology options worth specifying
- 4. Installation best practices for long-term serviceability
- 5. Color temperature, CRI, and dimming guidance
- 6. Design examples for different kitchen styles
- 7. Maintenance, safety, and code basics
- 8. What I prioritize when specifying toe kick lighting
- 9. How Forever Glow Lighting can help with your kitchen
- Sources
- FAQ
1. Ten toe kick lighting ideas and when to use each
The right toe kick style depends on cabinet layout, floor finish, and how much control you want over brightness and color. These options cover the range from simple accent strips to fully programmable scenes.
- Continuous concealed strip: A single uninterrupted LED run gives cabinets a floating look, best for modern kitchens with minimal trim.
- Segmented zones: Breaking the run into independently switched sections works well for islands and walkways where different areas need separate control.
- Motion-activated night light: A sensor-triggered strip turns on at low output when someone walks by, useful for late-night kitchen trips without flipping switches.
- Recessed micro-pucks: Small round fixtures spaced along the toe kick create a spotlight effect rather than a wash, suited to accenting specific cabinet sections.
- Backlit toe kick panels: Light bounces off a diffuser panel to mimic furniture-grade lighting, a favorite for high-end custom cabinetry.
- RGB or mood scenes: Color-changing strips can shift for holidays or entertaining, though they work best used sparingly so the kitchen still reads clean on an ordinary evening.
- Raised-plinth lighting: Furniture pieces with a raised base benefit from a thin strip along the underside edge, giving the piece a lifted, weightless appearance.
- Contrast strategies for dark cabinets and light floors: Darker toe kicks need slightly higher output to read clearly against reflective flooring, while light cabinets can run dimmer.
- Staggered runs and joint placement: Placing seams near removable panels rather than in the middle of long runs makes future repairs far easier.
- Combined toe-shelf and open-shelf lighting: Pairing toe kick strips with under-shelf lighting on open shelving creates a layered glow that ties the whole kitchen together.
Most kitchens do well with a combination of two or three of these rather than every option at once. A continuous strip with a motion sensor covers the basics, and a segmented zone near the island adds flexibility without overcomplicating the wiring.
2. Placement, spacing, and layout rules of thumb
Getting the physical layout right matters as much as picking a fixture. A few placement decisions determine whether the light reads as a soft glow or an eyesore.
- Set the strip back far enough behind the toe kick lip that the individual diodes are not visible from a standing position, since exposed diodes create harsh hot spots instead of a smooth wash.
- Keep strip runs continuous where possible and space puck lights close enough together to avoid visible gaps, since wide spacing on point-source fixtures creates uneven scallops of light on the floor.
- Plan extra attention at islands, inside corners, and cabinet returns, where light can either pool unevenly or fail to reach at all if the run stops short.
- Break long runs into separate zones when different areas need independent control, such as a kitchen island that stays lit while the perimeter dims for a movie night.
- Remember that dark cabinets and matte floors absorb more light than pale cabinets and glossy tile, so the same fixture can look dramatically different depending on the finishes around it.
Accent lighting like this is meant to sit below task lighting levels rather than compete with it, according to a recent kitchen lighting guide that lays out recommended layering practices for residential kitchens. Getting the offset and spacing right is what keeps that accent layer looking intentional instead of like an afterthought.
3. Fixture and technology options worth specifying
Not all LED tape is built the same, and the differences show up the moment you start dimming or running longer lengths. Knowing the terms helps you write a clear spec, even if a contractor handles the install.
- Standard SMD tape is the most common and least expensive option, suited to straightforward warm-white runs where color accuracy near prep surfaces is not a priority.
- COB tape packs diodes closer together for a smoother, dot-free line of light, which our guide on LED tape types and mounting options covers in more detail for homeowners comparing form factors.
- High-CRI tape renders colors more accurately and is worth the upgrade near any surface where food prep or fine detail matters.
- Aluminum channels with a frosted diffuser hide the diodes, protect the strip from moisture and impact, and give the light a softer edge instead of a hard line.
- Driver choice affects run length: 12V systems tolerate shorter runs before voltage drop dims the far end, while 24V systems support longer continuous runs with less falloff.
- Dim-to-warm (D2W) technology shifts color temperature as it dims, mimicking the amber glow of an old incandescent bulb, though stress testing from the U.S. Department of Energy found that D2W products use different electrical architectures than standard LEDs and carry their own reliability trade-offs, so it pays to specify a tested module rather than the cheapest option available.
- Control options range from a basic motion sensor to a wall dimmer to full smartphone app control over Bluetooth or Wi-Fi, each adding convenience at a different cost and complexity level.
One well-documented finding from the DOE testing: D2W LED products can behave differently under stress than standard LEDs, which is why reliable form factors matter more than the marketing claim on the box.
4. Installation best practices for long-term serviceability
The best toe kick lighting installs disappear during the day and never need to be fought with during a repair. That outcome depends almost entirely on decisions made before the strip ever gets powered on.
- Plan cable runs during cabinet construction rather than retrofitting afterward, since routing wire through the cabinet frame before it’s assembled avoids exposed conduit later.
- Place joints and connectors near access panels so a future repair does not mean pulling an entire cabinet run apart.
- Stagger connections across the length of the run to make troubleshooting easier if one section fails.
- Choose recessed or surface-mounted channels based on how much protection the location needs. Recessed channels sit flush and take more planning, while surface-mounted channels are faster to retrofit but slightly more visible.
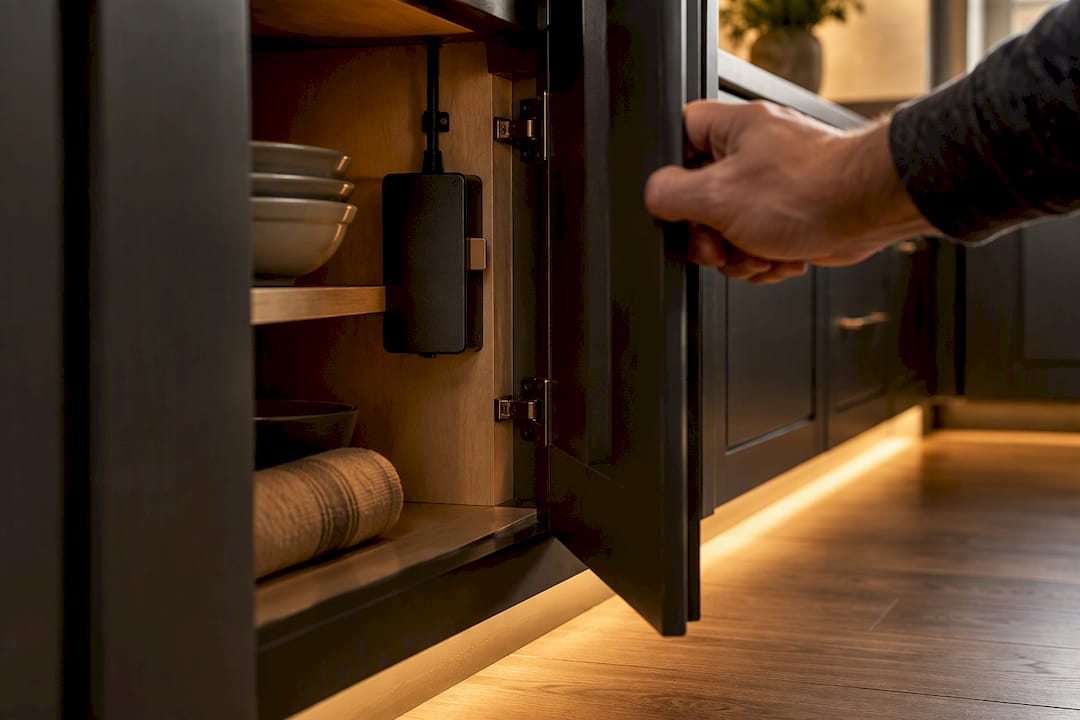
- Locate drivers where they can ventilate and stay accessible, on a dedicated circuit sized for the total run length rather than daisy-chained past its rated capacity.
- Bring in a licensed electrician for any new circuit work, and ask about load calculations, GFCI protection near sinks, and how they plan to label the panel for future service.
Concealing fixtures behind a channel and diffuser both hides the diodes and protects the strip, and planning the cable run during the cabinet build is the professional practice that gets you the truly invisible look, according to installation guidance discussed in a DIY wiring forum thread on toe kick lighting. Retrofitting an existing kitchen can still work, but it usually means accepting a surface channel or a more visible access point somewhere in the run.
Pro Tip: Ask your installer to label the driver location on the inside of a nearby cabinet door. It saves real time the first time something needs troubleshooting.
5. Color temperature, CRI, and dimming guidance
Getting the light’s color right matters more than most homeowners expect, since a mismatched toe kick strip can clash with the rest of the kitchen’s lighting even when the brightness is correct.
- Choose 2700K to 3000K for a warm, cozy ambience that pairs well with wood cabinetry and traditional finishes.
- Choose 3000K to 3500K for a slightly cooler, more neutral tone that suits modern kitchens with white or gray palettes.
- Specify CRI 90 or higher near any prep area where accurate color rendering matters, a benchmark also recommended in our guide to choosing CCT and CRI for under-cabinet lighting.
- Match the toe kick’s color temperature to your under-cabinet and accent lighting so the layers blend instead of visibly competing.
- Keep toe kick output at accent level rather than task level. It should be bright enough to navigate by, not bright enough to read by.
- If you want the warm-dimming look of D2W, budget for a tested product line, since DOE stress testing flagged reliability differences across D2W architectures that a standard dimmable LED does not share.
Accent lighting belongs at a lower footcandle level than task lighting, according to layering guidance in the MyHomePros kitchen lighting guide, which recommends planning accent layers to add atmosphere rather than replace primary task fixtures.
6. Design examples for different kitchen styles
Pairing the right technology with the right kitchen style keeps the finished look cohesive instead of feeling like an add-on.
- Modern and minimal: A continuous concealed warm-white strip under flat-panel cabinetry creates the floating effect that defines this style.
- Traditional and wood-toned: A 2700K strip behind a soft diffuser mimics the glow of furniture lighting and complements stained wood finishes.
- High-contrast kitchens: Dark cabinets against light floors need either higher output or segmented zones to avoid looking underlit against the reflective surface.
- Accent and seasonal modes: RGB capability is worth having for holidays or entertaining, but the everyday setting should default to a warm, steady tone rather than a rotating color show.
- Photo-friendly kitchens: Choosing a diffuser and keeping diodes out of view produces an even spread of light that looks better in real life and in photos, avoiding the dotted look of exposed tape.
7. Maintenance, safety, and code basics
A quick seasonal check keeps toe kick lighting running well for years and catches small problems before they become bigger ones.
- Wipe diffusers periodically to remove dust buildup that dims the output over time.
- Check driver vents for blockage and replace a driver that shows signs of failure rather than waiting for it to fail completely.
- Use listed drivers and proper grounding, and consult a licensed electrician for any new branch circuit work.
- Flickering or uneven light usually points to voltage drop over a long run or a dimmer that is not compatible with the LED driver.
- Keep channels and diffusers in place to protect strips from impacts, spills, and moisture near sinks or dishwashers.
8. What I prioritize when specifying toe kick lighting
The goal on any custom install is a fixture that’s invisible by day and brilliant by night, controlled entirely from a smartphone. That standard applies whether we’re lighting a roofline or a kitchen toe kick. The habit that matters most is planning for serviceability from the start: running cable during construction, placing joints where a technician can actually reach them, and treating the accent layer as one part of a larger lighting plan rather than an isolated afterthought.
— Dave
9. How Forever Glow Lighting can help with your kitchen
Toe kick lighting is easiest to get right when someone handles the design, wiring, and controls together instead of piecing it together after the cabinets are already installed. Forever Glow Lighting designs and installs custom under-cabinet and interior accent lighting with smartphone control built in, so dimming, color, and scheduling all live in one app.

- A site visit and free estimate to map out toe kick and under-cabinet runs before any wiring begins.
- A design plan that places joints and drivers for long-term serviceability, not just a clean first install.
- A clear installation timeline so you know what to expect before work starts, outlined on our installation process page.
If you’re weighing costs before committing, our breakdown of under-cabinet lighting cost per foot is a useful starting point. Reach out for a free estimate and see what a professionally planned system looks like in your own kitchen.
Sources
- Solid-State Lighting—Dim-to-Warm (D2W) LED Stress Testing (U.S. DOE)
- Kitchen lighting guide | MyHomePros
- How should I wire toe-kick lighting for bathroom vanity? | DIY Stack Exchange
FAQ
Is toe kick lighting worth it?
Yes, for most kitchens it adds meaningful nighttime navigation and a layered look without high energy use or ongoing upkeep. It works best as an accent layer alongside task and ambient lighting rather than as a replacement for either.
Where should toe kick lighting be placed?
Set it back far enough behind the toe kick lip to hide the diodes, and run it continuously along cabinet bases, islands, and inside corners for even coverage. Break long runs into zones near islands or walkways where you want separate on-off control.
What are some creative toe kick lighting ideas?
Options range from a simple continuous warm-white strip to motion-activated night lights, backlit panels for a furniture-like glow, and segmented zones for islands. RGB or seasonal color modes work well when used sparingly rather than as the everyday setting.
What is the latest trend in kitchen lighting?
Motion-activated LED strips are gaining ground because they automate toe kick and pantry lighting without requiring a switch, saving energy while adding convenience. Smartphone-controlled systems that let homeowners adjust color and brightness from an app are also becoming more common in custom installs.
How much does toe kick lighting typically cost to install?
Costs vary based on run length, fixture type, and whether new wiring or a dedicated circuit is needed, so getting a site-specific estimate is the most reliable way to budget. A licensed installer can walk through material and labor costs together during a site visit.