
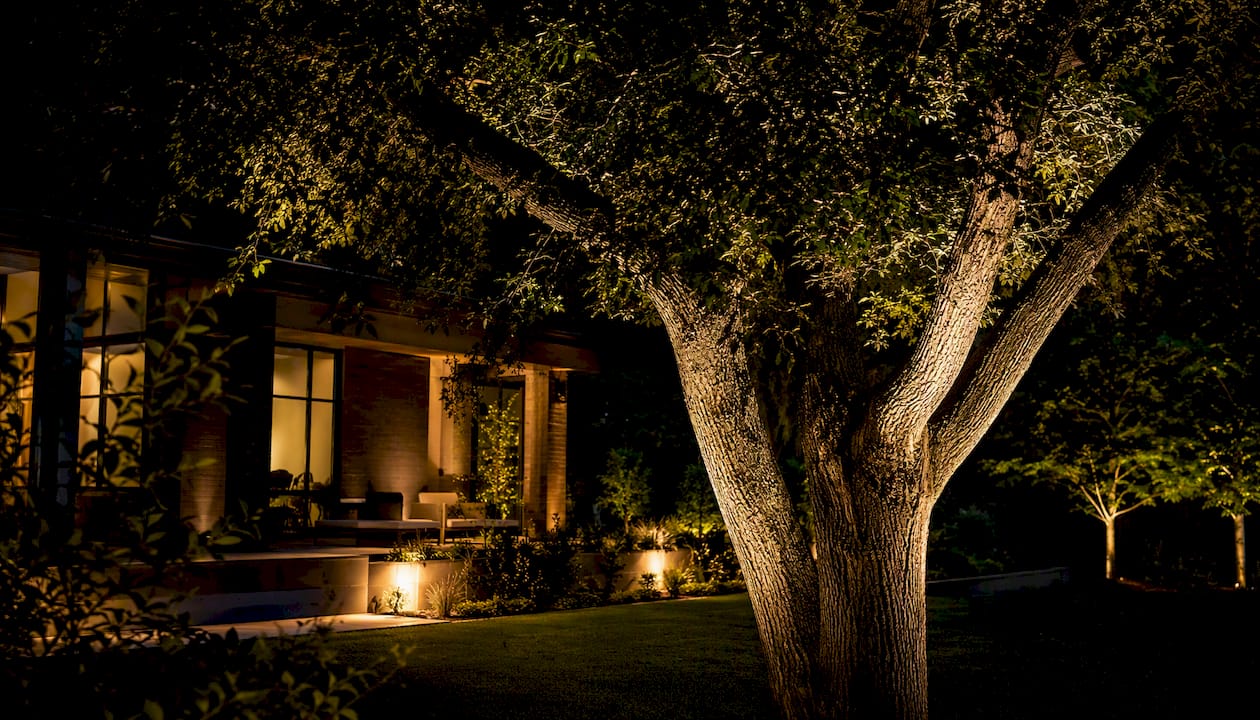
Cross lighting is illumination that hits a subject from two opposing sides, or from a raking side angle, to build texture, depth, and separation that flat, front-facing light can’t produce. The Merriam-Webster definition puts it simply: lighting an object from the side. You’ll find the technique doing three very different jobs: shaping a portrait or product shot in a photo studio, modeling a performer on a stage or film set, and carving dimension into a tree, facade, or water feature after dark. In every case, the visual payoff is the same — texture on the surface, a sense of three-dimensional depth, and a subject that visually separates from whatever is behind it.
That last point matters more than most beginners realize. Front lighting flattens a face or a facade into a single plane. Cross lighting reintroduces the shadow and highlight interplay your eyes use every day to read shape and distance, which is why it shows up everywhere from a Rembrandt-style portrait sitting to the uplighting on a Charlotte homeowner’s oak tree.
Key Takeaways
Cross lighting shapes texture and depth by placing two light sources on opposing sides of a subject, and the ratio between those sources matters as much as their angle.
| Point | Details |
|---|---|
| Core definition | Cross lighting means illuminating a subject from opposing sides or a raking side angle to build texture and depth. |
| Best use cases | Reach for it in portrait and product photography, stage and film work, and permanent landscape or facade accenting. |
| Easiest setup to try | Start with a key light at 45 degrees and a rim light directly opposite, using a half-power flash as a baseline outdoors. |
| Most common mistake | Mismatched color temperature between opposing sources creates an uneven, unnatural-looking result. |
| When to bring in a pro | For permanent outdoor installations, Foreverglowlighting handles fixture selection, aiming, and weatherproofing so the effect holds for years. |
Table of Contents
- What Is Cross Lighting Used For?
- Cross-Lighting Setups You Can Try Right Now
- Positioning, Angles, and Exposure Ratios That Actually Work
- Modifiers and Gear That Change the Look
- Studio, Daylight, and Nighttime Cross Lighting
- Cross Lighting on Stage and in Film
- Cross Lighting for Gardens, Facades, and Architecture
- Common Cross-Lighting Mistakes and How to Fix Them
- Permanent Outdoor Cross Lighting: What Homeowners Should Expect
- Why Cross Lighting Earns Its Reputation
- Ready for Permanent Cross Lighting at Your Property?
- Sources
What Is Cross Lighting Used For?
Cross lighting earns its place in a shoot or an installation plan when you need the scene to say something more than “well lit.” Photographers reach for it when a subject’s texture is the story: skin, wood grain, brick, tree bark. Designers reach for it when they want drama instead of flat illumination, because two-sided light sculpts a face or a facade the way a single frontal source never will.
The reasons practitioners choose it tend to fall into a short list:
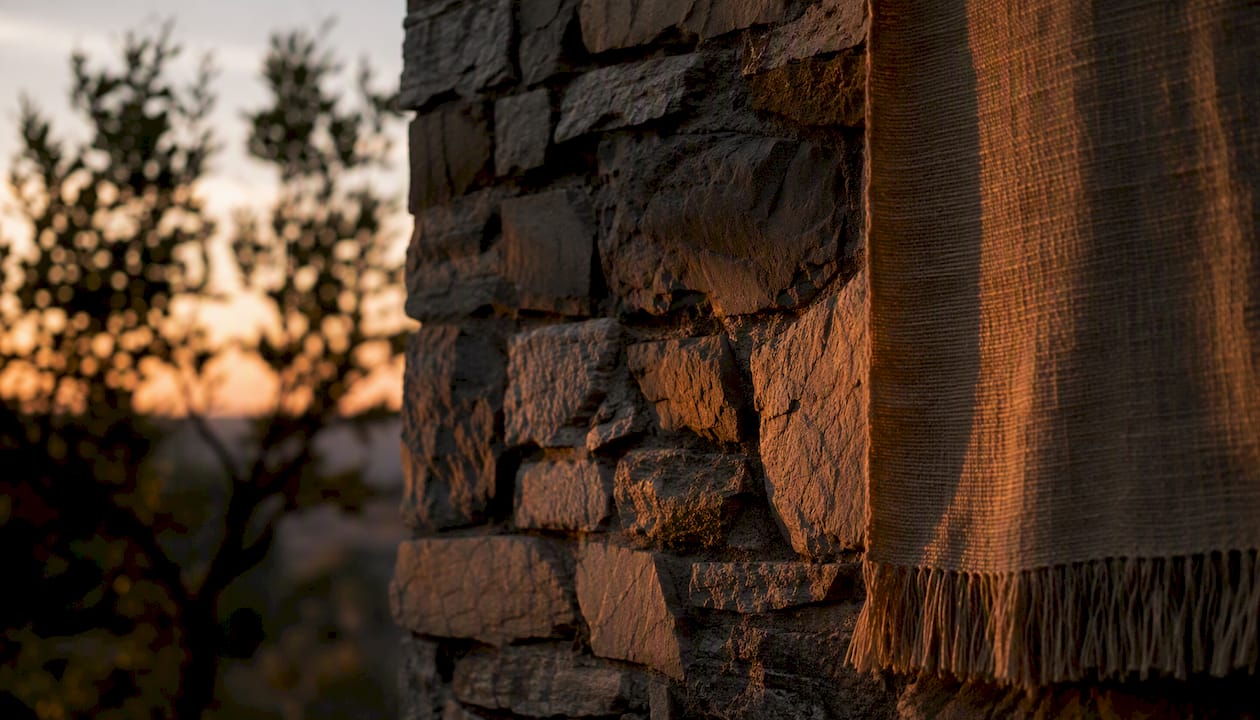
- Reveal texture by raking light across a surface at a low or side angle, which throws tiny shadows that a straight-on light would erase.
- Separate subject from background, since a lit edge on one side of the subject reads as distinct from a darker backdrop.
- Sculpt form and add drama, turning a flat two-dimensional capture into something with visible depth.
- Control mood, because the ratio between the two light sources determines whether the result feels subtle or theatrical.
Short-term shoot goals and long-term installation goals ask for the technique differently. A portrait photographer wants dramatic separation for a single session. A homeowner accenting a stone facade wants a permanent, consistent version of that same separation every night for years. Consider a typical portrait use: a subject seated with one softbox camera-left at eye level and a stripbox behind them, camera-right, throwing a narrow rim of light along the jaw and shoulder. Now consider a landscape use: a mature oak lit from two opposing ground stakes, one warmer and dimmer to suggest ambient glow, one cooler and brighter to define the canopy’s far edge against the night sky.
Pro Tip: Reserve dramatic, high-contrast cross lighting for a single hero subject you want to pop. For anything meant to feel inviting rather than theatrical, a home’s front garden, a restaurant patio, keep the rear light closer in power to the front source and let the shadows stay soft instead of graphic.
Cross-Lighting Setups You Can Try Right Now
You don’t need a truckload of gear to see what cross lighting does. Four setups cover almost every situation a beginner or intermediate shooter will run into, and each one builds on the same core idea: two light sources, one brighter than the other, positioned on opposite sides of the subject.
- Two-strobe opposite setup. Place one strobe as your key light at roughly 45 degrees from the camera on one side. Place a second strobe directly opposite, slightly behind the subject’s plane, as your rim or kicker light. Set your camera angle so both sources graze the subject rather than blast it head-on.
- Key light plus sun-as-rim. Position your subject so the sun sits behind and to one side, acting as a natural rim light, then add an off-camera flash on the opposite side as your key. This is the classic outdoor portrait workflow, and it’s the exact approach the Strobist guide to cross lighting walks through, including using something like half power flash as a common starting point when balancing daylight.
- Single strobe opposite the sun. If you only own one flash, let the sun do the rim work and put your one strobe on the shadow side as fill. It’s the leanest version of the technique and still produces visible separation.
- Reflector plus flash. Swap the second light for a reflector angled to bounce ambient or flash light back into the shadow side. Cheaper, quieter, and surprisingly effective for close-up product or portrait work.
A rough exposure starting point looks like this:
| Element | Starting Guidance |
|---|---|
| Key light power | Full or near-full power for a strong shadow-side fill |
| Rim/kicker power | Equal to or one stop brighter than key, for visible separation |
| Shutter speed | around 1/125 sec, to control ambient without exceeding sync speed |
| Aperture | f/5.6 to f/8, adjusted to balance flash output against daylight |
| ISO | a low ISO outdoors; raise only if ambient light is too dim to register |
Work through the setup in order rather than guessing at all the variables at once. Place your key light first and check that it lights the front of the subject the way you want. Add the rim or opposing light second, and look specifically for a visible edge of highlight along the subject’s silhouette. Set your camera angle so you can see both effects in frame. Then fire test exposures and adjust one variable, usually flash power or aperture, at a time. In the resulting frame, you’re looking for a clean rim highlight along the hair or shoulder and visible, slightly textured shadow detail on the front plane, not a blown-out streak or a muddy, undefined edge.
Positioning, Angles, and Exposure Ratios That Actually Work
The geometry behind cross lighting is more forgiving than it looks, but a few placement rules save a lot of trial and error. The most common starting point places the key light at roughly 45 degrees from the camera to subject axis, with the rim or opposing light positioned close to directly across from it, often just behind the subject’s shoulder line. That 45-degree starting angle is the same reference point beginners and professionals both use before making adjustments for a specific face, product, or facade.
Distance changes the character of the light more than most people expect. Move a light closer and it wraps further around the subject, softening the transition between highlight and shadow. Pull it back and the light tightens, producing a harder, more graphic edge. If you want a smoother fade rather than a hard line down the middle of a face, aim the rear kicker light slightly forward, angled between the subject and the camera, instead of pointing it straight across.
A few things to watch for as you dial in placement:
- A hard, distinct edge between light and shadow usually means your rim light is angled too far forward, essentially competing with the key instead of separating from it.
- A smooth, gradual fade typically means the rear light is angled correctly, feeding light around the subject’s contour rather than across its face.
- If the background is picking up spill from your rim light, you’ve either got it too close to the backdrop or its beam is too wide for the space.
- If the subject’s shadow side looks completely black with no detail, your key light needs more power or a closer position, not a change to the rim.
For separation and drama, practitioners commonly favor a brighter rear or rim light relative to the front key, since a rear light with more punch is what creates that sense of the subject lifting off the background. A workable starting ratio outdoors: set your flash at half power as a baseline when the sun is doing the rim work, then adjust up or down a stop depending on how bright the ambient light reads on your meter. That half-power starting point comes directly from field practice balancing daylight against strobe output, and it’s a far better first guess than starting at full power and fighting overexposed highlights.
Modifiers and Gear That Change the Look
The modifier you put on a light changes cross lighting more than almost any other decision you’ll make on set. A bare flash head produces hard, specular highlights and crisp shadow edges. Everything else on this list exists to soften, narrow, or shape that raw output into something more controlled.
- Softboxes spread light broadly and produce a soft wrap, ideal when you want gentle modeling on skin without harsh shadow lines.
- Stripboxes narrow the beam into a tall, thin shape, making them the standard choice for rim and kicker lights where you want a defined edge rather than broad coverage.
- Grids attach to a softbox or bare reflector to control spill, useful when you need the rim light to hit only the subject and nothing behind it.
- Umbrellas (shoot-through or reflective) give a quick, affordable way to soften a key light when you don’t have a dedicated softbox on hand.
- Reflectors bounce ambient or flash light back into shadow areas, a low-cost substitute for a second powered light source.
- Continuous LED panels let you see the lighting effect in real time, which helps on video work or when a client wants to preview the look before you commit.
- Strobes and HMI fixtures deliver the higher output needed for larger subjects, bigger sets, or situations where you’re fighting bright daylight.
Larger, broader modifiers like softboxes suit skin, where you want the highlight to roll off smoothly. Narrower modifiers like stripboxes suit fabric, product edges, and architectural texture, where a sharper, more defined highlight actually helps the material read clearly. On battery choice: if you’re shooting action or repeated bursts at half power or higher, an external battery pack is worth the extra weight, since internal batteries drain fast under that load and slow recycle times can cost you the shot you actually wanted.
Pro Tip: When you’re not sure which modifier to grab, ask what the surface is doing. Smooth skin wants a big, soft source close to the subject. Rough or reflective surfaces, wood grain, stone, woven fabric, want a smaller, harder source that lets the texture cast its own tiny shadows.
Studio, Daylight, and Nighttime Cross Lighting
The core technique doesn’t change between a studio and a backyard at night, but the tools and the balancing act absolutely do. In a controlled studio, you have full command over both light sources, the background, and the ambient level in the room, which makes it the easiest environment to learn the technique in. Move outdoors during the day and you’re suddenly negotiating with the sun, deciding whether it plays key or rim and adjusting your artificial source to match. Move to full darkness and continuous or long-throw fixtures take over almost entirely, since there’s no ambient light left to balance against.
A quick breakdown of what changes in each setting:
- Studio work gives you full control over background darkness, modifier choice, and light ratio, with nothing competing against your setup.
- Outdoor daytime work requires deciding whether the sun is your key or your rim, then dialing flash output to match whichever role it isn’t playing.
- Outdoor nighttime work relies on continuous LED or long-throw fixtures rather than flash, since there’s no daylight left to balance and the effect has to hold steady for viewing rather than a single exposure.
In a typical sun-plus-flash workflow, most photographers let the sun handle the rim, since repositioning the sun isn’t an option, and use a portable flash as the adjustable key on the shadow side. That’s the reverse of a pure studio setup, where you’d usually build the key light first. Small adjustments make a real difference outdoors: a warming gel on your flash keeps skin tones matching daylight color temperature, a flag or black card blocks spill from hitting a background you want to stay dark, and dropping ISO to its base setting gives you more room to open the aperture without overexposing highlights. For a lighter touch, skip the second light entirely and bounce sunlight back into the shadow side with a reflector instead, which reads as far more natural for a casual portrait than a second hard flash source.
Cross Lighting on Stage and in Film
Theater and film borrow cross lighting for a reason that has nothing to do with drama for its own sake: performers need to be shaped and visible at the same time, from every seat in the house or every camera angle on set. The IES definition of cross lighting describes exactly this use, illumination from two sources on opposite sides of a subject, often paired with color media that maintains visibility while still creating the illusion of shadow and depth.
Production teams lean on a handful of standard tools to pull this off:
- Followspots track a performer across a stage while maintaining consistent cross-angle coverage.
- Fresnels provide a soft-edged, adjustable beam that’s a workhorse for both theater side light and film set lighting.
- LED panels offer color-tunable, low-heat output that’s increasingly common on film sets where continuous light needs to match camera white balance.
- Color media (gels) shift the hue of one side’s light relative to the other, letting designers suggest shadow or mood without actually dropping visibility on a performer’s face.
A typical placement puts one source high and to one side of the performance area, and a second source at a matching angle on the opposite side, with front and back light layered in separately to handle overall visibility and separation from the set. The overlap zone in the middle of the stage or frame is where the cross-lighting effect is strongest. One safety note worth keeping in mind: designers angle these fixtures carefully to keep the beams out of audience sightlines and off-axis from camera lenses, even while achieving full overlap on the performer.
Cross Lighting for Gardens, Facades, and Architecture
Move cross lighting outdoors into a permanent installation and the principles hold, but the engineering problem changes completely. You’re no longer setting up for a single session. You’re aiming fixtures that need to hold their position, resist weather, and produce the same effect every night for years without a person adjusting anything.
A few criteria matter more here than in any temporary photo or stage setup:
- Beam angle determines how tightly the light wraps a tree trunk, a column, or a stretch of stone wall, and narrower beams generally give cleaner cross-lighting separation on architectural detail.
- IP rating (ingress protection) tells you whether a fixture can survive rain, irrigation spray, and ground moisture without failing early.
- Color temperature should stay consistent between the two opposing fixtures unless a warm-cool contrast is the deliberate design choice.
- Mounting options (ground stakes, wall mounts, tree straps) need to hold aim steady through wind and seasonal growth.
Think about three common scenarios. Cross-lighting a sculptural tree means placing two fixtures at roughly opposing points around the trunk, angled up into the canopy, prioritizing a beam narrow enough to avoid washing out the surrounding lawn. Lighting a stone facade means running fixtures along the ground at a raking angle to catch mortar lines and texture, prioritizing a warm color temperature that flatters the material, as explained in this guide on how to makeover my house How Do I Makeover My House?. Lighting a water feature means positioning at least one source below or at water level to catch movement and reflection, prioritizing weatherproofing above almost everything else. In every case, aiming for a genuinely dark background behind the subject, rather than a lit fence or wall, is what makes the separation read at night. Smart, app-controlled output lets a homeowner nudge brightness or color balance seasonally instead of re-aiming fixtures by hand, which matters because permanent installations get judged over years, not over one shoot. For more on how layered fixtures build a full nighttime scene, layering techniques for landscape lighting cover how cross lighting fits alongside path and uplighting.
Common Cross-Lighting Mistakes and How to Fix Them
Most cross-lighting problems trace back to one of a handful of causes, and nearly all of them are fixable without buying new gear.
- Over-texturing. A face, wall, or bark surface looks harsh or unflattering because the light is too small, too close, or too hard. Fix it by swapping to a larger modifier or moving the light further back to soften the shadow edges.
- Background spill. Light meant for the subject is bleeding onto the backdrop and killing separation. Fix it with a flag, a grid, or by simply narrowing the beam angle on the offending fixture.
- Uneven color. One side of the subject reads warmer or cooler than the other because the two sources have mismatched color temperature. Fix it by matching bulb or strobe color temperature, or by gelling one source to match the other.
- Lost subject detail. The shadow side of the subject has gone completely black with no visible texture. Fix it by adding fill, either a reflector or a low-power third light, rather than boosting the key.
- Harsh rim edges. The line between light and shadow looks like a hard cutout rather than a natural fade. Fix it by moving the rim light slightly more forward, between subject and camera, instead of directly opposite the key.
Picture the before and after on a portrait: before the fix, a subject’s cheek shows a stark white streak against pitch-black shadow with a visible seam running down the nose. After moving the rim light forward six inches and dropping its power half a stop, that same seam becomes a gradual highlight-to-shadow transition that reads as dimensional rather than broken. The same logic applies outdoors: a facade lit with two mismatched color temperatures looks like two different buildings stitched together; correcting the color temperature on one fixture makes it read as a single, intentional design.
Change one variable at a time and write down what you adjusted. It’s tempting to move a light, change power, and swap a modifier all in one test shot, but then you have no idea which change actually fixed or broke the look.
Permanent Outdoor Cross Lighting: What Homeowners Should Expect
A temporary cross-lighting setup for a photo or a single event gets torn down at the end of the day. A permanent installation has to survive summer storms, winter cold, HOA review, and years of unattended operation, which changes almost every decision a designer makes. Fixed aiming means the beam angle and position get engineered once and locked in, rather than adjusted shot to shot. Weatherproofing isn’t optional, and integrated smart control replaces the manual power dial you’d use on a photo shoot. Where a property sits within an HOA, it’s worth a quick check that fixture placement and brightness meet community guidelines before installation day.
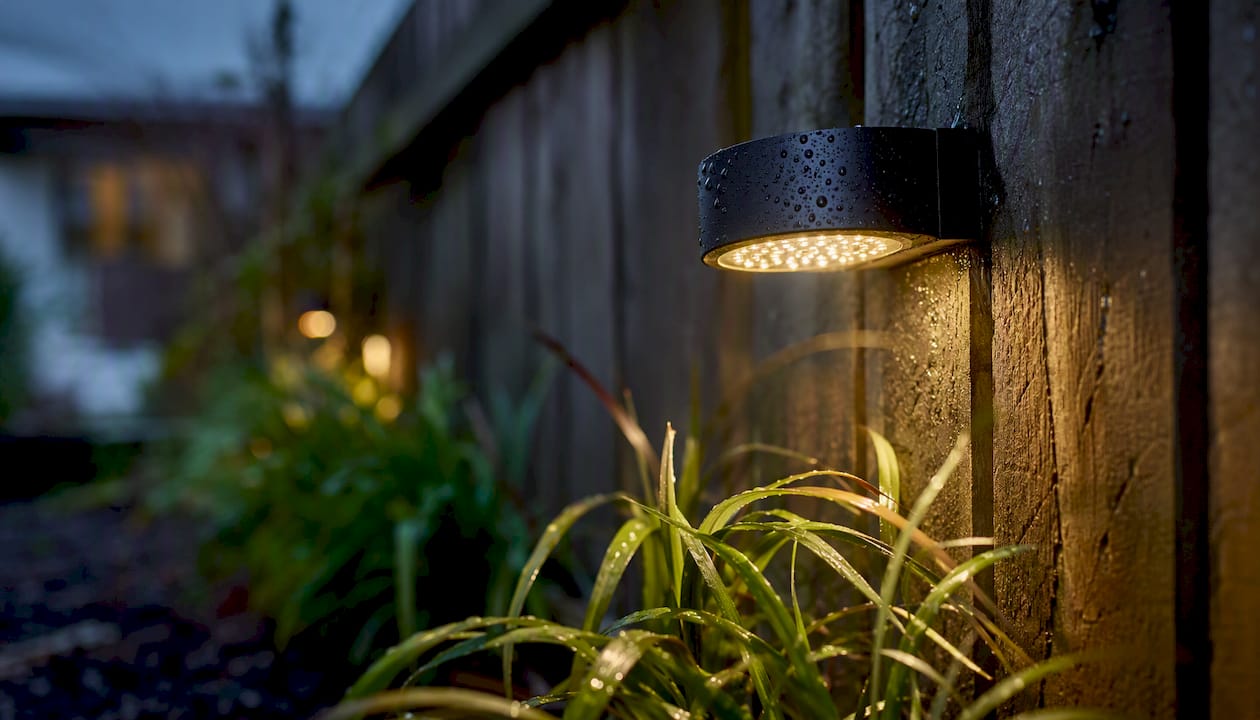
Foreverglowlighting builds these systems with fixture selection driven by longevity, not just initial look, choosing beam angles and mounting hardware that hold their aim through weather and tree growth while keeping spill off neighboring property lines. Every install integrates with smartphone-based smart controls, so a homeowner can shift color temperature or brightness by season without climbing a ladder or rewiring anything. The commercial exterior lighting work done for Hollifield Dentistry is one example of that same cross-lighting approach scaled to a business facade, where consistent nightly performance matters as much as the initial design.
For homeowners weighing whether a permanent system is worth it, the practical benefits tend to be:
- Low maintenance since there’s no ladder work or seasonal re-hanging once fixtures are set.
- Consistent scene-setting every night, rather than a look that degrades as lights are handled and re-hung year after year.
- Improved curb appeal driven by the same texture and depth principles used in portrait photography, applied at architectural scale.
- Usable outdoor space after dark, since well-placed cross lighting makes patios, gardens, and entryways genuinely inviting rather than just visible.
A recent landscape lighting transformation in Belmont, NC shows this principle applied to a residential property, where opposing fixture placement gave mature trees and stonework the same dimensional separation a studio portrait would get.
Why Cross Lighting Earns Its Reputation
Cross lighting works because it mimics how light actually behaves in the physical world. Very little of what looks compelling in a photograph, on a stage, or across a lit garden comes from a single flat source. It comes from at least two, often unequal in strength, doing different jobs at the same time.
What gets underestimated, in my view, is how much the ratio between those two sources matters compared to their placement. Beginners spend hours fine-tuning the angle of a key light and then grab a second light at random power, wondering why the result looks flat or, worse, chaotic. The angle gets you in the neighborhood. The ratio between key and rim is what actually decides whether a shot reads as subtle and natural or bold and dramatic.
On a commercial property lighting project, I’ve seen a design go from looking flat and administrative to looking genuinely upscale by doing nothing more than rebalancing the rear accent fixtures relative to the front wash, no new hardware, no repositioning, just a different ratio dialed in through the control app. That’s the part homeowners rarely anticipate when they picture a lighting upgrade: it’s not about buying more fixtures. It’s about getting the relationship between the fixtures right.
Ready for Permanent Cross Lighting at Your Property?
If everything above has you picturing what raking, dimensional light could do for your own facade, trees, or patio, the next move is a site evaluation, not a trip to a hardware store. Temporary cross-lighting setups take hours of trial and error to dial in for a single photo. A permanent system engineered by Foreverglowlighting gets that ratio, angle, and beam control worked out once by a professional, then holds it night after night through a phone app, no ladder, no re-aiming, no guessing at power settings in the dark.

Foreverglowlighting’s design team evaluates your specific trees, stonework, and architectural features on-site and builds a fixture plan around the same key-and-rim principles covered here, scaled for weatherproof, HOA-compliant permanent use. Whether you’re picturing a single accented tree or a full facade treatment, the outdoor lighting scene-setting guide walks through what a typical design consultation covers. Request a free estimate today and find out what cross lighting could look like on your own property.