
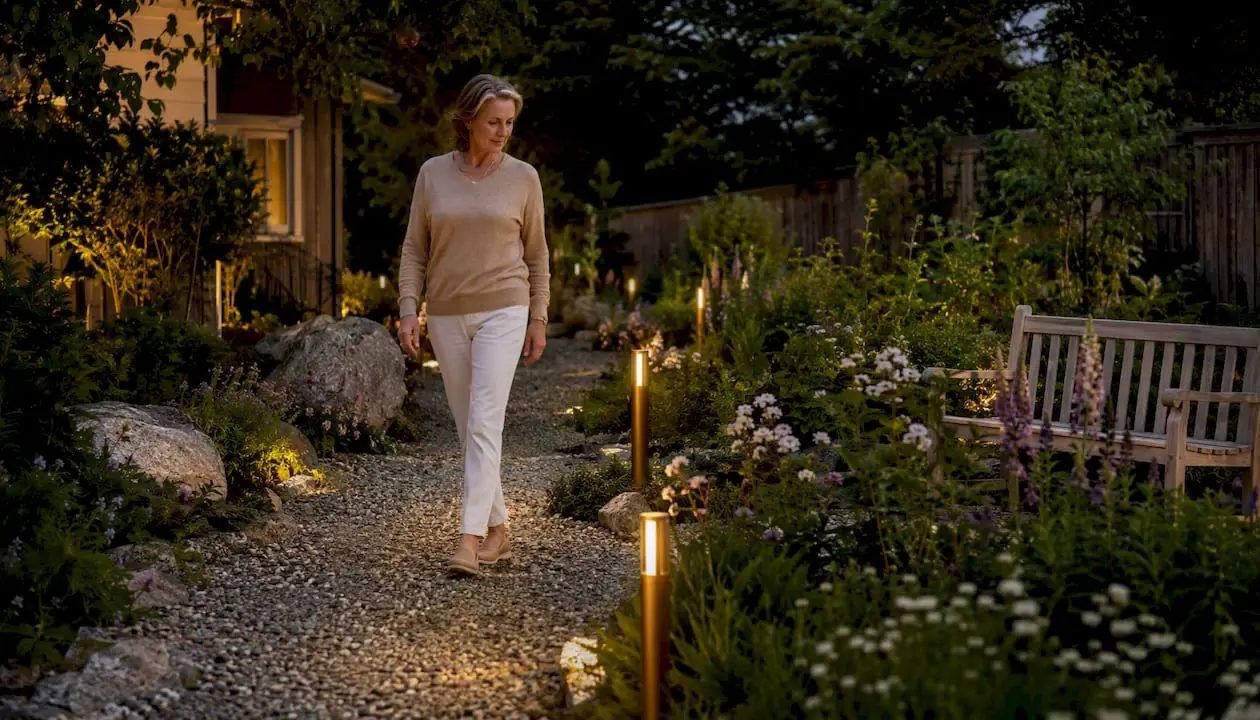
Path lighting refers to low-mounted, downward-focused outdoor fixtures installed along walkways, garden borders, and driveways to guide movement and highlight low landscape features. At its core, it solves three problems at once: it reduces trip hazards after dark, adds warmth and depth to your home’s nighttime curb appeal, and draws attention to plantings and hardscape details that disappear without light. One important distinction worth making early: path lighting is designed for wayfinding and ambience, not perimeter security. That job belongs to high-output motion floodlights and perimeter systems, which operate at a fundamentally different brightness level.
- Safety and wayfinding: Low pools of light mark edges, steps, and grade changes so guests and family members move confidently after dark.
- Curb appeal and ambience: Warm, downward light creates layered nighttime scenes that make a home feel welcoming and well-maintained.
- Targeted landscape highlighting: Fixtures placed near plantings or bed edges accent texture and color in ways that overhead or floodlighting cannot.
Table of Contents
- What path lighting actually does for your home and yard
- 1. Stake/hat-style path lights for traditional borders
- 2. Bollard lights for modern and wide walkways
- 3. In-grade and recessed step lights for hardscape
- 4. Wall- and post-mounted path lighting for elevated edges
- 5. Style matching: pairing fixtures to your home’s architecture
- How to choose between solar, low-voltage, and hardwired power
- How to plan placement and spacing before you buy a single fixture
- Choosing the right fixture: lumens, color temperature, and materials
- Installing path lights: what the process actually involves
- Keeping your path lights working: maintenance and troubleshooting
- What path lighting costs and how long it lasts
- Path lighting and security: what it can and cannot do
- When a permanent, professionally installed system makes sense
- Key Takeaways
- A few things most path lighting guides get wrong
- Foreverglowlighting brings permanent path lighting to Charlotte homeowners
- Useful sources and further reading
What path lighting actually does for your home and yard
The most immediate benefit is trip-hazard reduction. A well-placed fixture casts a soft pool of light directly onto the walking surface, marking edges, grade changes, and steps without blinding anyone approaching. That focused, low-level illumination is what separates path lighting from a floodlight aimed at the ground.
Beyond safety, path lighting improves safety and visibility in ways that also shape how a property feels at night. Beds edged with low fixtures look intentional and finished. A garden path lit with warm, downward light draws the eye through the landscape and makes outdoor spaces usable well past sunset.
The secondary benefits are real but worth keeping in proportion:
- Evening usability: Lit walkways extend the hours you and your guests spend outdoors comfortably.
- Curb appeal: Consistent, warm illumination along the front walk signals a well-maintained property to neighbors and visitors alike.
- Modest security improvement: Lit pathways remove dark zones near entry points, which increases the likelihood that unusual activity is noticed. However, path lights alone are not a substitute for motion-activated security lighting at access points.
Pro Tip: Combine path lights with at least one motion-activated fixture near your front door. The path lights handle wayfinding; the motion light handles deterrence.
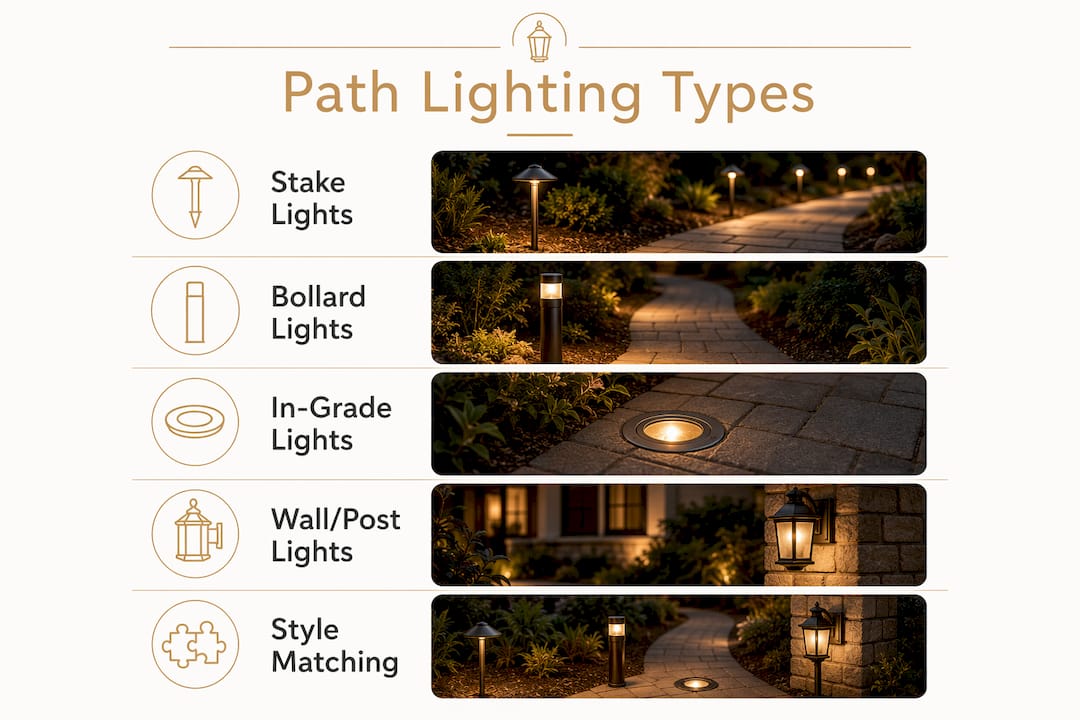
1. Stake/hat-style path lights for traditional borders
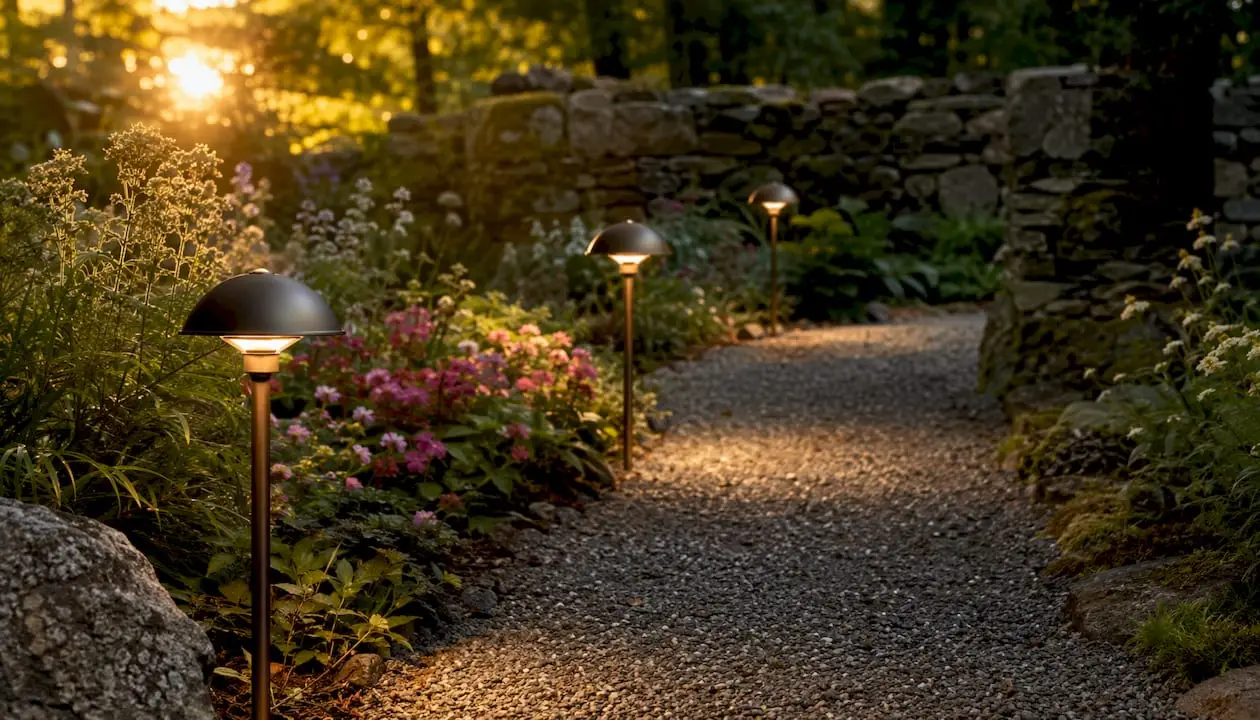
The most common fixture in residential landscapes, stake-mounted hat-style lights stand at typical heights suitable for residential landscapes and cast a downward, circular pool of light. The wide brim shields the bulb from direct view, which reduces glare and keeps the focus on the walking surface. They suit traditional, cottage, and transitional architecture well, and their low profile keeps them from competing visually with plantings.
2. Bollard lights for modern and wide walkways
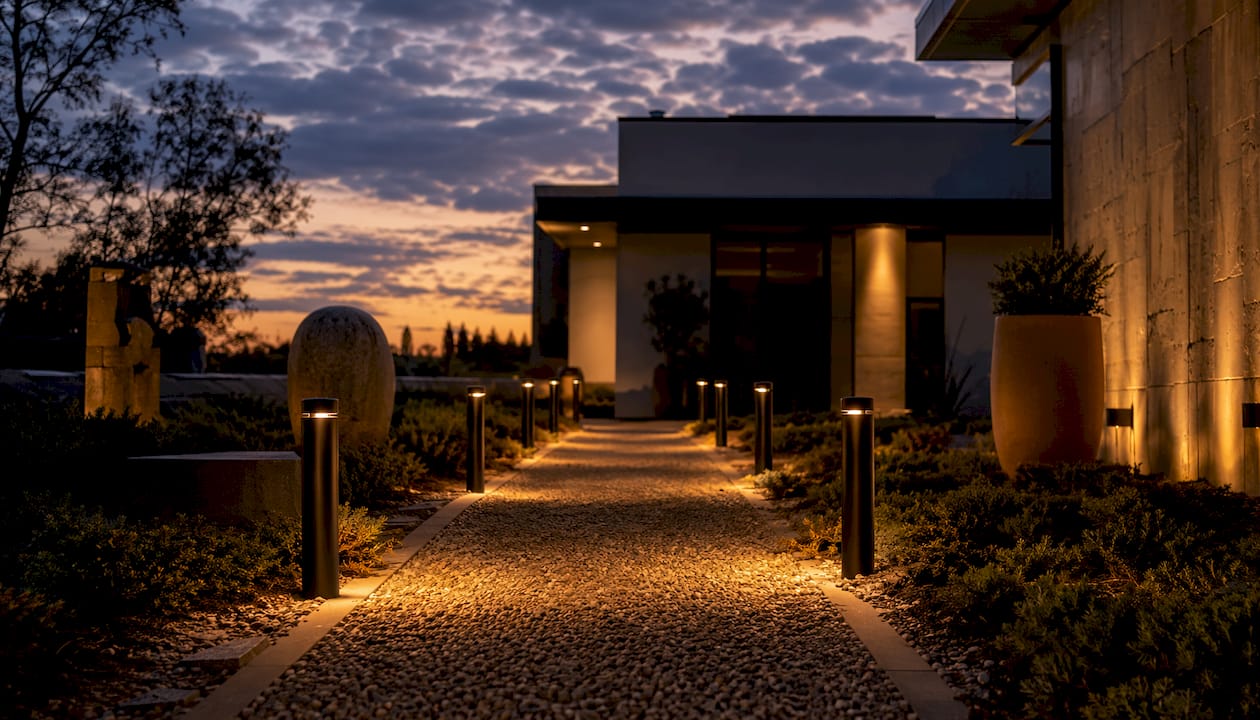
Bollards are taller post-style fixtures, typically 24–48 inches, that distribute light at a higher angle and cover a wider spread. They work well along broad driveways, contemporary entries, and commercial-style landscapes where a sleeker silhouette fits the architecture. Contemporary bollards pair naturally with modern homes, while dome or lantern styles suit traditional settings.
3. In-grade and recessed step lights for hardscape
In-grade fixtures sit flush with concrete, pavers, or decking and are built to handle foot traffic and weather. They deliver a clean, architectural look with no above-grade hardware to trip over or damage with a lawn mower. Step lights, recessed into riser faces, serve the same flush principle on stairs. Both fixture types require more planning during installation since the conduit and wiring must be set before the hardscape is finished. For a closer look at how these work in practice, Foreverglowlighting’s deck and step lighting page shows real residential applications.
4. Wall- and post-mounted path lighting for elevated edges
When a walkway runs alongside a retaining wall, raised planter, or long staircase, wall-mounted fixtures deliver consistent illumination without requiring ground stakes. Post-mounted lanterns at entry gates or driveway pillars serve a similar role, marking transitions and framing entries. These fixtures tend to cast light at a slightly higher angle than stake lights, so beam angle selection matters more here.
5. Style matching: pairing fixtures to your home’s architecture
Fixture hardware is visible during the day, so the daytime appearance matters as much as the nighttime output. Modern homes with clean lines benefit from matte black or brushed aluminum bollards. Traditional brick or craftsman homes read better with bronze or oil-rubbed lantern styles. Rustic or farmhouse landscapes often suit aged copper or dark bronze dome fixtures. The goal is for the hardware to look intentional at noon, not just after dark.
Pro Tip: Avoid the “runway effect” by mixing fixture heights and staggering placement on alternating sides of the path rather than lining identical fixtures in a straight row on one side. Mixing heights and creating pools of light is the single most effective way to make a path look professionally designed.
How to choose between solar, low-voltage, and hardwired power
Power source is the first decision that shapes everything else: installation complexity, brightness consistency, and long-term maintenance.
| Power Source | Up-Front Cost | Wiring Required | Brightness Consistency | Best For |
|---|---|---|---|---|
| Solar | Lowest | None | Variable (weather/battery dependent) | Small gardens, accent paths, renters |
| Low-voltage 12V | Moderate | Buried low-voltage cable + transformer | High | Most residential installs |
| Line-voltage (120V) | Highest | Licensed electrician typically required | Highest | Long driveways, commercial, in-grade |
Solar fixtures are the easiest to deploy. There is no wiring, no transformer, and no electrician. The trade-off is real: output depends on how much direct sun the panel receives during the day, and battery performance degrades over time. Solar path lights work well for short garden paths with good sun exposure. They struggle in shaded yards, under tree canopies, or in climates with extended cloudy periods. For best results, solar fixtures need 6–8 hours of direct sun to charge fully.
Low-voltage 12V systems are the industry standard for reliable, consistent output. A transformer plugged into a standard outdoor outlet steps voltage down from 120V to 12V, which is then distributed through buried cable to each fixture. The system is safe to handle, DIY-friendly for straightforward runs, and gives you precise control over brightness and zoning. Most residential path lighting projects use this approach.
Line-voltage (hardwired) systems run at full 120V and require a licensed electrician in most jurisdictions. They deliver the highest output and suit long driveway runs or in-grade fixtures in high-traffic hardscape. For a typical front-walk path lighting project, line-voltage is usually more than necessary.
- For a small garden path with good sun: solar is a practical, low-cost starting point.
- For a front walkway, driveway border, or integrated bed lighting: low-voltage 12V gives the best balance of reliability and design control.
- For long driveways, in-grade pavers, or smart-integrated systems: consider professional low-voltage or hardwired installation.
How to plan placement and spacing before you buy a single fixture
Spacing is not arbitrary. It follows directly from each fixture’s beam spread, and manufacturers publish that number. A fixture that produces a 16-foot diameter beam needs roughly 16-foot spacing for continuous illumination; a compact flat-hat fixture with a 3-foot beam works best spaced 3–4.5 feet apart. The goal is not to flood every inch of the path but to create overlapping or closely spaced pools of light that guide the eye and foot without glare.
Placement and spacing steps:
- Measure the total path length and note any grade changes, curves, or steps.
- Choose a fixture and note its published beam spread diameter.
- Decide on continuous illumination (pools touching) or spaced pools (slight gaps for rhythm). Divide path length by chosen spacing to get fixture count.
- Mark positions with temporary stakes or spray paint before ordering. Stagger fixtures on alternating sides of the path rather than lining them up on one side.
- Set each fixture approximately 6 inches back from the path edge to protect hardware from foot traffic and lawn equipment, and to soften the light pool’s edge.
- Test the layout at night using a flashlight held at fixture height before committing to installation.
- Photograph the test layout from the street and from the entry door to check visual rhythm from both directions.
Typical path light heights run 14–24 inches, and spacing commonly falls between 8–10 feet for standard fixtures, though beam spread always overrides the rule of thumb.
Pro Tip: For curved paths, space fixtures closer together on the inside of curves where the beam spread covers less linear distance. This keeps illumination even through the bend.
Choosing the right fixture: lumens, color temperature, and materials
Once placement is planned, the fixture spec sheet determines how the finished project actually looks and performs.
Color temperature (CCT) has the biggest impact on mood. Warm white at 2700K–3000K suits most residential landscapes: it flatters skin tones, renders plant foliage naturally, and feels welcoming rather than clinical. A range of 3000K–3500K works well for contemporary homes where a slightly crisper tone matches the architecture. Avoid anything above 4000K for path lighting; it reads as cold and institutional in a garden setting.
Lumens determine perceived brightness. Path lighting does not need to be bright. Fixtures in the 40–100 lumen range are appropriate for most residential walkways. Overlighting a path creates glare and washes out the layered effect that makes landscape lighting attractive.
- Beam angle: Narrow spots (15°–30°) concentrate light and suit accent applications. Wide spreads (60°–120°) are better for path coverage. Most hat-style path lights use a wide, downward spread by design.
- IP rating: Look for IP65 or higher for any fixture exposed to rain and irrigation. IP67 is appropriate for in-grade or near-water installations.
- Materials: Aluminum, stainless steel, and brass resist corrosion and UV degradation. Powder-coated finishes extend finish life. Avoid uncoated zinc or plastic housings in humid or coastal climates.
- Controls: Photocells (dusk-to-dawn auto-on) and timers are standard on most low-voltage transformers. Motion sensors add a layer of responsiveness near entry points. Smart integration allows dimming, zoning, and color control from a phone, which is particularly useful for seasonal accent changes.
LED path fixtures are now the standard across all price points, offering long manufacturer-quoted lifespans and consistent color temperature that does not shift as the bulb ages.
Installing path lights: what the process actually involves
Low-voltage 12V installation overview
- Size the transformer. Add up the wattage of all fixtures on the run and choose a transformer rated at least 20% above that total. Mount the transformer near an outdoor GFCI outlet.
- Plan the cable run. Bury low-voltage cable 6 inches deep along the path route. Use a flat spade or a dedicated cable-laying tool to minimize turf disruption.
- Connect fixtures. Most low-voltage fixtures use a simple snap-on or screw-down connector that pierces the cable jacket. No wire stripping is required for many systems.
- Set the timer or photocell. Program the transformer to run 6–8 hours per night, which is the typical range for path lighting.
- Test before backfilling. Turn the system on and walk the path before covering the cable trench.
Solar installation (no wiring required)
- Choose locations with 6–8 hours of direct sun exposure.
- Push the stake into prepared soil at the marked positions.
- Wipe the solar panel with a microfiber cloth before first use to remove any shipping residue.
- Allow a full day of charging before the first night of use.
When to call a professional
- Runs longer than 150 feet, where voltage drop becomes a design factor.
- In-grade fixtures set into concrete or pavers before the hardscape is poured.
- Integration with a smart home system or multi-zone transformer.
- Any line-voltage (120V) work, which requires a licensed electrician in most U.S. jurisdictions.
- Projects where permits are required by the local authority having jurisdiction.
Low-voltage landscape lighting is genuinely DIY-friendly for straightforward runs, but complex projects benefit significantly from professional design and installation.
Keeping your path lights working: maintenance and troubleshooting
A well-installed low-voltage system requires very little ongoing attention. Solar systems need slightly more.
Seasonal maintenance checklist:
- Spring: Clean fixture lenses and solar panels with a damp cloth. Check for frost heave that may have shifted stake positions. Inspect cable connections at each fixture.
- Summer: Trim plantings that have grown to shade solar panels or block fixture output.
- Fall: Check transformer timer settings as daylight hours shorten. Inspect for corrosion at wire connections.
- Winter: In freeze-thaw climates, check that in-grade fixtures have not cracked from ice expansion. Solar batteries lose capacity in sustained cold; bring solar fixtures indoors if temperatures drop below 20°F for extended periods.
Common problems and fixes:
- Flickering: Usually a loose connection at the fixture or a corroded splice. Disconnect, clean, and reconnect.
- Circuit overload: Too many fixtures on one transformer run. Redistribute fixtures across multiple runs or upgrade the transformer.
- Poor solar battery runtime: Panel may be shaded, dirty, or the battery has reached end of life. Many solar path lights use standard AA or AAA rechargeable batteries that can be swapped out every few years.
- Uneven light pools: Fixtures have shifted from their original positions. Restake and adjust spacing.
Pro Tip: Use a multimeter to isolate a bad run quickly. Disconnect fixture leads one at a time while measuring voltage at the transformer output. A sudden voltage recovery points to the faulty connection.
When a buried cable is physically damaged (from digging, edging, or root growth), or when a transformer fails entirely, professional service is the right call. Splicing buried cable incorrectly creates corrosion points that cause recurring failures.
What path lighting costs and how long it lasts
Cost varies significantly by power source, fixture quality, and whether installation is DIY or professional.
| Component | Relative Cost | Expected Lifespan |
|---|---|---|
| Solar path light fixtures | Lowest up-front | 2–5 years (battery limits lifespan) |
| Low-voltage 12V fixtures (LED) | Moderate | 10–15+ years (LED rated ~50,000 hours) |
| Low-voltage transformer | Moderate | 10–15 years with proper sizing |
| In-grade / line-voltage fixtures generally involve higher cost and longer service life. | ||
| Professional installation labor | Varies by project scope | N/A |
LED technology is now standard across all fixture categories, with manufacturer-quoted lifespans around 50,000 hours. At 6 hours of use per night, that translates to roughly 22 years of rated LED life, meaning the fixture housing and installation labor are usually the limiting factors, not the light source itself.
For solar systems, the rechargeable battery is the consumable. Expect to replace batteries every 2–3 years depending on climate and usage. For low-voltage systems, ongoing costs are minimal: occasional transformer inspection and rare fixture replacement. Installation labor for a professional low-voltage system is typically the largest single line item in a path lighting project budget, which is why total-cost-of-ownership favors durable, well-installed fixtures over cheap replacements.
Path lighting and security: what it can and cannot do
Path lights improve visibility and wayfinding, but they are not a primary burglar deterrent. Dedicated security lighting — motion-activated floodlights and perimeter fixtures — performs that role more effectively because the sudden high output draws attention and removes the cover of darkness at access points.
That said, a well-lit property is a harder target than a dark one. Path lighting contributes to a layered strategy by eliminating low-level dark zones near beds and walkways where someone could move unnoticed. The key is combining it with the right tools:
- Motion-activated floodlights at garage doors, side gates, and rear entries deliver the high-output response that deters approach.
- Perimeter path lighting removes dark zones along the property edge without creating the harsh shadows that a single floodlight can produce.
- Smart controls and cameras allow remote monitoring and alerts that path lights alone cannot provide.
- Higher-output fixtures at entry points (front door, driveway entry) create a bright transition zone that path lights can lead toward but not replicate.
Layered lighting techniques that combine path lights, accent fixtures, and security lighting produce better safety outcomes than any single fixture type used alone. Path lights handle the guidance layer; security fixtures handle the deterrence layer.
When a permanent, professionally installed system makes sense
Some projects are straightforward enough for a weekend DIY install. Others benefit clearly from professional design and installation, and the difference usually comes down to scale, complexity, and how long you want the system to last.
Projects where a permanent system pays off:
- Long driveways (100+ feet) where voltage drop requires careful transformer sizing and cable gauge selection.
- In-grade fixtures set into concrete or pavers, where the conduit must be placed before the hardscape is poured.
- Smart color-enabled systems for seasonal use, where zoning and app control require proper multi-zone transformer setup.
- Integrated landscape designs where path lighting, uplighting, and architectural accent lighting need to work as a coordinated system.
What professional design provides:
- Accurate fixture counts and transformer sizing based on actual measured wattage, not estimates.
- Electrical code compliance and permit handling where required.
- Warranty and maintenance plans that cover buried cable and transformer components.
- Design for layering: a professional considers how path lights interact with uplights, wall washers, and security fixtures rather than treating each in isolation.
Foreverglowlighting’s project portfolio includes a pathway and in-grade lighting installation in Weddington, NC and a landscape and pathway project in Waxhaw, NC that show what a coordinated permanent system looks like in practice.
Key Takeaways
Path lighting is the most direct way to make outdoor walkways safer and more visually appealing at night, with fixture choice, spacing, and power source determining how well the system performs long-term.
| Point | Details |
|---|---|
| Definition and purpose | Path lighting uses low, downward-focused fixtures to guide movement, reduce trip hazards, and accent landscape features. |
| Spacing rule of thumb | Space fixtures 8–10 feet apart for standard fixtures; always verify against the manufacturer’s published beam spread diameter. |
| LED lifespan advantage | LED path fixtures carry manufacturer-quoted lifespans of around 50,000 hours, making installation labor the primary long-term cost. |
| Power source choice | Solar suits small, sunny gardens; low-voltage 12V is the industry standard for reliable residential installs. |
| Foreverglowlighting | For permanent, custom-installed path and landscape lighting in the Charlotte area, Foreverglowlighting provides professional design, installation, and smart control integration. |
A few things most path lighting guides get wrong
Most articles on this topic treat path lighting as a product-selection exercise: pick a fixture, stake it in, done. That framing misses the part that actually determines whether a project looks good.
The layout decision matters more than the fixture. Two identical fixtures installed in a straight row on one side of a path look like airport runway markers. The same fixtures staggered on alternating sides, with one or two heights mixed in, look like a designed landscape. The fixture did not change. The placement did.
The second thing most guides understate is the relationship between beam spread and spacing. Homeowners often buy a fixture count based on path length divided by a generic 8-foot rule, then discover that their specific fixture has a 3-foot beam spread and the pools of light do not connect. Reading the manufacturer’s beam diameter before ordering saves a second trip to the store.
Finally, color temperature gets treated as a preference when it is closer to a technical decision. Warm white at 2700K–3000K renders plant foliage in a way that feels natural and inviting. Anything above 4000K makes a garden look like a parking lot at night, regardless of how good the fixture hardware is. The spec sheet number matters.
Foreverglowlighting brings permanent path lighting to Charlotte homeowners
Choosing the right fixtures and power source is only half the work. A system that performs well for years requires accurate transformer sizing, properly buried cable, and a layout designed around your specific landscape, not a generic spacing formula.

Foreverglowlighting designs and installs custom permanent outdoor LED systems for homeowners in the Charlotte area, including path lighting, in-grade hardscape fixtures, and smart color-enabled landscape systems controllable from your smartphone. Every project starts with a design review that covers fixture placement, transformer sizing, and a realistic budget and timeline. No guesswork, no generic kits.
Request a free estimate for your path and landscape lighting project, or browse the permanent lighting services page to see what a custom-installed system includes.
Useful sources and further reading
The following resources were used to support the guidance in this article and are worth bookmarking for deeper research:
- Consumer Reports: Best Solar Outdoor Lights — Lab-tested solar path light reviews with performance data.
- Gross Lighting & Home: Landscape Lighting 101 — Practical guidance on path light heights, spacing, and placement tips.
- VOLT Lighting: LED Low Voltage Path Lights — Manufacturer beam spread data useful for spacing calculations.
- NewInterior AI: Path Lighting Glossary — Design-focused definition covering fixture types, LED specs, and layout principles.
- Wirecutter / NYTimes: Best Smart Outdoor Lighting — Tested recommendations with clear guidance on security vs. wayfinding lighting.
- Foreverglowlighting: Landscape Lighting Explained — A broader homeowner guide to landscape lighting that complements this path lighting explainer.
- Foreverglowlighting: Why Professional Landscape Lighting Design Pays Off — Covers the value of professional design, layering, and long-term system planning.