
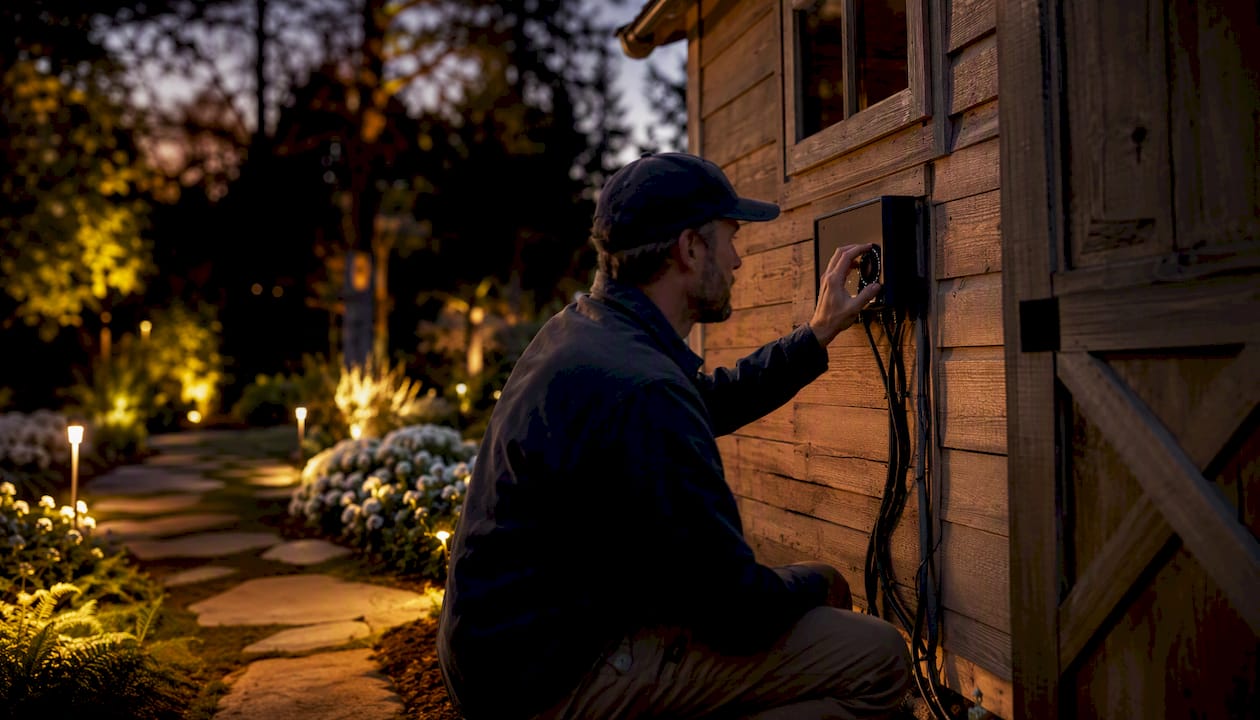
Setting landscape lighting timers cuts unnecessary runtime, reduces energy use, and improves both security and convenience across your property. The right timer settings mean your lights come on at dusk, shut off before midnight, and never run all night burning electricity for an empty yard.
Here is what properly configured outdoor lighting timers deliver:
- Lower energy bills by limiting fixtures to the hours they actually serve a purpose
- Consistent security coverage through predictable illumination schedules that signal occupancy
- Longer fixture and bulb life because reduced runtime means less heat cycling and wear
- Reliable curb appeal without manually switching lights on and off each evening
- Vacation-mode scheduling that keeps your property looking occupied while you are away
The sections below cover how each benefit works, which timer type fits your situation, and exact programming steps for energy-saving, security-focused, and convenience-oriented schedules.
Key Takeaways
Properly set landscape lighting timers reduce energy waste, improve security, and extend fixture life, with the dusk-to-timer hybrid being the most practical setup for most homes.
| Point | Details |
|---|---|
| Choose the right timer type | Astronomical or dusk-to-timer hybrid covers most homes without seasonal reprogramming. |
| Use the energy savings formula | Multiply fixtures × watts × hours per night × nights per year ÷ 1,000 to estimate annual kWh. |
| Confirm transformer compatibility | Total fixture wattage must stay below 80% of transformer capacity before programming. |
| Handle DST proactively | Enable auto-DST on astronomical timers; manually update fixed-schedule timers each March and November. |
| Foreverglowlighting for multi-zone needs | Permanent smart installations with multi-zone control and GlowCare maintenance serve larger or complex properties. |
Table of Contents
- What are the real benefits of landscape lighting timer settings?
- How do timers actually reduce your energy costs?
- Which timer type is right for your property?
- How to set your landscape lighting timer for the best results
- What to check before programming your timer
- Common timer problems and how to fix them
- When does a permanent smart system make more sense than a standalone timer?
- A professional’s perspective on timer settings
- Foreverglowlighting brings permanent smart lighting to Charlotte properties
- Sources
What are the real benefits of landscape lighting timer settings?
Properly programmed timers deliver five distinct advantages, and understanding each one helps you prioritize your settings.
-
Energy savings. Every hour you trim from a fixture’s nightly runtime reduces kilowatt-hour consumption. Even low-wattage LEDs add up across a full yard of fixtures running from dusk until dawn. Timers give you direct control over that runtime.
-
Improved security. Consistent, scheduled illumination signals that a home is occupied and actively maintained. Strategic placement combined with precise scheduling deters intruders more effectively than simply leaving lights on all night. Randomized or vacation-mode schedules add another layer by varying on/off patterns so the property never looks predictably empty.
-
Convenience and automation. A well-set timer means you never walk into a dark driveway or forget to turn off the patio lights before bed. Smart timers and Wi-Fi-enabled controllers extend this further, letting you adjust schedules remotely from a smartphone.
-
Fixture longevity. Transformers, LED drivers, and bulbs all have rated lifespans measured in operating hours. Cutting runtime by three or four hours per night meaningfully extends the interval between replacements and reduces maintenance calls.
-
Consistent curb appeal. Scheduled lighting scenes keep your property looking its best on every evening, not just the nights you remember to flip a switch. This matters especially when you are hosting guests or want to complement other exterior features. Well-timed lighting works alongside improvements like quality entry doors and architectural details to create a polished, welcoming exterior.
Timed schedules and vacation modes are among the most practical tools homeowners have for maintaining consistent visibility without constant manual effort.
How do timers actually reduce your energy costs?
The core mechanism is simple: fewer operating hours equals less electricity consumed. The formula works like this:
Annual kWh = (number of fixtures) × (watts per fixture) × (hours per night) × (nights per year) ÷ 1,000
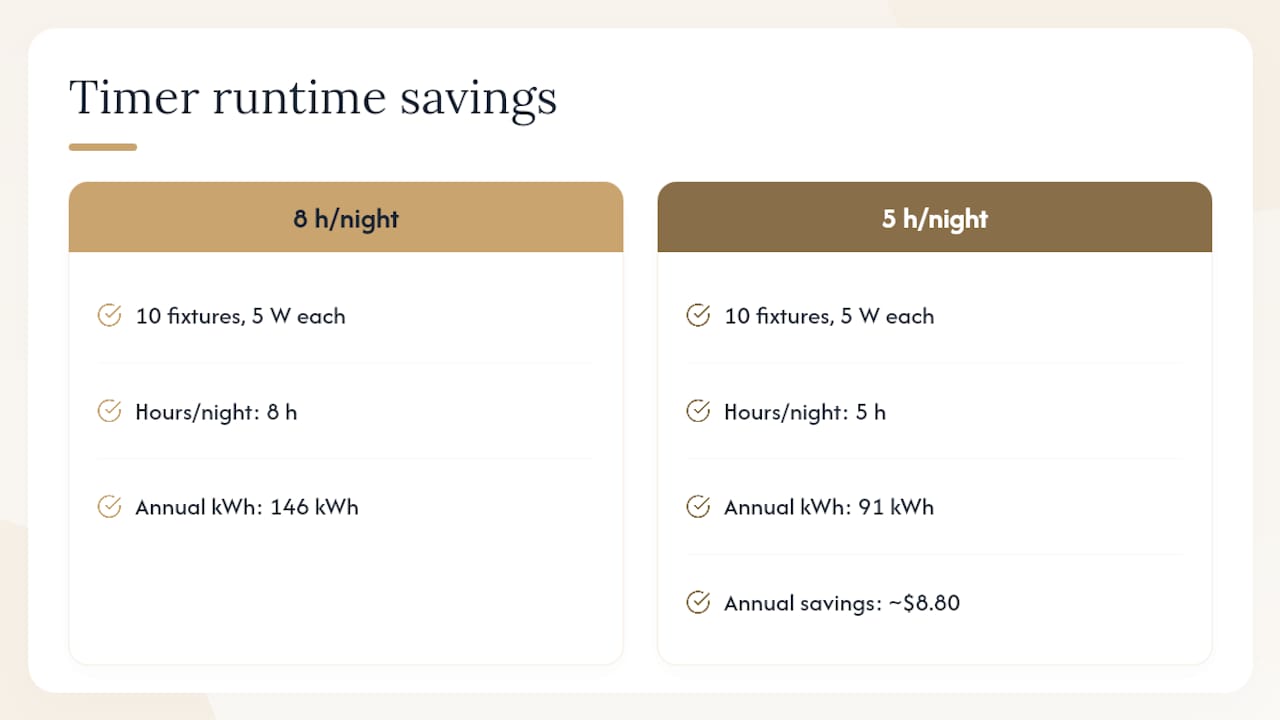
A practical example: 10 path lights at 5W each, running 8 hours per night, consume 146 kWh per year. Trim that to 5 hours per night and consumption drops to about 91 kWh. At a national average residential electricity rate of roughly $0.16 per kWh, that single scheduling change saves around $8.80 annually on just those 10 fixtures. Scale that across a full landscape system with 30 or 40 fixtures, and the savings become more meaningful.
LEDs change the scale but not the logic. Because LED fixtures draw far less wattage than halogen predecessors, the per-hour cost is lower. That said, reduced runtime still extends driver life and reduces heat stress on components, which matters for long-term reliability.
Dusk-to-timer hybrid setups, where a photocell triggers the ON event at actual sunset and a timer handles the OFF event at a set hour, are the most practical way to capture both automatic start times and controlled shutdown. The photocell adapts to seasonal sunset shifts; the timer enforces the energy-saving cutoff.
Factors that change your actual savings include fixture wattage, local electricity rates, and how many hours per night you currently run your system. The formula above works with any numbers you plug in.
Which timer type is right for your property?
Choosing the right timer comes down to three questions: How much precision do you need? How often are you willing to reprogram? And how much do you want to spend upfront?
-
Mechanical timers use a rotating dial with push-in pins. They are low-cost and reliable but require manual seasonal adjustments as sunset times shift. A good fit for simple, single-zone setups where precision is not critical.
-
Digital programmable timers offer multiple ON/OFF schedules, a digital clock, and often a battery backup to preserve settings through power outages. More precise than mechanical, but they still need seasonal reprogramming unless they include an astronomical feature.
-
Astronomical/dusk-to-dawn timers calculate actual sunrise and sunset times based on your location and date. The Intermatic DT200LT, for example, supports pre-programmed dawn/dusk times with minute-offset adjustments so you can set lights to come on 10 minutes after sunset rather than exactly at it. These timers eliminate seasonal reprogramming for the ON event entirely.
-
Photocell sensors detect ambient light and switch fixtures on at dusk and off at dawn. Combining a photocell with a timer gives you the best of both: automatic sunset detection plus a scheduled cutoff time to prevent all-night operation.
-
Smart/Wi-Fi timers and controllers connect to your home network and allow scheduling, remote overrides, and integration with voice assistants. They typically include astronomical scheduling and can support multiple zones. The tradeoff is higher upfront cost and dependence on a stable Wi-Fi signal at the transformer location.
-
Motion-sensor combos pair a timer or photocell with motion detection for targeted activation. Useful for side yards, back gates, or areas that do not need constant illumination but should light up when someone approaches.
For most residential properties, a photocell-plus-timer hybrid or an astronomical digital timer covers the majority of use cases without requiring a smartphone or hub.
How to set your landscape lighting timer for the best results
The right programming approach depends on your primary goal. Here is a decision flow followed by step-by-step instructions.
Choose your mode first:
- Energy saving: use a photocell ON + timer OFF (dusk-to-timer hybrid)
- Security: use dusk-to-timer with a later cutoff, plus motion sensors in key zones
- Convenience: use astronomical scheduling with weekend extensions or scene-based overrides
Step-by-step programming checklist (using a digital astronomical timer like the Intermatic DT200LT as the reference):
- Set the current time, date, and year on the timer’s display.
- Enter your location’s time zone and confirm Daylight Saving Time (DST) handling. The DT200LT includes a DST toggle; enable it so the timer adjusts automatically in March and November.
- Select your scheduling mode: astronomical (dawn/dusk) or custom ON/OFF.
- If using astronomical mode, set your dawn/dusk offset. A +10-minute offset at dusk means lights come on 10 minutes after sunset, which avoids the brief twilight period when full illumination is not yet needed.
- Set the OFF time manually. For energy saving, midnight works well for most homes. For security, 2:00 AM is a common choice.
- Save settings and test by manually triggering the timer to confirm all zones respond.
- Run the schedule for one full week before finalizing, checking that lights come on and off at the expected times across different weather conditions.
Example schedules:
- Energy saver: Photocell ON at dusk, timer OFF at 11:00 PM. Covers the peak evening hours and shuts down before late-night energy waste.
- Security focused: Photocell ON at dusk, timer OFF at 2:00 AM, motion sensors active through the rest of the night in driveway and entry zones.
- Convenience/entertaining: Astronomical ON at dusk, timer OFF at 11:00 PM weeknights, extended to 12:30 AM on Friday and Saturday.
Daylight Saving Time handling: If your timer does not auto-adjust for DST, plan to manually update the clock on the second Sunday in March (spring forward) and the first Sunday in November (fall back). Astronomical timers with a DST setting handle this automatically.
Pro Tip: The dusk-to-timer hybrid (photocell ON, timer OFF) is the most practical setup for the majority of homes. It removes the need to reprogram the ON time each season while still giving you full control over when the lights shut off.
What to check before programming your timer
Before you program any schedule, confirm these compatibility points. Skipping this step is the most common reason timers behave unexpectedly after installation.
- Transformer wattage limit: Add up the total wattage of all connected fixtures. The total must stay below 80% of the transformer’s rated capacity to prevent overloading. A 150W transformer should carry no more than 120W of fixtures.
- Low-voltage vs. line-voltage circuit: Landscape lighting transformers typically step 120V down to 12V. Confirm your timer is rated for the correct voltage on the load side.
- Outdoor/weatherproof enclosure: Any timer mounted outside needs a NEMA 3R or NEMA 4 rated enclosure to handle rain and humidity. Indoor-rated timers fail quickly in exterior conditions.
- Battery backup: Digital timers lose programming during power outages without a battery backup. Confirm your timer includes one, or plan to reprogram after any outage.
- Wi-Fi signal strength: Smart timers need a reliable signal at the transformer location, which is often near the garage or at the edge of the house. Test signal strength before purchasing a Wi-Fi-enabled controller.
- LED compatibility: Some older dimmer-style smart switches are not compatible with LED landscape transformers. Use a controller designed specifically for low-voltage landscape systems rather than a generic indoor smart switch.
Wiring and circuit verification before programming prevents the most common installation failures. For properties with multiple distinct areas, such as a front yard, back yard, and driveway, multi-zone transformers allow independent scheduling per zone so you are not forced to illuminate the entire property when only one area needs coverage.
Pro Tip: Many consumer “smart” plugs and indoor smart switches lack astronomical scheduling and outdoor-rated enclosures. A dedicated landscape lighting controller or transformer with built-in smart features is the more reliable choice for permanent outdoor use.
Common timer problems and how to fix them
Most timer issues fall into a short list of causes, and most can be resolved without a service call.
- Timer lost its programming after a power outage: Check for a battery backup compartment. If the battery is dead or missing, replace it and reprogram. Going forward, test the backup battery annually.
- Lights come on or off at the wrong time: Verify the clock is set correctly, including AM/PM. After DST changes, confirm the timer adjusted or update it manually. A dirty or shaded photocell can also trigger incorrect on/off behavior.
- Photocell not responding correctly: Clean the photocell lens with a soft cloth. Check that no nearby light source (a porch light, street lamp, or landscape fixture itself) is shining directly onto the sensor, which can trick it into thinking it is daytime.
- One zone not responding: Check the zone fuse or breaker in the transformer. A tripped breaker usually indicates an overloaded zone. Reduce the fixture load or redistribute fixtures across zones.
- Smart timer not connecting to the app: Confirm the Wi-Fi signal at the transformer location. Most smart landscape controllers operate on 2.4 GHz networks only. Check for firmware updates in the manufacturer’s app.
- Transformer running hot: This typically signals an overloaded circuit. Measure total fixture wattage and compare it to the transformer’s rated capacity.
Programming timers once and never rechecking them for seasonal changes is one of the most common homeowner mistakes. A quick seasonal review each spring and fall keeps schedules accurate and prevents unnecessary runtime.
Call a professional when you encounter repeated timer failures that persist after reprogramming, when the transformer itself needs replacement, or when you are adding zones that require new wiring.
When does a permanent smart system make more sense than a standalone timer?
Standalone timers work well for straightforward, single-zone setups. For larger properties or homeowners who want reliable multi-zone control, a professionally installed permanent system offers meaningful advantages.
- Independent zone scheduling: Multi-zone transformers and smart controllers let you run the front yard on one schedule, the back yard on another, and the driveway on a motion-triggered circuit, all from a single controller.
- Outdoor-rated reliability: Dedicated landscape lighting controllers are built for continuous outdoor exposure. Many consumer smart devices lack the outdoor ratings and transformer-aware controls that permanent systems include as standard.
- Smartphone and voice control: Permanent smart systems integrate with mobile apps and voice assistants without requiring workarounds or separate hubs.
- Centralized automation: A single app controls color, brightness, scheduling, and scene selection across every zone. Seasonal adjustments take seconds rather than requiring a ladder and a screwdriver at the transformer.
- Lifecycle value: Higher upfront cost, but lower long-term maintenance burden. Professional installation means the wiring, enclosures, and controller are sized and rated correctly from day one.
For homeowners considering how permanent lighting saves time compared to seasonal DIY setups, the math often favors a permanent system within a few years.
Pro Tip: If your property has three or more distinct lighting zones or you find yourself reprogramming your timer more than twice a year, a multi-zone smart controller or a professionally installed permanent system will pay for itself in convenience and reduced maintenance.
A professional’s perspective on timer settings
The most common mistake homeowners make is treating timer programming as a one-time task. Sunset in Charlotte shifts by nearly two hours between summer and winter. A schedule set in July will leave your property dark for an hour before the timer triggers in December. Astronomical timers solve this automatically, which is why we recommend them for nearly every residential installation.
Two other things worth knowing from the field: first, zone your critical areas separately. Entry points, driveways, and back gates have different security and convenience needs than decorative path lighting. Running them on the same schedule is a compromise that serves none of them well. Second, test any new schedule for a full week before considering it final. Weather, neighboring light sources, and seasonal conditions all affect how a schedule performs in practice.
For complex installs or properties where the lighting system is doing real security work, a professional evaluation is worth the time. Getting the zones, wattages, and controller specifications right from the start prevents the troubleshooting calls that come from undersized transformers and mismatched equipment.
Foreverglowlighting brings permanent smart lighting to Charlotte properties
Standalone timers are a solid starting point, but they have a ceiling. When your property needs multi-zone control, reliable outdoor-rated automation, and a system that manages itself through every season, a professionally installed permanent lighting system is the more capable answer.

Foreverglowlighting designs and installs permanent LED lighting systems across the greater Charlotte area, with smartphone control, multi-zone scheduling, and HOA-compliant designs built in from the start. The GlowCare maintenance subscription keeps your system performing year-round without you managing a single firmware update or photocell cleaning. Whether you need custom landscape illumination or a full architectural lighting plan, the process starts with a free evaluation. See how the installation process works and schedule your consultation today.
Sources
The following sources informed this article and offer deeper technical detail for readers who want to go further.
- Everything You Need to Know About Landscape Lighting Timer
- Tips and Tricks to Set Your Landscape Light Timers
- Intermatic DT200LT digital landscape timer manual
- Automation and Control: An Instructional Guide to Landscape Lighting Timers and Photocell Sensor Integration – Tru-scapes
- Kichler 300W smart control transformer review (multi-zone transformer guidance)