
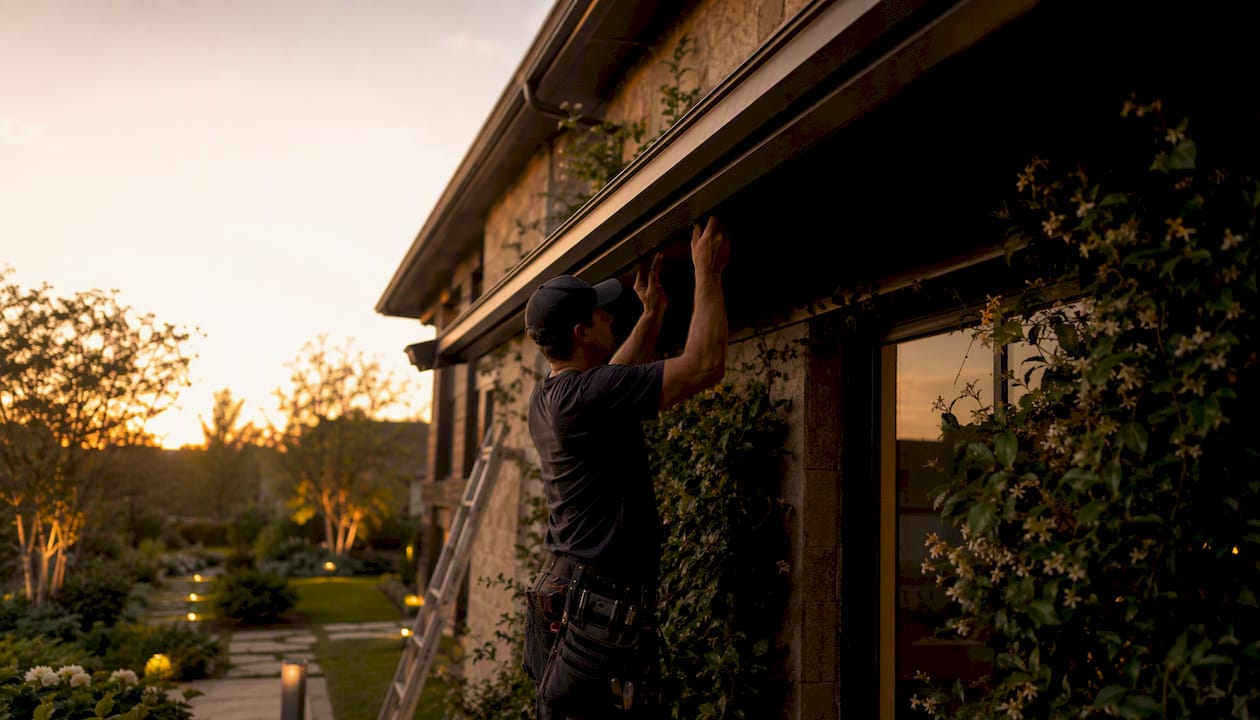
Yes, permanently installed low-profile LED track systems can be effectively invisible during daylight and genuinely attractive after dark. The key is professional placement under the soffit or along the fascia, using a color-matched aluminum channel, recessed LED lenses, and precise alignment to the roofline. When those four elements come together correctly, the system disappears into your trim during the day and delivers a clean, even wash of light at night. The recommended next step is to schedule a free site survey to confirm your soffit depth, sightlines, and color-match options before committing to any system.
Key Takeaways
Professionally installed low-profile LED track systems can be effectively invisible during daylight and visually compelling at night when soffit placement, color-matched channel, and IP-rated sealed connectors are all specified correctly.
| Point | Details |
|---|---|
| Daytime invisibility requires three things | Correct soffit placement, color-matched channel finish, and recessed LED lenses working together. |
| IP65 minimum, IP67 for connectors | Lower-rated connectors are the most common failure point in permanent outdoor systems. |
| RGBW outperforms RGB for residential use | The dedicated white channel produces cleaner whites and pastels for everyday architectural accenting. |
| Start with a site survey | Soffit depth and sightlines vary by home; an accurate quote and visibility test require an on-site assessment. |
| Foreverglowlighting recommended | Offers free site surveys, color-matched aluminum channels, GlowCare maintenance, and a documented local project portfolio. |
Table of Contents
- What is permanent roofline LED track lighting and where does it mount?
- How does roofline lighting blend and stay invisible during the day?
- What technical specs should you confirm before installation?
- What controls and programmability should you expect?
- What are the practical benefits of a permanent, invisible-by-day system?
- What does a professional installation include and how long does it take?
- What do roofline lighting systems typically cost?
- How long will the system last and what maintenance does it need?
- How do you evaluate portfolio photos for genuine daytime invisibility?
- Why does professional installation matter for this type of system?
- How do you vet installers and compare quotes fairly?
- Foreverglowlighting delivers the invisible-by-day result
- What experienced installers notice that homeowners often miss
- Where to read more and find installers
What is permanent roofline LED track lighting and where does it mount?
Permanent roofline LED track lighting is a fixed, weatherproof system installed once and left in place year-round. It differs fundamentally from string lights or clip-on holiday strands. The core assembly is an extruded aluminum channel that houses individual LED modules or a continuous linear LED strip, sealed connectors, and low-voltage wiring that runs to a centralized driver. You control the whole system from a smartphone app.
Common mounting locations fall into two categories:
- Under the soffit: The channel sits flush against the underside of the overhang, tucked back from the outer edge. This position offers the best daytime concealment because the overhang itself shields the channel from street-level sightlines.
- On the fascia: The channel mounts to the vertical face of the fascia board. Slightly more visible from the street, but sometimes the only option when soffit depth is limited or when the architectural goal is a defined roofline edge.
A roofline lighting installation typically includes the channel, all LED modules, sealed connectors, a centralized driver, and the wiring path hidden inside the soffit cavity or routed through conduit along the fascia.
Pro Tip: Ask your installer to show you the channel profile in person before installation. A shallower profile sits closer to the surface and is easier to color-match; a deeper profile may house more powerful LEDs but can be harder to conceal on a narrow soffit.
How does roofline lighting blend and stay invisible during the day?
The roofline lighting blend daytime invisible effect is not magic. It comes from a specific set of design decisions that reduce contrast between the channel and the surrounding trim.
The most important factor is placement relative to the overhang edge. When the channel sits 2–4 inches back from the drip edge and under a soffit with at least 3–4 inches of depth, a person standing at street level cannot see the LED face directly. The viewing angle simply does not reach it. Professional installers assess sightlines from the curb, the driveway, and neighboring sidewalks before finalizing the mount position.
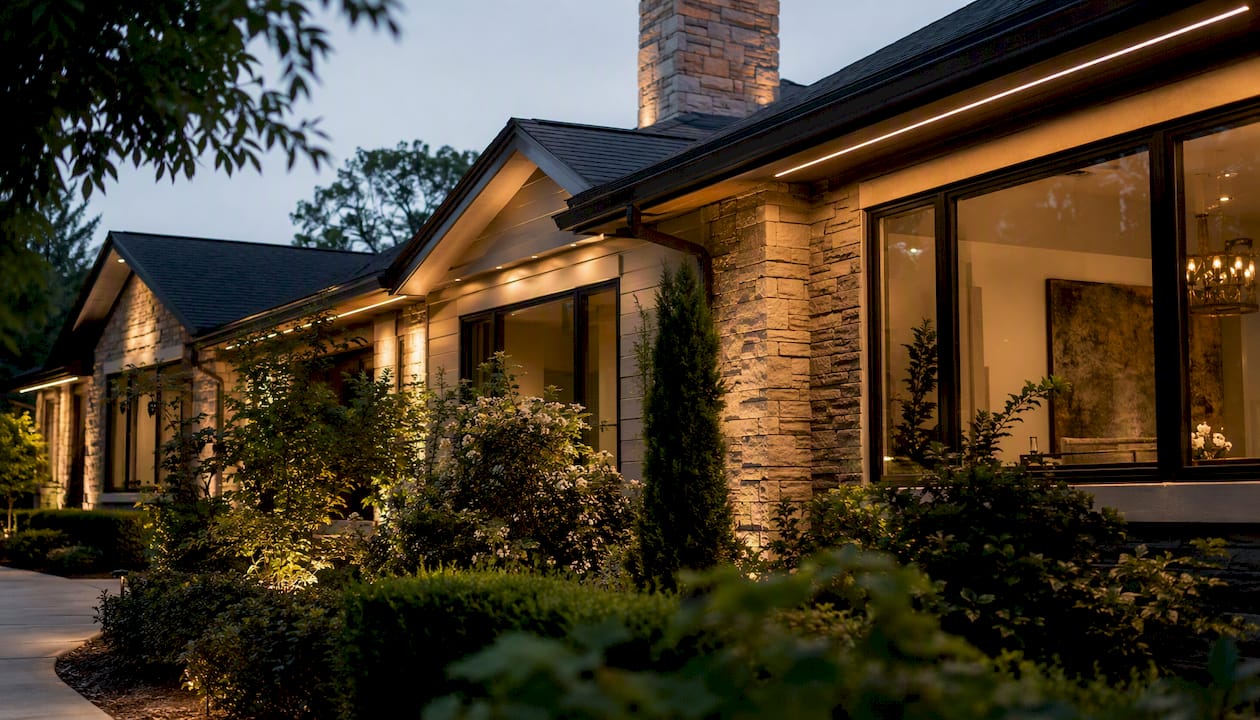
Color matching is the second critical factor. Manufacturers offer anodized aluminum channels in white, tan, brown, and custom-painted finishes. When the channel finish matches the soffit or fascia color within a close tolerance, the eye reads it as part of the trim rather than a separate object. A trade blog on permanent lighting daytime appearance notes that color-matched tracks and recessed LED pucks are what make a system appear virtually invisible from street-level views.
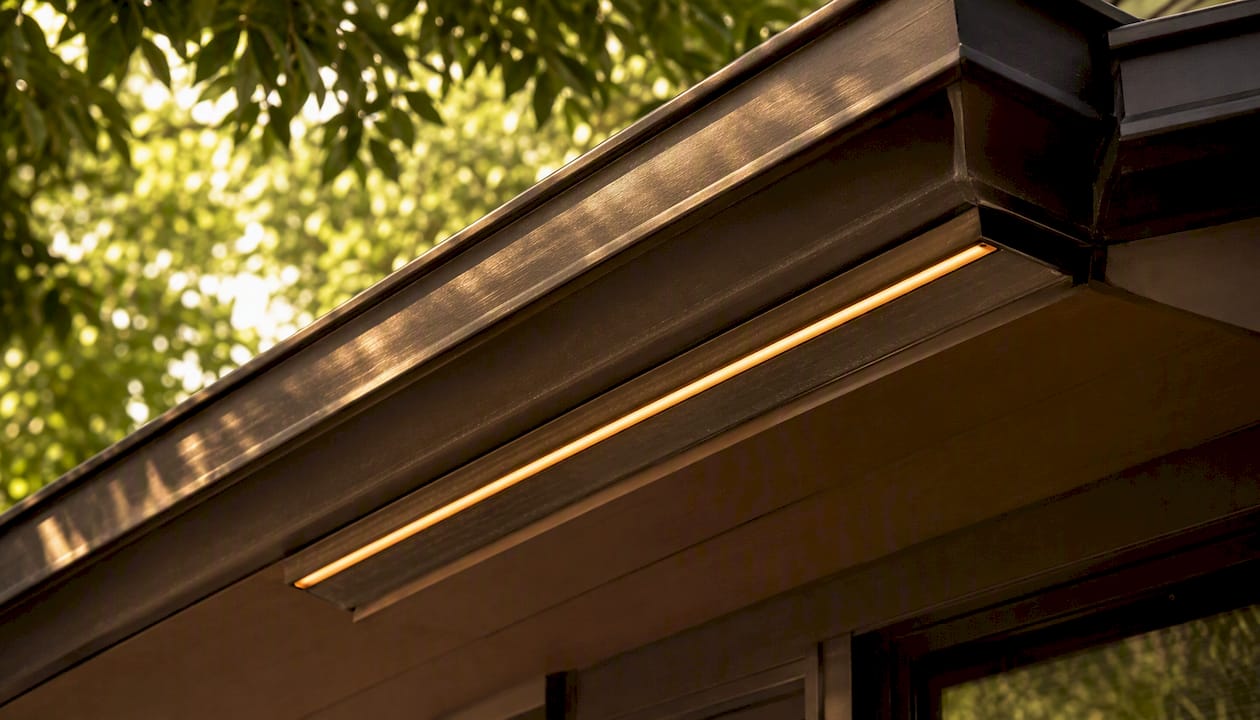
Recessed LED lenses are the third element. A lens that sits flush with or slightly below the channel face does not catch direct sunlight and does not create the bright reflective dot that makes budget systems visible during the day. Tight joints between channel sections and clean alignment along the roofline complete the picture.
Pro Tip: Request daytime photos of completed installations on homes with a similar soffit depth and trim color to yours. A reputable installer will have them. If the photos only show nighttime results, ask why.
What technical specs should you confirm before installation?
Getting the specs right protects your investment and keeps the system looking clean for years. Here is the core checklist:
- IP rating: Exterior tracks and connectors should carry at minimum an IP65 rating, which means dust-tight and protected against water jets. IP67 or IP68 is preferable for connectors in climates with heavy rain or ice. A lower rating risks water ingress that corrodes the LED modules and causes premature failure.
- LED type and color range: RGB LEDs produce red, green, and blue; RGBW adds a dedicated white channel for cleaner whites and pastels. For architectural accenting, RGBW systems give you more usable color range without the muddy tones that pure RGB can produce at low saturation.
- Color temperature: For residential warmth, a 3000K color temperature is the standard recommendation. It reads as warm white, complements most exterior paint colors, and avoids the harsh blue-white cast of higher Kelvin outputs.
- Voltage and driver: Most residential permanent roofline systems run on 12V or 24V DC. Low-voltage systems are safer to work with, easier to permit, and more energy-efficient than line-voltage alternatives. Centralized drivers should include surge protection.
- Channel finish and profile depth: Anodized aluminum resists corrosion and holds paint well. Profile depth should match your soffit geometry.
The table below summarizes the key specs and why each one matters:
| Spec | Recommended Standard | Why It Matters |
|---|---|---|
| IP rating (track) | IP65 minimum | Prevents water and dust ingress in outdoor exposure |
| IP rating (connectors) | IP67 or IP68 | Connectors are the most common failure point in wet climates |
| LED color type | RGBW | Cleaner whites and pastels vs. pure RGB |
| Color temperature (white) | 3000K | Warm, residential-friendly tone |
| System voltage | 12V or 24V DC | Safer, more efficient, easier to permit than line voltage |
| Channel material | Anodized aluminum | Corrosion-resistant, paintable, holds color match long-term |
Pro Tip: Always ask for the driver’s surge-protection rating in joules. A surge event from a nearby lightning strike can wipe out an unprotected driver and every LED module connected to it.
What controls and programmability should you expect?
A well-specified permanent roofline system gives you meaningful control without requiring technical expertise. Most current systems offer:
- Smartphone app control with real-time color selection, brightness adjustment, and on/off switching from anywhere with a data connection.
- Scheduling: Set the system to turn on at sunset, dim to 20% at 10 PM, and shut off at midnight automatically. Good seasonal lighting automation means you rarely touch the app once the schedule is set.
- Presets and scenes: Save a warm white architectural scene for everyday use, a red-and-green holiday preset, and a blue-and-white winter scene. Switching between them takes one tap.
- Smart home integration: Many systems support voice assistants and home automation hubs, allowing the roofline lights to respond to routines alongside interior lighting.
The local-versus-cloud control question is worth asking directly. Systems that store presets and schedules locally on a controller continue to run on schedule even when your internet is down. Cloud-dependent systems may lose their schedule during an outage. For a security-focused homeowner, local storage is the more reliable choice.
Pro Tip: Before signing a contract, ask whether firmware updates are pushed automatically or require a service visit. Automatic updates are convenient but can occasionally change behavior; manual updates give you more control.
What are the practical benefits of a permanent, invisible-by-day system?
The value of a permanent system goes well beyond holiday lighting. Permanent lighting beyond Christmas covers a range of year-round uses that a seasonal string-light setup simply cannot match.
- Curb appeal and architectural accenting: A warm white wash along the eaves, gables, and columns defines the roofline after dark and adds perceived depth to the facade. The effect is subtle on a weeknight and dramatic when you want it for an event.
- Holiday and seasonal scenes: Switch from warm white to a full holiday color palette in one tap. No ladders, no staple guns, no storing tangled strands in the attic.
- Safety and security: Timed perimeter lighting removes dark zones around the roofline and entry points. An “occupied” scene that varies brightness and color on a schedule can deter opportunistic intrusion more effectively than a static floodlight.
- Energy and time savings: LED systems draw a fraction of the power that incandescent holiday strands consume. More practically, you eliminate the annual labor of hanging and removing seasonal lights, which carries real fall-from-ladder risk.
What does a professional installation include and how long does it take?
The installation process for a permanent roofline system follows a defined sequence. Knowing each step helps you ask the right questions and set realistic expectations.
Pre-installation:
- Site survey to assess soffit depth, fascia condition, and sightlines from multiple vantage points
- Color-matching samples held against your trim in natural daylight
- HOA or architectural-review documentation if required
Installation steps:
- Site preparation: Protect landscaping and confirm all wiring paths before any drilling begins.
- Channel routing and mounting: The aluminum channel is cut to length, fitted to the soffit or fascia, and secured with concealed fasteners.
- Wiring to driver: Low-voltage wiring runs through the soffit cavity or conduit to the centralized driver, typically located in the garage or a weatherproof exterior enclosure.
- Weatherproofing: All connector points are sealed; any penetrations through the soffit are caulked and color-matched.
- Programming and testing: The installer loads baseline presets and tests every LED segment for consistent output and color accuracy.
- Final tuning and homeowner demo: You walk through the app, confirm schedules, and approve the final scene settings before the crew leaves.
A standard residential installation on a single-story home typically completes in one day. Larger or more complex rooflines may require two days. The final on-site acceptance test should include a nighttime walkthrough at the curb to confirm even light distribution, no visible hot spots, and correct dimming behavior.
Pro Tip: Schedule the final acceptance test at dusk so you can evaluate the transition from daylight to full night. A system that looks great at full brightness may reveal uneven segments or color drift as it dims.
What do roofline lighting systems typically cost?
Pricing for permanent roofline LED systems varies with several factors, and any figure without a site survey is a rough estimate at best.
Major cost drivers include:
- Home size and roofline complexity: Linear footage of channel is the primary cost variable. A simple ranch-style roofline costs less than a multi-gable two-story with dormers.
- Soffit depth and condition: A deep, clean soffit is faster to work with. A shallow or damaged soffit may require additional prep or a fascia-mount approach.
- RGB vs. RGBW capability: RGBW systems cost more per linear foot than single-color or warm-white-only configurations.
- Driver count and surge protection: Larger homes may need multiple drivers; each adds to material and labor cost.
- Color-matched channel: Custom-painted or specialty-anodized channel adds cost over standard white or brown stock.
- Local labor rates: Installation labor varies by region and by the complexity of the electrical work involved.
A free site survey is the only reliable way to get an accurate quote. Ballpark ranges for residential installations vary widely, and a written quote with a clear scope of work protects both parties.
What to know about lead time: Custom color-matched channel may require 2–4 weeks for procurement. Factor in HOA review time if your neighborhood requires architectural approval before scheduling installation.
How long will the system last and what maintenance does it need?
LED modules in a well-sealed, IP-rated track system typically last many years under normal outdoor conditions. The driver is often the first component to show wear, particularly in climates with extreme temperature swings. Surge protection extends driver life considerably.
Routine maintenance tasks are straightforward:
- Lens cleaning: Dust, pollen, and spider webs accumulate on the channel face over time. A soft cloth wipe twice a year keeps lenses clear and maintains even output.
- Seal and fastener checks: Inspect caulked penetrations and connector seals annually, especially after severe weather.
- Firmware updates: Check the control app periodically for updates that improve scheduling reliability or add new scene options.
- Seasonal scene review: Before each major holiday or season, run through your presets to confirm all segments are performing correctly.
Warranty coverage to request from any installer includes a product warranty on LED modules and drivers, a separate workmanship warranty covering the installation itself, and an optional annual maintenance subscription. Foreverglowlighting offers a GlowCare maintenance plan that covers routine inspections, seal checks, and firmware updates so the system stays performing and looking clean without requiring homeowner effort.
Pro Tip: Keep a photographic record of your channel color and finish at installation. If a section needs replacement years later, that photo gives your installer the exact color reference for a seamless match.
How do you evaluate portfolio photos for genuine daytime invisibility?
Not every portfolio photo tells the full story. A few targeted checks help you separate genuine daytime concealment from flattering photography.
In daytime images, look for:
- Channel color that reads as part of the trim, not a separate element
- No visible gaps between channel sections or exposed wiring
- Clean, straight alignment along the full roofline length
- No reflective glare from LED lenses in direct sunlight
In nighttime images, look for:
- Even light distribution with no bright dots or dark gaps between modules
- Adjustable brightness visible across multiple photos at different dimming levels
- Color temperature that complements the home’s exterior rather than overwhelming it
- Clean transitions at corners and gable ends
A roofline lighting portfolio that shows both daytime and nighttime photos of the same home is the strongest evidence of genuine invisibility. Single-angle nighttime-only photos are insufficient for evaluating daytime concealment.
Pro Tip: Ask for photos taken from the same angle as your primary street view. A system that is invisible from the front may still be visible from a side approach if the soffit geometry changes at the corner.
Why does professional installation matter for this type of system?
A permanent roofline lighting system is not a DIY project. The reasons go beyond convenience.
- Electrical safety: Centralized drivers require proper grounding and surge protection. Incorrect wiring creates shock and fire risk. Licensed electricians understand local code requirements and pull the necessary permits.
- Aesthetic precision: Color matching, alignment, and sealed connectors require experience and the right tools. A misaligned channel or an unmatched finish is visible every day, not just at night.
- HOA and permitting navigation: Many neighborhoods require architectural review before exterior modifications. Experienced installers prepare submission packets, specify compliant color temperatures for dark-sky-sensitive areas, and handle the paperwork.
- Long-term reliability: Properly sealed connectors and correctly torqued fasteners prevent the water ingress and vibration loosening that cause premature failure in DIY installations.
Low-voltage landscape lighting still requires correct driver sizing, proper wire gauge, and sealed terminations to perform reliably over years of outdoor exposure. A professional handles all of that as part of the standard scope.
Pro Tip: Before hiring any installer, ask specifically whether they carry general liability insurance and whether the electrical work is performed by or supervised by a licensed electrician. Get the answer in writing.
How do you vet installers and compare quotes fairly?
A structured approach to the site survey and quote process protects you from vague proposals and mismatched expectations.
Checklist for evaluating any installer:
- Confirm the IP rating of both the track and the connectors they use.
- Ask where the driver will be located and how it will be protected from weather and surge.
- Request the warranty terms in writing: product warranty length, workmanship warranty, and what each covers.
- Ask about the color-matching process and whether they hold physical samples against your trim in daylight.
- Ask for references or portfolio photos from homes with similar soffit geometry and trim color to yours.
- Confirm their HOA submission experience if your neighborhood requires architectural review.
- Ask about maintenance options, including any annual service subscription.
When comparing two quotes:
- Confirm both quotes specify the same IP rating, LED type (RGB vs. RGBW), and driver brand.
- Confirm both include the same warranty terms and cleanup scope.
- A lower price that omits surge protection or uses a lower IP rating is not a comparable quote.
Request a written scope drawing that shows channel run lengths, driver location, and wiring paths. That document protects you if there is any dispute about what was agreed.
Reviewing roofing sightline examples from a roofing contractor’s portfolio can also help you understand how soffit depth and overhang geometry vary across different home styles before your site survey.
Foreverglowlighting delivers the invisible-by-day result

Foreverglowlighting specializes in exactly this outcome: a permanent LED roofline system that disappears into your trim during the day and delivers a calibrated, color-accurate display at night. Every installation begins with a free site survey where the team assesses soffit depth, sightlines, and trim color before a single channel is cut. Color-matched anodized aluminum channels, IP-rated sealed connectors, and centralized low-voltage drivers are standard on every job, not upgrades.
The GlowCare maintenance subscription keeps the system performing year after year without requiring homeowner effort. A growing portfolio of completed local projects, including a documented Oelo roofline installation, shows the daytime-invisible and nighttime-brilliant result on real homes. Schedule your free estimate to see what the system looks like on your roofline before you commit.
What experienced installers notice that homeowners often miss
Most homeowners focus on the nighttime photos when evaluating a permanent roofline system. That is understandable. The nighttime result is what drew them to the product in the first place. The detail that actually determines long-term satisfaction, though, is the daytime profile.
A channel that is even slightly mismatched in color or mounted a half-inch too low on the fascia will catch your eye every morning when you back out of the driveway. That small visual friction compounds over time. The nighttime display is spectacular for a few weeks; the daytime appearance is what you live with every day.
The practical tip that follows from this: schedule your site survey and installation around any planned exterior painting or roof work. If your trim is due for repainting in the next year, wait until after the paint is done and use the new color as the channel match reference. Installing before a repaint means the channel color is matched to a color that will change, and repainting around a mounted channel is tedious work. A photographic record of the installed channel finish, taken in natural midday light, gives your painter and any future installer the exact reference they need.
Where to read more and find installers
- Foreverglowlighting permanent lighting services — service overview and contact for a free estimate
- Soffit and roofline lighting installation details — technical overview of how roofline systems integrate with your home’s architecture
- Landscape lighting layering techniques — guidance on combining roofline lighting with ground-level and pathway layers for a complete exterior design
- Roofing sightline gallery — roofing project photos useful for understanding how soffit depth and overhang geometry vary across home styles